TopPodcast.com
Menu
  • Home
  • Top Charts
  • Top Networks
  • Top Apps
  • Top Independents
  • Top Podfluencers
  • Top Picks
    • Top Business Podcasts
    • Top True Crime Podcasts
    • Top Finance Podcasts
    • Top Comedy Podcasts
    • Top Music Podcasts
    • Top Womens Podcasts
    • Top Kids Podcasts
    • Top Sports Podcasts
    • Top News Podcasts
    • Top Tech Podcasts
    • Top Crypto Podcasts
    • Top Entrepreneurial Podcasts
    • Top Fantasy Sports Podcasts
    • Top Political Podcasts
    • Top Science Podcasts
    • Top Self Help Podcasts
    • Top Sports Betting Podcasts
    • Top Stocks Podcasts
  • Podcast News
  • About Us
  • Podcast Advertising
  • Contact
Not in our directory?
Add Show Here
Podcast Equipment
Center

toppodcastlogoOur TOPPODCAST Picks

  • Comedy
  • Crypto
  • Sports
  • News
  • Politics
  • True Crime
  • Business
  • Finance

Follow Us

toppodcastlogoStay Connected

    View Top 200 Chart
    Back to Rankings Page
    Courses

    Speech and Language Kids Podcast

    The Speech and Language Kids Podcast is BACK and better than ever! Learn how to treat communication challenges in children without losing yourself in the process. Speech-language pathologist Carrie Clark shares her best tips, tricks, and strategies to help children improve their communication skills in all areas: speech, articulation, phonology, language, literacy, social communication, stuttering, voice, AAC, functional communication, and more! Plus, Carrie will walk you through the best ways to save time and streamline what you do so your clients make faster progress and you can be more effective in less time (and stop taking work home)! Listen to the live recordings inside The Hub at Hub.SpeechAndLanguageKids.com

    Advertise

    Copyright: © Copyright: Speech and Language Kids 2013

    • Apple Podcasts
    • Google Play
    • Spotify

    Latest Episodes:
    Inferencing | Speech Therapy Goals and Activities Mar 23, 2015
    Show notes

    Inferencing | Speech Therapy Goals and Activities

    How can we teach inferencing in speech therapy?

    What goals should we write for inferencing?

    An inference is when you use clues present (in text or in real life) along with your background knowledge to make a guess about something that’s not explicitly known.

    On this page, we’ll tell you everything you need to know about teaching inferencing skills to children and teens. We’ll provide you with sample IEP goals for inferencing as well as therapy activities to help teach it.

    Middle School / High School Language curriculum Bundle

    Middle/High School Language Bundle

    Vocabulary, Syntax, and Literacy for Middle Schoolers and High Schoolers (Includes Inferencing)

    $45 ~ Buy Now!

    Inferencing Goals for Speech Therapy:

    There are two main ways that we can work on inferencing in speech therapy: in text and in social contexts. Here are two sample inferencing goals for speech therapy:

    In Text:

    By the end of the reporting period, after reading a text, ______________________ will make an appropriate inference from the text and refer to details and examples in the text when explaining how he/she drew that inference on four of five observed opportunities.

    Social Inferencing:

    By the end of the reporting period, after reading, watching, or hearing a description of a social scenario (some including sarcasm), ______________________ will use social cues plus background information to make an appropriate inference of what has happened or is happening on four of five observed opportunities.

    Inferencing Activities for Speech Therapy

    We can work on inferencing skills with children and teens through speech therapy activities. We start by simply explaining to them what an inference is and then providing them with activities that allow them to practice and demonstrate the skill in progressively harder contexts.

    What is an Inference?

    Clues from Text or Pictures + Background Knowledge = Assumption of what has happened or what is happening

    Let me give you an example. You walk up to the bathroom and see this:
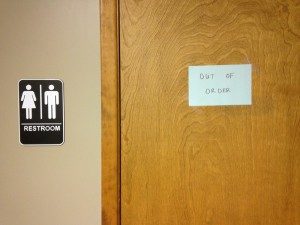
    From this text, you gather the clue that someone has placed an “out of order” sign on the bathroom door. You combine this with your background knowledge that “out of order” means something typically isn’t working and the main working part of a bathroom is the toilet. Using these two parts, you can reasonably assume that the toilet is not working and they therefore do not want anyone to use it. That, my friend, is an inference.

    What Do We Use Inferences For?

    Inferences come in handy frequently throughout our day. Not only do we make inferences about text that we are reading, we also using inferences to “read” our environment and make inferences about what’s going on around us. Also, we use inferences to “read” other people and try to make assumptions on what they’re thinking or feeling so we can adjust our actions accordingly.

    Inference Vs. Prediction

    Keep in mind that inferences are made about past events or events that are currently happening. If you make an assumption or guess on what is about to happen (something in the future), you’re actually making a prediction, not an inference.

    Inferencing Step One: Making Inferences from Pictures

    Since it is typically easier to make an inference from a picture than from a text, we’ll start with that. Have the child look at a picture. You can find pictures in books that are good for inferencing or download the worksheets from our Curriculum.

    If you are using your own pictures, try to take pictures of things that are out of place or pictures that clearly define an event that just happened.

    How to Teach It:

    Take each picture and show it to the child. Ask the child to guess what is going on in the picture or what happened before the picture was taken. Then, talk to the child about what an inference is. You can say something like “an inference is when we find clues in the picture and combine them with our own background knowledge to make an assumption about what is happening or what just happened”.

    Then, show the child the picture again and talk through the inference that was made. For example, in the bathroom example above, you would explain to the child that the inference is that the toilet is broken. You figured that out because you used the clues from the picture (out of order sign) and combined that with your background knowledge that “out of order” means broken and the toilet is the main working part of the bathroom.

    Walk the child through several examples like that until the child can identify the two pieces that contribute to the inference on his or her own.

    Inferencing Step Two: Making Inferences from Text and Pictures Combined

    Since it can be quite the jump from making inferences about pictures to inferences about text only, I like to include an in between step where they make inferences about text and pictures combined. You can use children’s books that have a simple story along with pictures or something like a comic strip that uses text within a picture. Comic strips (like from your Sunday Funnies section of the newspaper) can be very good because they rely heavily on inferences to make the strips funny.

    Take this comic strip for example:

    Observations/Clues: The pets are running around like crazy. The owner says he wished he had the receipt for the pets.

    Background Knowledge: You need the receipt when you return something that you don’t want anymore.

    Inference: The owner wishes he could take back his pets sometimes.

    How To Teach It:

    For this step, read the text and look at the pictures with the child. Then, have them make an inference and back it up by telling you what in the text or pictures they used as clues/observations and what background knowledge they had to add to come up with their assumption.

    Inferencing Step Three: Making Inferences about Text

    Finally! We’ve made it to the actual skill that kids are expected to use in school. These children must read a grade level text (literature and informational) and then make inferences based on the information provided. The child you’re working with may not be ready for something on grade level yet so you may have to adapt this skill down at first. Start with steps one and two from this tutorial before you go into this step because you want them to have a good working knowledge of what an inference is and how to come up with one.

    How to Teach It:

    Show the child a few sentences that are written down that could lead to an inference. Ask the child to read the text and then make an inference about what just happened or what is currently happening. Once the child has made his inference, have him circle or underline the parts of the sentence that he used for clues/observations and then have him write down what background knowledge he added to come up with his inference.

    For example, here is the sentence:

    “Johnny walked into the room and saw a birthday cake with his name on it, presents, and all of his friends standing around the table”.

    Inference: It is Johnny’s birthday.

    Observations/Clues:

    “Johnny walked into the room and saw a birthday cake with his name on it, presents, and all of his friends standing around the table”.

    Background Knowledge: You get presents and a birthday cake with your name on it when it’s your birthday.

    Once you have done several examples like this and the child is able to come up with an inference and tell you how he got there, you’re ready to gradually increase the difficulty level of the text. Work your way up to being able to do this in the readings or texts that the child has been assigned for his classes. Provide support for the child by walking him through the steps of picking out the clues and adding background knowledge as needed.

    Inferencing Step Four: Using Inferences for Social Skills

    If you are working with a child who purely needs to use inferencing for reading activities, you can stop here. However, many children with social problems also need help with making inferences in social situations. If a child doesn’t understand how to “read” a situation to figure out how to act or “read” a person’s body language to get a good idea of what’s going on, they may need some inferencing help.

    Children who have trouble with this skill are often having difficulty with both parts of the formula. Let’s look at an example.

    Johnny starts talking to Fred about trains. Johnny loves trains so he tells Fred everything that he knows about trains. He has been talking about trains for 5 minutes. Fred starts to look at his watch and tap his foot. He starts looking around and he stops responding to what Johnny is saying. Johnny keeps talking anyway.

    Know anyone like that?

    Well, poor Johnny has a few problems here. Chances are, he doesn’t notice that Fred looks disinterested. He hasn’t noticed him looking at his watch or tapping his foot. Furthermore, Johnny doesn’t even know that those signs typically mean that someone is not interested. So even if Johnny had noticed Fred looking around, he doesn’t have the background knowledge to tell him that when someone starts looking around, they aren’t interested in what you’re saying.

    How to Teach It:

    In order to teach making inferences for social skills, you need to teach the child not only to start paying attention and making observations, but also to know what to look for. You must give the child the background knowledge necessary to know what nonverbal behaviors mean.

    Start by choosing one social skill that the child has trouble with, like knowing when someone is no longer interested in what he has to say. Teach the child what to look for (what observations or clues to look for) and then teach him what those clues mean. Role play situations where you demonstrate the clues for the child and the child has to recognize them. Then, you’ll also need to teach the child what to do when he notices those signs, like ask the other person a question about himself or herself.

    Practice those situations and then take the child to a situation where those kinds of things may happen and signal him to pay attention to the clues when you see them arise. You can also video tape interactions and play them back to the child to help him see the clues when they arise.

    Listen to the Podcast Version of this Info:

    A Structured Curriculum for Teaching Inferencing and Other Higher Language Skills

    Looking for a pre-made program that will teach inferencing skills and other higher language skills?

    Our Middle School / High School Language Curriculum Bundle targets inferencing along with a ton of other skills that our clients need for effective communication:

    Middle School / High School Language curriculum Bundle

    Middle/High School Language Bundle

    Vocabulary, Syntax, and Literacy for Middle Schoolers and High Schoolers

    $45 ~ Buy Now!Carrie Clark, Speech-Language Pathologist

    About the Author: Carrie Clark, MA CCC-SLP

    Hi, I’m Carrie! I’m a speech-language pathologist from Columbia, Missouri, USA. I’ve worked with children and teenagers of all ages in schools, preschools, and even my own private practice. I love digging through the research on speech and language topics and breaking it down into step-by-step plans for my followers.

    Fun Fact: I play the cello. I took lessons for cello and piano for most of my childhood, though I’m way better at cello than I ever got a piano. I also taught myself guitar as an adult. I have a super fun bright blue electric guitar that I get out every once in a while and play around on. And then I curse the fact that since I don’t play consistently, I don’t have my callouses built up.

    Connect with Me:

    The post Inferencing | Speech Therapy Goals and Activities appeared first on Speech And Language Kids.


    Using Video Modeling For Kids With Autism Mar 16, 2015
    Show notes

    What is Video Modeling?

    Video modeling is a fun instructional technique where the child watches a video of himself or herself doing a desired behavior or skill. For example, let’s say Johnny always throws a fit on the way from the bus to his classroom at the beginning of each day. You could use video modeling to show Johnny a video of himself walking all the way from the bus to the classroom without having a meltdown and without any assistance.

    You may be asking, how is this possible? If I could take a video of Johnny doing this, I wouldn’t need the video!

    Well, the power of technology has allowed us to create these videos through the magic of editing, and I’m going to show you how!

    You take a video of a child doing a skill and you give him as much help as you need to so he can get through it. Then, you edit out all of the parts where you had to help him. The end result is a video that looks like he did it all by himself even if he didn’t.

    Listen to the Audio Version Here or scroll down to keep reading:

    Does Video Modeling Work?

    The American Speech-Language Hearing Association (ASHA) website has links to a systematic review where researchers looked at all of the research on video modeling for children with autism. Here’s what they found:

    “Overall, results of the review indicated positive gains in social-communicative skills, functional skill, perspective-taking skills, and problem behavior. However, the authors cautioned that: “A small pool of studies was reviewed, and treatment effects were not measured. Consequently, it is unclear at this time whether video modeling is more or less effective than other models of instruction for learners with autism, and too soon to make detailed recommendations for practitioners” (p. 41).”
    Link:
    http://www.asha.org/Members/ebp/compendium/reviews/Video-Modeling-Interventions-for-Individuals-with-Autism.htm

    Furthermore, video modeling works the same way that social stories work. (For more information on using social stories with children with language disorders, click here!) And social stories have been shown to be helpful for children with autism, learning disabilities, cognitive impairments, and language impairments.

    What Can You Use Video Modeling For?

    Video modeling is used to teach a child to do a new skill or to perform a current skill at a higher level or with fewer supports. This can be applied to behaviors that you would like the child to learn as well as behaviors that you would like the child to stop. Here are some examples of challenges that can be addressed using video modeling:

    • How to help a child get through transitions without melt downs
    • How to help a child learn to use communication to get his needs met instead of inappropriate behaviors (like saying hi instead of hitting a kid)
    • How to help a child participate in a routine activity independently
    • How to help a child respond to social situations appropriately, such as responding to others
    • How to help a child use language appropriately in social situations

    How to Use Video Modeling

    Step One: Choose a Target

    The first thing you will need to do is choose a target behavior. What skill do you want the child to learn how to do? Map out exactly what you will want the child to do in steps.

    Step Two: Video Tape the Target

    Next, you will want to video tape the child doing that skill. Since the child cannot actually do the skill yet (or at least not independently), you will need to stage the situation so that he is most likely to do it on his own and then provide prompts, guidance, and support as needed. You may have to break the overall skill down into smaller steps and record each step separately. Break it down into the smallest parts necessary to make it look like the child is doing it on his own.

    For example, if the target behavior is cleaning up the play room, you may set it up so that the child is holding a toy and the basket is right in front of him, then you video tape him putting that one toy into the basket. Then, you have to take another video of him putting a second toy in the basket. Don’t expect him to do the whole skill in one go.

    I recommend that you video tape the entire process because we will be editing it down later.

    I use my smart phone to video tape but you could use any device that you have to record video.

    Step Three: Edit the Video Down

    This is probably the intimidating part for you. Well don’t worry, it doesn’t need to be!

    First, upload the video to your computer. If you’re using your camera, you should have a cord that will connect to your computer and allow you to upload. If you used a smart phone, you should be able to email the video to yourself and then open it on a computer.

    If you used an iPhone or iPad to record the video, you can download the iMovie app from the app store and edit it right on your device, no need to transfer to your computer unless you really want to.

    Once you get it on the computer, open the video in whatever video editing software your computer already has. Most computers come with some basic video editing software. If you cannot find any such software on your computer, you can search the internet for “free video editing software”. Just make sure what you download is legitimate and not a scam. I use Camtasia Studio but that is a paid video editing software.

    Once you’ve put the video into your video editing software, you’ll want to edit out (delete) any parts where it looks like you’re helping the child. You should be left with a video that just includes the parts where the child did the skill independently. It may be a bit choppy but don’t worry, the child won’t mind. He’ll be too focused on the fact that he’s watching himself do something awesome!

    Here’s a video that will show you how to edit down the videos:

    Would you like the step-by-step instructions for how to edit down a video to use for video modeling? Click this button to download my free PDF guide to creating video modeling videos:

    Click Here Download: How to Create and Use Video Modeling Videos Worksheet

    How to Use Video Modeling in Instruction

    Once you get your video done, it’s time to show it to the child.

    Step One: Show the Video at a Different Time

    Show the child the video during a low-stress time that is not near the time that you want the target skill to occur. Show the video and then talk to the child about what happened in the video. Have the child watch the video as many times as he wants. Show the video to him several different times (different days) before attempting the actual routine with it.

    Step Two: Show the Video Right Before the Expected Behavior

    Once the child is familiar with the video, you’ll want to try to use it to make that actual routine or activity go smoothly. Show the child the video right before you are going to expect him to do it. For example, if the video is about getting the child off the bus, you will get on the bus with the video and show him the video before you unbuckle him.

    Step Three: Show the Video While the Child is Doing the Behavior

    As soon as you’ve shown the video to the child, tell him that it’s time to do what he saw in the video. Help him go through the steps just as they were presented in the video. If it’s at all possible, let him watch the video of him doing the skill while he’s actually doing it. In our example above, this would look like you holding the iPad with the video playing in front of him as he walks down the hallway toward his classroom.

    Step Four: Reinforce and Practice!

    Reinforce any success that the child had during the activity and then practice, practice, practice. You will want to have the child continue watching the video multiple times per day as well as right before and during the activity. Keep doing this until the child can complete the behavior successfully.

    Success!

    There you have it! That’s all the steps to use video modeling. Just like any therapy technique, this isn’t guaranteed to work for every child and on every behavior, but it’s definitely a great tool to try, especially if you have a low functioning kiddo who isn’t responding well to more traditional instruction.

    If you’d like to download my PDF guide to creating and using Video Modeling videos, please click the button below:

    Click Here Download: How to Create and Use Video Modeling Videos Worksheet

    More Resources for Speech-Language Pathologists:

    Looking for more therapy ideas and resources to help you provide the BEST services to your clients? Join us in The SLP Solution, our membership program for speech-language professionals! Inside the membership, you’ll find:

    • Step-By-Step Guides for teaching a variety of speech/language/communication skills
    • Pre-Made Worksheets and Therapy Activities for hundreds of different topics
    • Training Videos for dealing with difficult disorders or problems
    • Answers to Your Questions in our exclusive SLP community
    • Tools and Resources to help you with your paperwork and admin tasks
    • Continuing Education through our monthly webinars and webinar recordings

    To join us in the full SLP Solution, or to snag a free membership, click on the button below!

    JOIN THE MEMBERSHIP TODAY!

    The post Using Video Modeling For Kids With Autism appeared first on Speech And Language Kids.


    Figurative Language Examples and Speech Therapy Activities Feb 23, 2015
    Show notes

    Figurative Language Examples and Speech Therapy Activities

    Have you been bending over backwards trying to teach your students figurative language?

    Are they left high and dry when idioms are used in their classrooms?

    Well I’m going to take the bull by the horns and knock your socks off with some fabulous activities for working on figurative language in speech therapy!

    On this page, we’ll give you examples of common figurative language expressions (aka idioms). Plus, you’ll get some great activities that you can use to teach figurative language in speech therapy, the classroom, or at home.

    Middle School / High School Language curriculum Bundle

    Middle/High School Language Bundle

    Vocabulary, Syntax, and Literacy for Middle Schoolers and High Schoolers

    $45 ~ Buy Now!

    What is Figurative Language?

    Figurative language, also called abstract language or non-literal language, is anything we say where what we mean is not exactly the same as the literal meaning of those words. For example, when I say I will knock your socks off, I don’t mean that your socks will literally come off of your feet. I mean that I will impress you. Figurative language is specific to each language and even to specific groups of people who use that language. Each culture has its own sayings and expressions that have different meanings to them.

    The following are all types of figurative language/abstract language:

    • Similes and Metaphors
    • Idioms, also known as figures of speech
    • Hyperbole
    • Sarcasm

    What is an Idiom in Figurative Language?

    An idiom is a type of figurative language that is a phrase that people say that is commonly accepted as having a different meaning that the individual words may lead you to believe. For example, stating that “it’s raining cats and dogs” does not mean that there are literally cats and dogs falling from the sky. Instead, it means that it is raining heavily. Many of the idioms in English have roots back to older ways of saying things.

    Idioms are a form of figurative language and are often not well-understood by children with language disorders. While there is no magical age by which children should understand idioms, it is reasonable to generalize that a 5-year-old knows very few idioms and an adult knows (and uses) a ton. Children should gradually get better at using idioms and should be able to use quite a few idioms in the middle school years and even more in the high school years.

    Figurative Language Examples (AKA Idioms):

    • Hang on = Wait a moment
    • Have a seat = Sit down
    • You’re driving me up the wall = you’re annoying me
    • Bend over backwards = Do everything you can
    • Fishy = Weird or Odd
    • Knocked my socks off = Impressed me very much
    • Pulling my leg = Kidding me, making a joke
    • Horsing around = messing around, playing
    • Let the cat out of the bag = Told the secret or let someone know something they weren’t supposed to know
    • Play it by ear = Improvise or make it up as you go
    • Give it a shot = Try to do it
    • That was a piece of cake = That was easy
    • Slipped my mind = I forgot
    • In hot water = In trouble
    • Having second thoughts = Changed your mind
    • Out of the blue = Random or unexpected
    • I’m all ears = I’m listening
    • In the same boat = In the same situation
    • Don’t see eye to eye = Don’t agree
    • Call it a day = Quit doing something for now

    Figurative Language Speech Therapy Ideas:

    For children who are struggling to learn or understand idioms, speech therapy can help. Idioms speech therapy will focus on helping children understand the meaning of these common (and sometimes uncommon) figures of speech that have non-literal meanings. Here are the steps to doing speech therapy to help a child learn idioms:

    1. Have the child read a passage (or read it aloud for him) that contains an idiom. Ask the child to guess the meaning of the idiom based on the context in which it is given.
    2. Have the child come up with a scenario in which that idiom might be used (aside from the example already given). Role play the scenario and have the child use the idiom.
    3. Give the child an assignment to use the idiom at an appropriate time sometime before your next session. Ask him to write down in a journal when he used it and what the context was. Review during the next session.
    4. During your next session, ask the child to tell you the true meaning of the idiom. For this, just say the idiom out loud, don’t give it in context. If the child is unable to tell you the meaning, repeat the steps above.
    5. Repeat the steps above with a new idiom.

    Examples of Figurative Language in Passages:

    1. John was super busy. He was talking on the phone with his office while he stirred the soup that was cooking on the stove and starting to burn. His son Billy walked up to him and said “Dad, I need help with my homework”. John replied with “Hang on!”
    2. The children walked into the classroom and found their teacher, Ms. Donna waiting for them. All of the chairs were arranged in a circle around Ms. Donna. As they approached the circle of chairs, Ms. Donna said “Have a seat” and waved her hand toward the chairs.
    3. Batson was clearly having a rough day. The children in her class were running around the classroom and screaming. There were toys and art supplies everywhere. Three children were pulling on her clothes and singing as loudly as they could. Mrs. Batson looked at the children and said “You’re driving me up the wall!”

    What are Similes and Metaphors in Figurative Language?

    What is a Simile?

    A simile is a comparison between two unlike things that uses the word “like” or “as”. For example, you could say your Grandma is as friendly as a grizzly bear (meaning that she’s not very friendly) or that your socks are as warm as a fireplace (meaning that they are very warm).

    How to Teach Similes to Children:

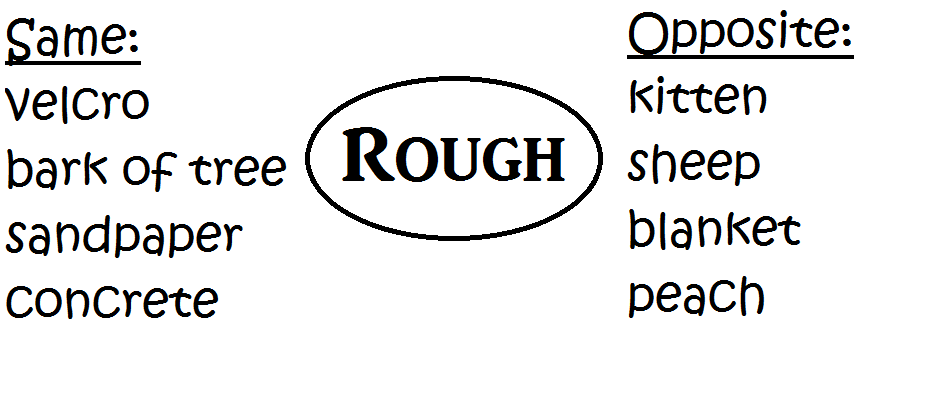
    Step One: On a piece of paper, write an adjective in the middle. On the left side of the paper, write objects that can be described by that adjective. On the right side of the paper, write objects that are not described by that adjective. You should have a list like this:

    Similes Figurative Language Activity

    Step Two: Have the child choose two items from either side of the paper and create a simile for them. For example, you could use “this blanket is as rough as a kitten”. You can also do this with a verb in the middle and the word “like” in the simile, such as “you jump like a kangaroo”.

    Step Three: Practice using some of the similes that the child created in written or spoken language. Come up with scenarios or situations where it would be appropriate to use those similes and either role play scenarios or write out paragraphs that include them.

    What is a Metaphor?

    A metaphor is a comparison between two unlike things but instead of using “like” or “as”, you just replace one word with another word. For example, you might say that your child is a doll, or that your chocolate bar is heaven.

    Literature is full of metaphors. Go through a pleasure-reading book with the child and pick out any metaphors that come up. Talk with the child about what the literal meaning of the metaphor would mean and ask if he thinks the author meant that. Then, decide on the figurative meaning that the author was going for. For example, if the author wrote, “Jason was a pig at dinner”, ask your child if the author meant that he actually turned into a pig. No, probably not. Then help the child determine that the author really meant he ate sloppily like a pig would.

    A Structured Curriculum for Teaching Abstract Language:

    Middle School / High School Language curriculum Bundle

    Middle/High School Language Bundle

    Vocabulary, Syntax, and Literacy for Middle Schoolers and High Schoolers

    $45 ~ Buy Now!

    Listen to this Information on Idioms, Figurative Language as a Podcast:

    Carrie Clark, Speech-Language Pathologist

    About the Author: Carrie Clark, MA CCC-SLP

    Hi, I’m Carrie! I’m a speech-language pathologist from Columbia, Missouri, USA. I’ve worked with children and teenagers of all ages in schools, preschools, and even my own private practice. I love digging through the research on speech and language topics and breaking it down into step-by-step plans for my followers.

    Fun Fact: Peanut M&Ms are my favorite guilty pleasure food. I could eat them all day. Mmmmmm….

    Connect with Me:

    The post Figurative Language Examples and Speech Therapy Activities appeared first on Speech And Language Kids.


    How to Help your Child with Teasing Feb 09, 2015
    Show notes

    “You’re kid sounds funny”

    “He’s so weird”

    “What’s wrong with that kid?”

    “Why is he doing that?”

    “Is she dumb or something?”

    Sticks and stones may break bones but words can be just as painful if you are the parent of a child with special needs. Those insults may come from other kids, other parents, or random people in the community who don’t know a thing about kids.

    The fact of the matter is, we as humans tend to make fun of that which we don’t understand. And we tend to judge others based on our own narrow views of the world. That means, our precious little ones who have special needs are going to get insulted. They’re going to get teased. And they may even get bullied.

    As a parent, you want to protect your child from any harm and it can be hard to know what to do in a situation such as this. Do you ignore it? Do you say something? Do you punch the guy in the face? (Ok, don’t do that one…legal disclaimer…)

    I am a parent, but so far my child does not have any delays, so I’m not going to pretend to know what you’re going through. But I am a speech therapist and I have spent a lot of time with kids who look, sound, and act different than everyone else. I’ve also been around when those children have been picked on, teased, or asked very uncomfortable questions.

    My advice on dealing with bullying, teasing, and questions is based on my own experiences. It’s not a perfect plan, but it’s a plan. Take from it what will help you and your child and leave what doesn’t match up with your beliefs. But I truly hope this helps you deal with those difficult situations:

    Click the Player Below to Listen to This in Podcast Form. Or, keep scrolling to read on:

    Your Child is Watching for Your Reaction

    When someone says something negative about your child in front of you, your child probably won’t know how to respond. In that moment, he will be watching your response. And how you respond to the situation will tell him a lot. It will tell him what you think of him (even if he’s wrong). It will also tell him what he should do if that situation arises when you aren’t around.

    Let’s pretend that someone says to you “Your kid sounds funny”. Your child will look at you and watch your reaction. If you ignore the comment and don’t say anything about it, your child may think that means that you also think he sounds funny and that you’re ashamed of him. This can create guilt in your child which can weigh quite heavily on him.

    Whatever you decide, you must do something! If you decide to ignore the stranger’s remarks, that is completely fine. However, if you don’t respond to the stranger, then you have to respond to your child. You can wait to do this until you’re alone, but you must explain to him why you didn’t say anything. You can tell him that those sorts of comments don’t deserve a response because they are disrespectful, or whatever other reason you had for ignoring the comment.

    But then, make sure to follow up by talking to your child about what was said and how you feel about it. Be honest with your child. If he does sound funny, you can say “I know some speech sounds are hard for you to get out and that’s not your fault. But you’ve been working really hard in speech therapy and I am so proud of the progress you’ve made! Plus, you’re really good at basketball and there are tons of people who have trouble with that.”

    Not only does your reaction tell your child what you think of him, it also shows him what to do in similar situations. If you think it’s best for your child to ignore comments like that, then show him how to ignore (instead of getting mad). If you think it’s best for your child to address comments like that, then you should show your child how to do that as well. There’s no right or wrong here. Each child will need a different approach so decide what will work for your child.

    What You Should Say in Response to Something Negative

    As I mentioned before, you don’t have to say anything to the speaker if you don’t want to. You can tastefully ignore the rudeness and reassure your child that you don’t think any less of him because of it. However, you may also want to say something back. This should not be just so you can retaliate and feel better. Think about it as a way to show your child how he can respond in the future. Make sure you are polite and respectful in your response. If you are nothing but kind to them, they will surely feel bad about making their remark in the first place!

    1. Try a Little Education

    Let’s go back for a moment to my comment about making fun of things that we don’t understand. Most likely, the rude comments or questions are probably happening because they don’t understand. Think about it, if a mom of a child with autism walked by another autistic child, she wouldn’t say “what’s wrong with that child?”. No, she’d be more likely to give that parent a high five of solidarity or a sympathetic look if the child was in the middle of a meltdown.

    If someone says something negative, try educating them about what’s going on with your child. If it is another child, use simple language that can help him/her understand why your child sounds, looks, or acts different. If it’s an adult, talk to them just like you would talk to a friend about what’s going on.

    2. Explain that your Child Does Things Differently

    When you are educating the other person on what’s going on, you don’t have to say that there’s something wrong with your child. You can describe the way your child does things differently. If your child is in a wheelchair, you can say “you move around using your feet, but his feet don’t work like yours. He moves around using these wheels”. If you have a child with autism who is stimming by staring at his fingers, you can say “He has autism. That means he learns things differently and he sees things differently. To him, his fingers look really cool when he looks at them like that”.

    You can also explain that your child is still learning a certain skill. If a child asks why he keeps hugging her, you can say “Johnny is still learning how to talk to kids. Since he doesn’t always know what to say, he hugs people instead. That’s his way of saying hello”. That way, you are explaining what your child does differently but without making it sound to your child like you think he’s messed up.

    3. Highlight Something that your Child Does Well

    Since you’ve now spent time talking about what’s different or abnormal about your child, you should make sure to follow up by talking about something that your child does well. If your child only hears you talk about the negative, that’s all he’ll think about himself. I recommend having at least a few different positive things that you can say about your child ready to go at all times, just in case. Think of these ahead of time so you’re not fumbling for a thought.

    Creating Widespread Understanding

    I talked before about how education can be all it takes to stop someone’s comments, questions, or teasing. Once people understand what’s going on and get to know your child as a person, they are much less likely to pick on him. Of course, there are always those people who will continue to be rude, and that’s a great time to teach your child the power of ignoring. However, most people will change their tune with a little education. This is especially true of children. Many kids will stand up for their friend with special needs if others pick on him, but only if they are given the chance to understand and love him first.

    That is why I am a big proponent of educating people who will be around your child ahead of time, so there will be fewer comments and teasing. You may be able to prevent your child from being bullied at school by educating his classmates before it happens.

    Here’s what I recommend:

    1. Think about the places that your child will spend time. School? Church? Daycare? Family? Playgroups?
    2. Offer to teach the people at each location about your child’s disability or delay and provide some education. You can offer to do this at your child’s school by talking to your child’s teacher or the principal.
    3. If you get the chance to speak to the group, let them know what’s going on with your child, including what the diagnosis is, what caused it (if you know), what it looks like, and what kinds of things they may notice your child doing. You may also want to tell them that they can’t catch it if it’s something that looks like it could be contagious, or if you’re talking to young children.
    4. Tell them all of the positive things about your child as well! Tell them what he’s good at and what he loves to do.
    5. Give them a few ways that they can interact with him in an appropriate manner. Maybe they just don’t know what to say! Tell them some questions they can ask him that he knows the answers to, or tell them how to say hello and offer him a toy. You can also tell them how they can respond if he does certain things. For example, if your child hits to get attention, instruct your listeners to tell him “Safe hands. You can say ‘hi’” when he hits (or whatever you guys say at home).
    6. Thank them for listening and accepting your child into their community.

    You can also record a video of yourself saying these things and share it on your Facebook or social media pages if you have certain friends or family members who don’t understand your child and are creating negative situations.

    For most people, once they understand what’s going on and how they can help, they are all on board! They just need a little education first.

    Get Some Examples:

    If you’d like some examples of what these things may sound like, I’ve created a PDF guide full of scripts for how to deal with teasing. Click the button below to download the scripts that you can use around your child.

    Click Here to Download the “How to Respond to Teasing” Scripts

    More Resources for Speech-Language Pathologists:

    Looking for more therapy ideas and resources to help you provide the BEST services to your clients? Join us in The SLP Solution, our membership program for speech-language professionals! Inside the membership, you’ll find:

    • Step-By-Step Guides for teaching a variety of speech/language/communication skills
    • Pre-Made Worksheets and Therapy Activities for hundreds of different topics
    • Training Videos for dealing with difficult disorders or problems
    • Answers to Your Questions in our exclusive SLP community
    • Tools and Resources to help you with your paperwork and admin tasks
    • Continuing Education through our monthly webinars and webinar recordings

    To join us in the full SLP Solution, or to snag a free membership, click on the button below!

    JOIN THE MEMBERSHIP TODAY!

    The post How to Help your Child with Teasing appeared first on Speech And Language Kids.


    Writing IEP Goals | SMART Goals and Examples Feb 02, 2015
    Show notes

    Writing IEP Goals: Sample Goals and SMART FormulaLooking for some awesome IEP goals for speech/language therapy? You’ve come to the right place! We’ve simplified and streamlined the goal-writing process (and even given you some samples to get you started). This page contains helpful resources for writing IEP goals for speech/language/communication goals: sample goals, a SMART goal-writing formula, and links to our full Curriculums with goals and therapy plans built right in. Speech/Language Therapy CurriculumsA structured program for treating communication disorders - includes goals and plans for all areasView the CurriculumsThe Secret to Better IEP Goals:Writing IEP goals can be frustrating and intimidating…but it doesn’t have to be! Imagine that you show up to an IEP (Individualized Education Plan) meeting, whether you are a parent or a professional, and you see a goal like this: “Bonnie will learn the letters of the alphabet.” What would you think? I hope you would think, “What does that even mean??”. What exactly is she supposed to learn? What they’re called? What sounds they make? How to sing the song? And how will you know that she has “learned” them? And when does she need to have this done by? All in all, this is a terrible goal. So how does one write a decent IEP goal? Well, I’m going to explain it to you and give you the formula for writing IEP goals. Whether you are a speech-language pathologist or another educator/professional, this information will help you in writing IEP goals for your student. The Formula for Writing IEP Goals:We’re going to break down exactly how to write an IEP with great goals but here’s the basic overview. If your IEP goals have these essential parts, then you’re doing great! The Process for Writing IEP Goals: Writing IEP Goals Step One:Identify the Areas of Concern The first step for writing IEP goals is to identify the area of concern. These concerns should be written in the “Present Level of Academic Performance” area of the IEP (some schools/states name that area something slightly different). You can figure out what areas are of concern by using standardized tests, developmental checklists, common core curriculum benchmarks/standards, or any other skills assessments that you have access to. This section should also include information on how that area of concern impacts the child in the educational setting. For example, you could say “Jimmy is not able to stand on his head for more than 3 minutes.” That is definitely an area of concern for poor Jimmy. However, it is not educationally relevant. That is to say, his lack of head-stand skills is very unlikely to cause him problems in the classroom. Unless, of course, there is a head-stand competition and his grade depends on it…but let’s assume that’s probably not going to happen. For that reason, Jimmy’s head-stand disability should not be included in the present level of academic performance. IEP Goals: Examples of Impact Statements Instead, we should be writing IEP goals like “In spontaneous speech, Jimmy does not include any grammatical markers in his utterances. This makes his speech sound ‘telegraphic’ which causes him to be very difficult to understand. This impacts Jimmy’s ability to communicate his wants and needs with teachers and peers, participate in classroom discussions, and initiate and maintain appropriate relationships with peers.” The key to this section is to write what the child is having difficulty with (specifically) and then how it impacts him in the classroom. Here are a few examples of how communication delays may impact a child in the classroom (use these in your impact statements!): Difficulty being understood by teachers and peers Difficulty communicating basic wants and needs to teachers and peers Difficulty initiating and maintaining relationships with peers Difficulty participating in classroom discussions Making it difficult for teachers to assess knowledge and skill acquisition Difficulty understanding classroom texts and reading Difficulty following directions to complete educational tasks Difficulty following routines Difficulty understanding and retaining new concepts presented in class Difficulty attending to auditory/verbal stimuli Difficulty retelling past events in a logical manner or forming narratives Writing IEP Goals Step Two:Each Area of Concern Should be Addressed in the IEP Ok, here’s a big takeaway. If you write a concern in the Present Level of Academic Performance, you need to address it somewhere in the IEP. That means, you can write a goal for how you will help the child overcome that concern. You could also write an accommodation or modification that will address the area of concern (such as sitting a child closer to the teacher to accommodate for attention or hearing problems). Just keep in mind that each area needs to be addressed. You can’t just say that something is a problem and then never say what you’re going to do about it. Writing IEP Goals Step Three:Choose an Area of Concern and Write a Goal Ok, so now that you know all of the areas you are going to write goals for, you need to sit down and write the goal. Don’t stress, I’ll help you! Here is a general framework that will help you think about writing IEP goals. Maybe you’ve heard of it, it’s called “S.M.A.R.T. Goal-Writing”. Every goal you write should be: SpecificMeasurableAttainableRelevantTime-Bound Let’s break it down: Specific: Each goal should specifically state what the child will do. It should be so specific that a substitute could walk in, read the goal, watch the child, and then know exactly if the child can do that skill or not. Your goal should include what the child will do, in what setting he will do it, what accuracy he should do it with, and what kinds of support he should need. Measurable: Each goal should specifically state how the skill will be measured. Make sure that you state not only how data will be collected but exactly what percentage/accuracy will be attained. You should also write this section so a substitute could come in and assess it without you explaining how. Attainable: Make sure that the goal you set is something that you reasonably expect that the child will accomplish in the given time frame. I know this can be hard to do if you’re doing an evaluation and don’t know how quickly the child will progress, but take a good guess. The IEP can (and should) be revised halfway through the IEP cycle if the child is making faster or slower progress than expected. Relevant: The goal should be relevant to each child’s individual needs. This means, you can’t just use the same goal for everyone on your caseload. Each goal should be customized to what that child needs. Also, the goals should be relevant to the child’s educational needs. We can go back to our example of head-stands as a goal that would not be relevant to a child’s educational needs. Time-Bound: Each goal should explicitly say what time frame it will be achieved in. You can say things like “by the end of the IEP cycle…” or “in one year…” or “by ___ date…”. This allows you to specify if this is a goal that will take the child all year to accomplish or if you expect it to be mastered and knocked out of the way early on to leave time for working on harder skills. IEP Goals Examples:Now let’s take a look at how this looks on actual IEP goals. Again, here’s the formula: Bam! There it is! Each of those 6 boxes is one thing that you must include in your goal although you can arrange them in any order that you like. Here are the parts written out in case you can’t read the graphic: By _____ (When the child will master the goal by: by the end of the IEP cycle, by a certain date, in six months) Student will _______ (Write the specific skill that the child will do) In ______ setting/context (Where will the skill be measured? In the classroom? In the therapy room? In conversational speech? At the sentence level? During peer interactions?) As measured by ______ (How will progress be measured? With data collection? By teacher report? A language sample? A checklist? A tally sheet?) With ____ accuracy (How accurate must the child be? Examples: 80% accuracy, in 4 of 5 trials, on 3 of 4 observed opportunities, on 5 consecutive data collection days) With ____ supports (Can the child have any supports and still be considered to have met the goal? Examples: Independently, with reminders, with verbal prompts, with physical prompts, with partial physical assistance, with visual cues) IEP Goals Example: By the end of the IEP cycle, Johnny will correctly produce the pronouns “he” and “she” when retelling a story that has just been read aloud in the speech therapy room as measured by data collection with at least 80% accuracy and no more than 2 reminders as needed. Ok, I know that is quite a mouthful. But when you break it down, it has all of the information we need. These are not designed to be great conversational pieces. They are designed to convey enough information that if you passed your IEP on to another professional, they could pick up with exactly what you were intending to do. And remember, many children change schools or move mid-IEP cycle so that very well could happen to you! If you get a new kiddo, you’re going to want his goals to be written like this as well. Including Baselines: Some schools and states require that baselines be included in each IEP goal so it is clear where the child started and how far they’ve come. If you want or need to include baseline, you can add it to the above formula by replacing your “Student will”, “supports”, and “accuracy” sections with this: “…student will increase/decrease ______ from a baseline of ____ accuracy with ____ supports to ____accuracy with _____ supports…” IEP Goal Example with Baseline: By the end of the IEP cycle, Johnny will increase correct production of the pronouns “he” and “she” when retelling a story that has just been read aloud in the speech therapy room from a baseline of 57% accuracy with 3 reminders to at least 80% accuracy with no more than 2 reminders as needed. You also may want to change the location of the goal from your baseline as well. For example, you could say that the child will go from doing a skill in the speech therapy room with 80% accuracy to in the classroom with 80% accuracy. IEP Goals Examples with Benchmarks So what are benchmark goals for? Benchmark goals are “mini” goals that are the steps leading up to a bigger goal. Think of these as the skills that the child will need to learn before he can do the larger goal. For example, if a child is going to answer a variety of “where” questions about a story read aloud, then some benchmark goals may be to answer “where” questions by pointing (where’s the ball) and then answer “where” questions verbally about the location of objects immediately present (such as “where is the block? Under the table). The key here is to include time stamps on when you expect these benchmark goals to be met by. If you do this right, you’ll be able to easily see if the child is making adequate progress to meet the overall goal. Let’s take my example above and assume that your school district tracks and updates progress once per trimester. If that were the case, you could write the following goal and benchmark goals to get you there: Example Benchmarks: Overall Goal: By the end of the IEP cycle, Juliet will independently answer “where” questions about a book that has been read aloud in the therapy room with 80% accuracy as measured by data collection. Benchmark 1: By the end of the first trimester of this IEP cycle, Juliet will independently answer a “where’s the ___” question by pointing to the correct object in the therapy room with 80% accuracy as measured by data collection. Benchmark 2: By the end of the second trimester of this IEP cycle, Juliet will independently answer a “where’s the ____” question by verbally describing the location of the object in the therapy room with 80% accuracy as measured by data collection. As you can see, the benchmarks follow the logical progression of skills that the child will need to learn how to answer “where” questions and can easily by measured by you or anyone else looking at the IEP. You’ll easily be able to tell at progress-reporting time if she’s on track to meet the goal. If she’s not, you can modify the IEP accordingly (during a formal IEP meeting!). Speech and Language IEP Goal Bank:Time for some IEP goals examples! Check out our sample speech and language IEP goals in the goal bank below. When writing IEP goals, you will need to modify these to meet the needs of each individual child, but these should be a great starting place to get you going. Speech Sound Goals Examples: These sample goals could be used for children with speech sound disorders. By the end of the IEP cycle, Client will improve intelligibility by achieving a 4 or higher on the following rubric as rated by the classroom teacher from a baseline of 2 on ______(date).1 – Student’s speech is rarely understood by peers and adults2 – Student’s speech is understood less than half of the time and is frequently asked to repeat or clarify.3 – Student’s speech is understood about half of the time by peers and adults.4 – Student’s speech is understood most of the time but sometimes must be asked to repeat.5 – Student’s speech is almost always understood by peers and adults. By the end of the IEP cycle, Johnny will correctly produce the /f/ sound during conversational speech in the therapy room with fewer than 5 production errors in ten minutes, with no more than one verbal reminder to focus on the /f/ sound. By the end of the IEP cycle, Johnny will produce conversational speech with an average rating of 3 on the following intelligibility scale during a 5-minute conversation or class discussion as rated by the classroom teacher on 3 consecutive data collection days.1 = requires frequent clarifications by the teacher2 = requires clarifications sometimes by the teacher3 = rarely requires clarifications by the teacher(This goal from Smarter Steps) Language Goals Examples: Sample goals for children with language disorders. By the end of the IEP cycle, Client will improve grammatical accuracy by producing fewer than 10 grammatical errors during a 5-minute conversational sample (in the therapy room) on three consecutive data collection days (from a baseline of 25 on ___date).Objectives: When producing sentences to describe pictures, Lexi will use pronouns “he” and “she” with 80% accuracy. When producing sentences to describe pictures, Lexi will use possessive pronouns “her”, “hers”, and “his” with 80% accuracy. When presented with a sentence with incorrect word order (either one that she previously spoke or a made up example), Lexi will rephrase/recast the sentence with correct word order with no more than 2 prompts from the speech-language pathologist on 80% of observed opportunities. By the end of the IEP cycle, Johnny will answer yes/no questions about his basic wants and needs (such as “do you want it” and “are you all done”) in structured classroom activities with 80% accuracy and one reminder as needed (per activity) as measured by teacher report or therapist observation. By the end of the first trimester, Johnny will describe the category, function, and two attributes of a vocabulary word selected from the current science curriculum on 4 of 5 observed opportunities during speech therapy sessions using classroom resources as needed (such as a dictionary or text book) as measured by data collection. By the end of the first trimester of the IEP cycle, Student will follow related 3-step directions in a structured setting (such as during speech therapy) on at least 4 of 5 attempts with one repetition as needed (per set of directions) as measured by data collection Social Skills Goals Examples: Sample goals for working on social skills with children. By the end of the IEP cycle, Johnny will use spoken language to request a…

    Full show notes at the publisher

    Frontal Lisp/Interdental Lisp | Speech Therapy Ideas & Word Lists Jan 26, 2015
    Show notes

    Frontal Lisp / Interdental Lisp | How to Fix itA frontal lisp, or interdental lisp, occurs when a child pushes their tongue out between their teeth on sounds like /s/, /z/, “sh”, and “ch”. We can help these children fix their speech errors with speech therapy techniques. This page contains therapy plans, word lists, and techniques for eliminating frontal lisps. The Hardest Sounds: /r/, /s/, and “sh”Therapy Program + Mini-Course:Strategies and materials for teaching the /r/, /s/, and “sh” sounds $19 ~ Buy Now!What is a Frontal Lisp?Let’s start at the beginning. A frontal lisp, also known as an interdental lisp, occurs when a child says the /s/ and /z/ sounds with the tongue pushed too far forward. This causes /s/ and /z/ to sound more like “th”. Frontal lisps are sometimes caused by tongue thrust, which is when the tongue is consistently too far forward, including during swallowing and at rest (when the tongue is not doing anything at all). Not all frontal lisps are caused by tongue thrust but some are. Tongue thrust requires additional types of therapy that are not discussed in this article. Today’s article will just focus on treatment for a plain old frontal lisp. Alternatively, there is another type of lisp called a lateral lisp. This is where air comes out the sides of the mouth, making the /s/ and /z/ sounds “slushy”. There is also often a lot of saliva associated with a lateral lisp. For more information about treating lateral lisps, click here. How Do You Treat Frontal Lisp? I’m so glad you asked! Frontal lisp therapy can be broken down into six steps. 1. Assessment for a Frontal Lisp: The first thing you will need to do for frontal lisp therapy is to assess the lisp. You don’t need any standardized tests for this, you just need a lot of words for the child to say so you can see if there are any words where the child is already producing a good /s/ or /z/ sound. I recommend you test both the /s/ and /z/ in all word positions. This means testing when the sound is at the beginning, middle, and end of the word as well as in consonant clusters (blends) at both the beginning and end of the word. Simply have the child say words with the sounds in all of those different positions. If the child can read, just have him read word lists. If the child cannot read, you can have him label pictures that represent the words. Below are my word lists for /s/ and /z/ in all positions, or you can download my articulation cards which contain pictures of /s/ and /z/ words in the initial, medial, and final position as well as /s/ blends in the initial position of words. Just write down which words the child can say correctly and which words are lisped. The Hardest Sounds: /r/, /s/, and “sh”Therapy Program + Mini-Course:Strategies and materials for teaching the /r/, /s/, and “sh” sounds $19 ~ Buy Now!Lisp Words: Word Lists for Assessing Frontal LispsInitial /s/ Say See Siren Soap Soup Second Simple Sock Sad Soot Sun Sound Soy Medial /s/ Medicine Motorcycle Pieces Pacifier Castle Whistle Dinosaur Glasses Recycle Pencil Baseball Popsicle Final /s/ Base Crease Ice Close (like opposite of far) Moose “s” Kiss Boss Class Bus Mouse Initial /s/ Blends Smile Smell Small Smooth Swing Sweet Swim Snake Snow Snack Sticker Stop Stairs Spoon Spaghetti Spider Strawberry Street stripe Final /s/ Blends Coughs Laughs Forests Tests Claps Tips Wasps Asps Fox Mix Mask Whisk Asks Whisks Best Lost Initial /z/ Zebra Zoo Zipper Zap Zero Zig zag Zone Medial /z/ Puzzle Scissors Bulldozer Lizard Wizard Raisin Tweezer Desert Present Newspaper Final /z/ Maze Sneeze Eyes Nose Lose Fizz Jaws Fuzz Cows Boys 2) Find a Natural Tongue Placement to Eliminate Frontal Lisp Ok, take a look at your results. Was the child able to say the /s/ or /z/ sound correctly in any of those words? If so, that’s where you’re going to start! Have the child say that word (or words if the child had multiple words he could say) and ask him to feel where his tongue is for the /s/ sound when he says it. Talk about how the tongue is behind the teeth. Ask the child to tell you if his tongue tip is up or down. Either way is acceptable and some children do it with the tongue tip up behind the top front teeth and some do it with the tongue tip down behind the bottom front teeth. Make sure the child is saying the /s/ sound in the word in a very crisp, clear manner without any lisp. If he starts to lisp on it, try a different word. Practice this correct /s/ sound (in those words if necessary) until the child knows exactly what his tongue is doing. If the child does not have any correct productions after testing all of those words, you can either keep trying new words to try to find a good one, or try some elicitation techniques to get an /s/ without having a word that he can already produce correctly. Elicitation Techniques for /s/ and /z/: If the client is having a hard time getting a good /s/ placement, try some of these tips. Watch the video below for tips for speech-language pathologists to help a child produce this sound. Exploding /t/ Sound: Start by having the child say the /t/ sound. Have him say it over and over again (“t…t…t..t…t”). Then, tell him that you want him to say it 5 times but explode the last one. Take that last /t/ and force it out as hard and long as you can. It should sound like this “t…t…t…t…tsssss”. You should get a nice /s/ sound after the /t/. Don’t tell the child that’s the /s/ sound right away. Practice it a few times until you know he can do it and then say “Hey, that makes an /s/ sound at the end”. If you can get the exploding “t” sound, then you can practice it in words that end in “ts” like “bets” and “cats”. Or, you can practice holding out the /s/ part of it and then putting a pause in the middle of the /s/ so that the child gets practice starting the /s/ sound again, like “tssss…sssss”. The Straw Technique for Teaching the /s/ Sound: This is a great strategy for teaching the /s/ sound. Use a straw to get help the child keep their tongue back and blow the air right through the middle. View this post on Instagram A post shared by Speech and Language Kids (@carrieclark_slp) Coarticulation: Coarticulation is when you put a different sound next to the target sound so it comes out more clearly. In the above example, we used the /t/ to facilitate the /s/ sound because the /t/ sound is produced in the same place in the mouth as the /s/ sound. You can use coarticulation by saying a word that ends in /t/ right before a word that starts with /s/. For example, you could say “cat soup” to try to get a good placement for /s/. You could also use the /n/ sound, like “tan silo” because the /n/ sound is also produced in the same place as the /s/. Or, you may find that other sounds work well to help the child say the /s/ or /z/ sound, such as sounds that require the tongue to be in the back of the mouth like /r/ (bear soup) or /k/ (black sock). Try a bunch of different sounds to see if any help. Turning Voice on for /z/: If you are able to get the /s/ sound but are struggling to get /z/, have the child practice turning his voice on by humming. Have the child place his hand on his throat so he can feel the vibrations when he turns his voice on and hums. Then, have him say the /s/ sound and then turn his voice on or hum. If he’s having trouble with this, have him hum a simple tune while saying the /s/ sound. 3. Eliminate Frontal Lisp in Single Words Once you are able to get the child to say a good /s/ or /z/ sound (either in single words or by itself), you want to start working on saying that sound in single words. If you were able to get the child to say either /s/ or /z/ in one or more of the words from the assessment, start with those words and other words like them. For example, if the child was able to say “bus”, try other words that have the “uh” vowel and then the /s/ sound, like “us”, “Gus”, “Rus” (you may have to get creative). Then, slowly branch out to words that are slightly less similar. For this example, you could start trying other words with /s/ at the end but with different vowels. If you weren’t able to get any of the words before but were able to get a good /s/ using the elicitation techniques, try having him put that good /s/ into some words and see what’s the easiest. For example, if you used the exploding /t/, you’ll want to start with words that have /ts/ in them. If you need to, go through the list again and see if any words are easier now that the child has a good /s/ in isolation. Then, start with those words. Gradually shift to other words that are similar. Once you pick where to start, focus on just that sound in just that position. For example, if you start with “bus”, you should only work on /s/ at the ends of words until the child can do that one well. Or, if you choose “best” to start with, you should only use /st/ at the ends of words until the child has mastered it. 4. Practice that Sound/Position in Sentences Once the child can say that one sound in that one position or context, practice saying those words in sentences. You can have the child repeat simple sentences that you say or make up his own sentences. Just make sure that he’s really mastered that sound in that position before you move on. 5. Go Back and Do It Again: Eliminate Frontal Lisp in a New Position Now that the child has mastered that sound in that position in sentences, you’ll want to go back and pick a new target to practice in single words again. You’ll want to do another mini assessment because some of the other /s/ or /z/ words may have fixed themselves while you were working on that one context. From your quick re-assessment, look for words that are getting close but aren’t quite there. Or, choose a position that’s similar to what you already worked on. I would stick with the same sound you chose to work on first instead of switching back and forth between /s/ and /z/. Just pick a new position (like /s/ at the beginning of words or /s/ in /st/ initial blends) and practice it in single words and then sentences. Keep repeating this process until the child can produce the /s/ or /z/ sound in sentences in any position or context. At this point, you can either repeat the process for the other sound or move on to conversational carry-over with the first sound. 6. Eliminate Frontal Lisp and Interdental Lisp in Conversation Once the child is able to say the sound in sentences, you’ll want to work on the sound in conversation. For more information on practicing sounds in conversation, check out my post on increasing self-awareness and carry-over: Click Here to Learn About Teaching Sounds in Conversation Structured Curriculum for Lisp Speech Therapy:The Hardest Sounds: /r/, /s/, and “sh”Therapy Program + Mini-Course:Strategies and materials for teaching the /r/, /s/, and “sh” sounds $19 ~ Buy Now!About the Author: Carrie Clark, MA CCC-SLPHi, I’m Carrie! I’m a speech-language pathologist from Columbia, Missouri, USA. I’ve worked with children and teenagers of all ages in schools, preschools, and even my own private practice. I love digging through the research on speech and language topics and breaking it down into step-by-step plans for my followers. Fun Fact: In college, I did a brief stent as the secretary of the Herpetology club….which in case you were wondering is all the creepy crawly reptiles and amphibians like snakes, lizards, frogs, etc. Can’t say I had more than a passing interest in those things but my friend was in the club and there were only 5 members so I got drafted into a leadership position. Connect with Me: The post Frontal Lisp/Interdental Lisp | Speech Therapy Ideas & Word Lists appeared first on Speech And Language Kids.

    Full show notes at the publisher

    Final Consonant Deletion | Activities, Words, and Goals Jan 19, 2015
    Show notes

    Final Consonant Deletion | Activities, Words, and Goals

    Final consonant deletion is a phonological process (pattern of speech errors) where a child drops off the ending consonants of all words.

    Final Consonant Deletion Examples:

    • “dog” becomes “dah”
    • “cat” becomes “ca”
    • And “Please Mom, can I eat some eggs and toast?” becomes “Plee mah, ca I ee suh eh a toe”?

    This page will show you how to help a child with final consonant deletion. It includes sample activities, word lists, and goal ideas.

    Early Phonology Curriculum - final consonant deletion, initial consonant deletion, unstressed syllable deletion

    Early Phonology Curriculum Bundle

    Initial Consonant Deletion, Final Consonant Deletion, Unstressed Syllable Deletion

    $19 ~ Buy Now!

    When Should Final Consonant Deletion Go Away?

    Final consonant deletion is a very normal speech pattern for young children. By dropping off the last sounds of words, young children are able to let us know what they need without over-taxing their speech systems.

    However, after a certain age, we expect children to stop using this process/pattern and start including all of their sounds.

    The age of elimination for final consonant deletion is 3 years. We expect that by a child’s 3rd birthday, they are not still continuing to drop final consonants off of their words.

    If a child continues to use final consonant deletion much past this age, he/she may need speech therapy to learn to include final consonants on words.

    Final Consonant Deletion Goals:

    Here’s an example of a great set of goals you can write for a child who needs to eliminate the process of final consonant deletion:

    By the end of the IEP cycle, Client will eliminate the phonological process of final consonant deletion by producing final consonants in the therapy room with no more than 5 omissions of final consonants in 15 minutes of conversation with 2 verbal reminders as needed on 3 consecutive data collection days.

    Benchmarks:

      1. Auditory Discrimination: Student will receptively identify the difference between two minimal pair words where the words sound the same except that one word has a final consonant and the other does not (example: bee and beak) with at least 80% accuracy.
      2. Production in Single Words: Student will produce single words with final consonants with at least 80% accuracy.
      3. Production in Phrases: Student will produce final consonants in 2-3 word phrases with at least 80% accuracy.
      4. Production in Sentences: Student will produce final consonants in sentences with at least 80% accuracy.

    Final Consonant Deletion Activities

    Fortunately, the therapy to fix final consonant deletion is pretty straight forward. You just need to help the children hear that there definitely are consonants on the ends of many words and then help them say those final consonants.

    These final consonant deletion activities will gradually help a child learn to use those final consonants. Use the activities below in order. Don’t move on to the next activity until the child has mastered the previous one.

    1: Auditory Discrimination for Final Consonant Deletion

    The first thing you will need to do is help the child hear the difference between words that have final consonants and words that do not. To do this, you will need to come up with some pairs of words that are exactly the same except that one has a final consonant, and one does not. Fortunately for you, I have listed as many as I can think of here:

    Final Consonant Deletion Words:

    This final consonant deletion word list shows examples of minimal pairs – words that are exactly the same except that one word has a final consonant and the other does not. Use these word pairs to help the child hear the difference between words with and without final consonants.

    • Baa (like a sheep noise…but only if you say “baa” the same way you say “bag”)/bag/bat/bad/bass/bath/back
    • “R”/”arm” (technically /ar/ is a rhotic vowel, though if the child is having trouble with /r/, skip this one)
    • Bee/beak/beet/beam/beast/
    • Bye/bike/bite
    • Bow/boat/bone
    • Boo/boot/boom
    • “K”/cake/cape/Kate/case/cane
    • Cow/couch/count/cows
    • Dry/drive
    • Four/fork/fort/form/force
    • Key/keys/keep
    • Lie/light/life/lime
    • No/nose/nope/gnome/note
    • Play/plane/plate
    • Sew/soap/soak
    • Tie/time/ties
    • Tree/treat
    • Purr/purse
    • Go/goat
    • Me/meat
    • My/mice/might/mine
    • You/use
    • Two/toot/tune
    • We/week/wheel/wheat/weep
    • Tea/tease/teen
    • Boy/boys
    • “Q”/cute
    • Toe/toast/toad/tone/toes
    • Shoe/shoot/shoes
    • “C”/seem/seed/seat
    Early Phonology Curriculum - final consonant deletion, initial consonant deletion, unstressed syllable deletion

    Early Phonology Curriculum Bundle

    Initial Consonant Deletion, Final Consonant Deletion, Unstressed Syllable Deletion

    $19 ~ Buy Now!

    Auditory Discrimination Game:

    Place two pictures in front of the child from the same pair. Tell the child what each picture is called and then have him close his eyes. Hide a penny (or a piece of candy) under one of the pictures. If it sticks up and is obvious to the child, use two paper cups and put the cards on top of the cups and the candy/penny under one. Then, have the child uncover his eyes and tell him which picture to look under. (Or, if you don’t want to do the penny game, just tell the child to point to one picture or the other).

    For example, if you had “bee” and “beak” out, you could say “look under ‘bee”. Make sure you exaggerate the final consonant when you say it. If he looks under the wrong picture, say “Oh listen, that word has a final/end sound (or doesn’t have a final/end sound)” and exaggerate the sound for him again. Keep doing this until the child can correctly pick the right picture each time. The child may be able to do this right away or it may take several weeks. Keep at it!

    2: Eliminate Final Consonant Deletion in Single Words

    Once the child can hear the difference between words that have final consonants and those that do not, it’s time to start having the child say those sounds in single words.

    Put two words from a pair in front of the child again, but this time, tell the child that he will have to tell you which picture to look under. Have the child close his eyes and then you hide the penny (or candy) under the picture with the final consonant (always under the one with the final consonant). Have the child open his eyes and this time have him tell you where to look.

    The child will probably say the word without a final consonant first so repeat the word back to the child and look under that picture. (For example, if you’re doing long and short sounds with the pair “bee” and “beak”, hide it under the “beak”. When the child tells you to look under “bee”, say “bee. Ok, I’ll look under “bee”. Oh, it’s not under bee”). Then, have the child guess again. If he says the word without the final consonant again, repeat his error back to him, and then model the correct pronunciation of the word. In our example, you would say “you said ‘bee’ but it’s not there. Do you mean, beaK?” Then, help the child say the word with the final consonant so you can look under that picture.

    3: Final Consonants in Phrases and Sentences

    Now that the child is able to produce the class of sounds in single words, you are ready to move on to having the child say final sounds in phrases and sentences.

    Use the card pairs from before and have the child say two sentences, one with each word in the pair. For example, he could say “I see a bee. I see a beak”. You could also have the child say one sentence with both words. Make sure that the child correctly produces any final consonants that occur in the sentence. Continue to ask the child to make up sentences with other words and make sure that all final consonants are present and accounted for. Keep practicing this until the child is consistently using final consonants in simple sentences.

    4. Final Consonants in Conversational Speech

    Once the child knows how to produce final consonants in sentences, you can start working on conversational speech. Here is some information about working on sounds in conversation:

    How to Work on Sounds in Conversational Speech

    A Structured Curriculum for Phonological Errors:

    If you’d like a complete plan for eliminating phonological processes and improving intelligibility, check out our Phonology Curriculum:

    Early Phonology Curriculum - final consonant deletion, initial consonant deletion, unstressed syllable deletion

    Early Phonology Curriculum Bundle

    Initial Consonant Deletion, Final Consonant Deletion, Unstressed Syllable Deletion

    $19 ~ Buy Now!Carrie Clark, Speech-Language Pathologist

    About the Author: Carrie Clark, MA CCC-SLP

    Hi, I’m Carrie! I’m a speech-language pathologist from Columbia, Missouri, USA. I’ve worked with children and teenagers of all ages in schools, preschools, and even my own private practice. I love digging through the research on speech and language topics and breaking it down into step-by-step plans for my followers.

    Fun Fact: I enjoy yoga and meditation. I’m not particularly good at either but I don’t let that get in my way. I do the poses that feel good and I spend a few minutes focusing on my breath even if I can’t meditate for very long. I am perfectly fine with my imperfect practice as long as I’m focusing on taking care of my body.

    Connect with Me:

    Listen to the Podcast Version of this Information Here:

    The post Final Consonant Deletion | Activities, Words, and Goals appeared first on Speech And Language Kids.


    The Magic Formula to Teach a Child Any New Skill (By Fading Supports) Jan 12, 2015
    Show notes

    The inspiration for this post came to me while I was laying in my 10-month-old’s crib with him. Yeah, I’m that mom. But let me explain!

    My sweet baby boy was an excellent sleeper until he hit the 6-month mark. Then, suddenly we went from one night waking to like 7…or more. I tried everything I could think of to get him back on track but nothing worked. Finally, I just gave up and started bed-sharing with him in the guest bedroom of our house. With him in the same bed as me, at least I got some sleep while he nursed every 1-2 hours.

    Now, I’m not trying to start a discussion or debate on the safety or benefits/dangers of bed-sharing so let’s not go there. Let’s stay focused.

    The point is, I gave up trying to teach my son how to sleep in his crib. But after a few months of this, I had an “Aha!” moment when I realized that what I really wanted to do was to teach my son a new skill (sleeping in his bed), and as a speech therapist, I know a formula for teaching a child anything. (Plus, I really wasn’t getting much sleep with him in the bed with me so that was pretty motivating)

    The Magic Formula for Teaching a Child a New Skill

    The concept is easy, though implementing it can be a long process that involves a lot of work, depending on the skill. Here’s the basic idea:

    To teach a child a new skill, figure out what supports they need to do the skill successfully, and then gradually fade those supports until the child is doing the target skill on his own.

    I know, easier said that done. That’s why I’m going to show you the formula that will make this process a piece of cake. Here’s the formula:

    Step One: Identify the Target Skill

    What is the target skill? What do you want the child to do?

    The first thing you need to do is figure out exactly what it is you want the child to do. Be as specific as possible.

    In my case, I wanted my child to sleep in his crib by himself and it sure would be nice if he would sleep through the night, too (but that would just be icing on the cake).

    Step Two: Identify How the Child is Currently Doing the Skill (or the closest that they can come)

    What supports (prompts, help, assistance, cues) does the child currently need to do the skill?

    How much help do you have to give the child before he’s able to do the skill on his own. Or, if he can’t do the skill no matter how much help, what is the closest he can come to the skill? Well, first you may want to make sure that the skill you’re targeting is appropriate for that child. For example, what if the target skill is answering “where” questions but the child is not doing anything close to that? Then, maybe the closest that you can come with the child is saying “Where’s your nose?” and then helping him move his finger to his nose. See what I did there? I came up with the closest approximation that I could to the desired skill and with as much support as necessary. Sometimes the support is you actually doing the skill for them. Other times, the support is just a verbal reminder or a knowing look from Mom.

    In my example, my child was able to sleep if he was in a separate bed with me nursing him and staying beside him the whole night.

    Step Three: Compare the Supports to the Target Skill

    The next thing you want to do is to list out all of the supports that the child needs and then compare each one to how it would look if the child was doing the skill independently. This will help you see what path you need to take to eliminate each support (gradually, of course).

    Let’s take a look at how my son’s supports compared to his target skill:

    • Sleeping in guest bed à Sleeping in his crib
    • Sleeping with mom beside him à Sleeping independently
    • Nursing to sleep when woken à Putting self back to sleep when woken

    Step Four: Decide on the First Support To Take Away or Fade

    What would be the easiest support to take away (or fade slightly) while leaving all other supports the same?

    Take a look at your list of supports and decide which one will be the easiest to remove or fade slightly. When I say “fade”, I’m referring to gradually taking the support away. Try to decide which support would be the least disruptive to the child. If there is a support that the child relies heavily on, you don’t want that one to be the one you take away first. Instead, take away a less important support. If you can’t entirely eliminate a support in one swoop, try to just gradually decrease it instead. I’ll give you an example of that in a bit.

    Well, fortunately for us, my son has a very large crib that would accommodate both of us. So in this example, the easiest thing that I could change (without totally throwing him off) was to move both of us into his crib but still lay with him and nurse him when he wakes up.

    Step Five: Remove or Fade that Support

    It’s time to start removing or fading the support that you chose. Try to keep everything else the same (all other supports are in place) but just remove the chosen support and ask the child to do the task. If the child falls apart or cannot do the skill, then you will want to gradually fade the skill instead.

    To fade a support, you will want to slightly decrease the intensity of that support. For example, if the support is moving a child’s hand to touch an object, you could fade that slightly by holding onto just his elbow and pushing his arm in the right direction but not entirely controlling his hand like you were before. Take a look at my example in the “Pro Tip” section for more details.

    Step Six: Remove Another Support

    Once the child is comfortable doing the skill without that support, what is the next easiest support to take away (or fade slightly) while leaving all other supports the same?

    Now that the child is comfortable doing the skill without that first support, take a look at the remaining supports and determine which one would be the next easiest to remove. Keep in mind, you can always just gradually decrease a support instead of taking it away cold turkey, see the next section.

    Once I had my son sleeping well in his crib, the next support I removed was me laying next to him. I would wait until he was asleep and then quietly and gracefully extricate myself from his crib. Let me tell you, it was a little touch and go when I was half-asleep in the middle of the night, but so far I haven’t fallen face first yet. …knock on wood…

    Perfect! Two of the three supports removed. But this last support wasn’t going to be so easy to remove.

    Pro Tip: What to Do When You Can’t Remove a Support Cold Turkey

    If you can’t completely take away a support in one swoop, either because the child will become upset or won’t be able to do the skill anymore, consider just backing it down slightly.

    Take my example: The last support to remove was nursing my child to sleep. Well, I tried just not nursing him and he screamed bloody murder. Not good. So I had to figure out a way to scale back a bit and just slightly reduce the amount of support he was getting. I decided to do this by only nursing for 60 seconds, then pulling back to see if he would go to sleep. If he latched on again I nursed for another 60 seconds and then pulled back again. I kept doing this until he was content to be unlatched.

    We are now at the point where he will only nurse for the first 60 seconds and then happily goes back to sleep unlatched. I’m not all the way there but I would say this is a HUGE improvement over where we were and I will continue to fade this support until he is independently sleeping and putting himself back to sleep in his crib.

    The key here is that there is no right or wrong way to fade a support. You just have to take a guess at what would be a good way to fade the support and then give it a try. If it doesn’t work, you try something else. If it does, you go with it.

    Step Seven: Continue Fading and Removing Supports as Necessary

    Ok, now that you have the hang of it, just keep going! Keep fading or removing supports until the child is performing the target skill without support. Keep in mind that you may be at this for a while. You may have to work on removing one support for a while before the child is comfortable doing the skill without that support. In my example, it has taken a few months to get to the point we’re at now. You may be working on fading a particular support for months! Just be patient and keep working and eventually you will get it.

    Download the Formula Worksheet!

    I know this was a lot of information, so I have created a worksheet format that will help you go through this process. Please click the button below and I will send you the worksheet.

    Click Here to Get the Free Worksheet

    More Resources for Speech-Language Pathologists:

    Looking for more therapy ideas and resources to help you provide the BEST services to your clients? Join us in The SLP Solution, our membership program for speech-language professionals! Inside the membership, you’ll find:

    • Step-By-Step Guides for teaching a variety of speech/language/communication skills
    • Pre-Made Worksheets and Therapy Activities for hundreds of different topics
    • Training Videos for dealing with difficult disorders or problems
    • Answers to Your Questions in our exclusive SLP community
    • Tools and Resources to help you with your paperwork and admin tasks
    • Continuing Education through our monthly webinars and webinar recordings

    To join us in the full SLP Solution, or to snag a free membership, click on the button below!

    JOIN THE MEMBERSHIP TODAY!

    The post The Magic Formula to Teach a Child Any New Skill (By Fading Supports) appeared first on Speech And Language Kids.


    Parent Rights in the IEP Process with Lara Wakefield Nov 24, 2014
    Show notes

    In episode 26 of the Speech and Language Kids Podcast, Carrie Clark interviews speech-language pathologist Lara Wakefield, PhD, CCC-SLP about the parent rights in the IEP process. Lara discusses what rights you have as a parent of a child with a special need or disability.

    Who is Lara Wakefield?

    Lara Wakefield is a speech-language pathologist and parent advocate in Columbia, Missouri where she has a private practice providing parent advocacy and speech therapy services to local families. Lara has 19 years of experience in various speech and language therapy settings and has been a parent advocate for 7 years. Lara’s areas of interest and research include collaborative and inclusive approaches in the schools, parent advocacy and education of IDEA, FERPA, and LRE, as well as evidence-based practice related to the selection and use of smartphone and tablet apps.

    What is a Parent Advocate?

    • Someone to help parents advocate and navigate the world of having a child with special needs
    • Someone to help with medical issues, insurance, juvenile justice system, and school system
    • Currently no certification for parent advocates but there are training programs through COPAA:

    http://www.copaa.org/

    Do I Need a Parent Advocate?

    • Not all parents of children with special needs have parent advocates
    • Lara currently sees a growing need for parent advocates because the education laws are not written in parent-friendly ways and there are more special needs students now than ever before
    • Parents often don’t understand the jargon that schools are using and this can cause communication breakdowns
    • Schools don’t always understand the complexities of the diagnoses walking in their doors
    • Parent Advocates can be translators to improve communication between schools and parents

    What Laws Protect Families of Children with Special Needs?

    • Individuals with Disabilities in Education Act (IDEA)
    • American’s with Disabilities Act (ADA)
    • Outline the steps required
      • Team must determine eligibility
      • IEP or 504 plan must be in place
    • The law and the states lay out who qualifies and who doesn’t. The schools have to follow what the law says.

    What Rights to Families Have When Their Child Has a Disability:

    • Least Restrictive Environment (LRE): Children should receive their education with their typically-developing peers as much as is possible and practical. They should also access the general education curriculum as much as possible.
    • Evidence-Based Practices (EBP): Children should be provided therapies that are based on what the research says are the best practices.

    What if the School Says the Child Doesn’t Qualify?

    • Still protected under IDEA
    • Parents have 4 options if they disagree with the diagnostic information:
      • Mediation with a lawyer provided by the state: Aimed at peaceful resolution (the best possible outcome)
      • File Child Complaint to the state and the state would investigate the school to see if they are violating the law
      • File for Due Process: Involves a court hearing where a ruling is handed down about if the school was wrong. Run by the state (not in the formal courts)
      • Can ask for independent evaluation by someone outside of the school. Team reconsiders eligibility based on the new information

    How Do Response to Intervention (RTI) Programs Work?

    • Therapists provide therapies to children in the regular education setting without using the full IEP evaluation
    • These children should be protected by ADA Section 504

    How Can Parents Find All of Their Rights?

    Go to state’s department websites and click on parents’ section on special education. Look for the compliance manual and standards indicator. You can also look for youtube and web information. Another good website is “Wrightslaw”

    http://www.wrightslaw.com/

    Steps if You Feel Your Rights Are Being Violated:

    • Talk to the team first
    • Bring in principle and district administrator if possible
    • If that doesn’t work, find an advocate to assist you in knowing your options

    What is Due Process?

    • A parent’s rights to go through mediation and work out the problem or have the school investigated.
    • A neutral entity (the state department) comes in to mediate or investigate. These entities may not be entirely neutral though so advocates are helpful.
    • This should not be your first step. Other steps should be taken to find peaceful resolution first. Most cases don’t need to go all the way to due process.

    How To Promote a Positive Working Relationship with your Child’s IEP Team:

    • Document, document, document
    • Put everything into writing if possible (email is preferable)
    • If you have face-to-face or phone conversations, follow up with an email that summarizes what was discussed.
    • Ask for clarification constantly. Say “Ok, let me make sure I got that correct, I heard you say…”. Ask the IEP team any time you don’t understand what they’re talking about.

    How To Find an Advocate:

    Wright’s Law:

    http://www.yellowpagesforkids.com/

    COPAA Website:

    http://www.copaa.org/search/custom.asp?id=1489

    How to Find Info About Lara Wakefield

    573-268-3284

    wakefieldconsultationservices@gmail.com

    Facebook:

    https://www.facebook.com/wakefieldconsultationservices

    More Resources for Speech-Language Pathologists:

    Looking for more therapy ideas and resources to help you provide the BEST services to your clients? Join us in The SLP Solution, our membership program for speech-language professionals! Inside the membership, you’ll find:

    • Step-By-Step Guides for teaching a variety of speech/language/communication skills
    • Pre-Made Worksheets and Therapy Activities for hundreds of different topics
    • Training Videos for dealing with difficult disorders or problems
    • Answers to Your Questions in our exclusive SLP community
    • Tools and Resources to help you with your paperwork and admin tasks
    • Continuing Education through our monthly webinars and webinar recordings

    To join us in the full SLP Solution, or to snag a free membership, click on the button below!

    JOIN THE MEMBERSHIP TODAY!

    The post Parent Rights in the IEP Process with Lara Wakefield appeared first on Speech And Language Kids.


    Generalization for Speech Therapy | Help Clients Self-Monitor and Carry-Over Skills Nov 17, 2014
    Show notes

    Generalization for Speech Therapy | Help Clients Self-Monitor and Carry-Over Skills

    “They can do it in speech therapy, but they’re not carrying it over to the classroom!”

    How many times have you said this?

    Carry-over and generalization skills are sometimes the hardest to teach because the client CAN do the skill but they either forget or aren’t motivated to use the skill anywhere else.

    On this page, we’ll share with you our best tips for helping children generalize their speech therapy skills to other environments. We’ll show you how to boost their ability to self monitor and carry those skills over.

    The Hardest Sounds: /r/, /s/, and “sh”

    Therapy Program + Mini-Course:
    Strategies and materials for teaching the /r/, /s/, and “sh” sounds

    $19 ~ Buy Now!

    How to Increase Self-Awareness and Self-Monitoring of Speech Therapy Skills:

    What is Self-Awareness?

    Self-awareness refers to a child’s ability to monitor himself to determine if he is doing something correctly. In terms of speech and language skills, we look for self-awareness with the speech and language errors that the child is producing.

    For example, if a child doesn’t say “s” correctly in conversational speech, we want to know if the child is aware that he is saying it incorrectly. Most of the time with speech errors, the child is not at all aware that he is producing it incorrectly. In contrast, children who have significant stutters are often painfully aware that they are stuttering and become very embarrassed by it.

    What is Carry-Over?

    Carry-over refers to a child’s ability to take a skill that she has learned in an isolated setting (like speech therapy) and begin to use it in other settings, such as in the classroom and at home. Once we teach a child to do a skill on command, we must then teach her to carry-over that skill to the rest of her life.

    How Does Self-Awareness Improve Carry-Over?

    If a child is not aware that he is doing something incorrectly, it is very, very difficult for him to fix it. Children must develop a level of self-awareness before they are able to monitor and change their behavior. If you are working with a child who can do a skill (for example, say the target sound) brilliantly in speech therapy or practice sessions, but who struggles to remember to use it during every-day activities, he may be lacking self-awareness.

    How to Improve Self-Awareness and Self-Monitoring Skills:

    • Record the child doing the skill as well as times when she doesn’t do it. Play the recordings back to the child and have her tell you whether it was correct or incorrect.
    • Have the child perform the skill for you at a level that he sometimes struggles with. This may be when answering open-ended questions or retelling past events if he’s able to do the skill in simple sentences well. After each time the child attempts the skill, put your thumb up or down behind a large object (or under the table) based on if it was correct or incorrect. Have the child guess, based on his performance, if you rated it correct or incorrect. Then, show the child your hand to see if he was correct.
    • Provide a positive reinforcement system for when the child remembers to use the skill on his own. Provide intermittent reinforcement (don’t praise every good time, just some) and track the child’s progress so he can work toward a goal. You can download my Speech Sound Carry-Over Challenge to use at home or send home with your families:

    Speech Sound Curriculums:

    The Hardest Sounds: /r/, /s/, and “sh”

    Therapy Program + Mini-Course:
    Strategies and materials for teaching the /r/, /s/, and “sh” sounds

    $19 ~ Buy Now!Carrie Clark, Speech-Language Pathologist

    About the Author: Carrie Clark, MA CCC-SLP

    Hi, I’m Carrie! I’m a speech-language pathologist from Columbia, Missouri, USA. I’ve worked with children and teenagers of all ages in schools, preschools, and even my own private practice. I love digging through the research on speech and language topics and breaking it down into step-by-step plans for my followers.

    Fun Fact: When my son was three, he once got mad at me and told me he was going to send me to Antarctica in nothing but a t-shirt. He had an overly large vocabulary for a 3-year-old….along with an overly large amount of sass. He still has both to this day.

    Connect with Me:

    The post Generalization for Speech Therapy | Help Clients Self-Monitor and Carry-Over Skills appeared first on Speech And Language Kids.


    Previous 1 5 6 7 8 9 10 Next

    Related Podcasts

    Coffee Break French

    1

    Coffee Break French Courses
    EconTalk

    2

    EconTalk Courses
    TED Talks Education

    3

    TED Talks Education Courses
    The Torch: The Great Courses Podcast

    4

    The Torch: The Great Courses Podcast Courses
    LSE: Public lectures and events

    5

    LSE: Public lectures and events Courses
    Homeschool Better Together

    6

    Homeschool Better Together Courses
    footer-logo

    Contact Us

    Toll Free: 844-670-7747

    Links

    • Home
    • Top Charts
    • Networks
    • Apps
    • Independents Podcasts
    • Podcast Advertising
    • Podcast News
    • Contact Us
    • About Us
    • Analytics & Insights

    Stay Connected

      Privacy, Terms of Use & Our Code of Ethics Protecting Content Creators Copyrights