TopPodcast.com
Menu
  • Home
  • Top Charts
  • Top Networks
  • Top Apps
  • Top Independents
  • Top Podfluencers
  • Top Picks
    • Top Business Podcasts
    • Top True Crime Podcasts
    • Top Finance Podcasts
    • Top Comedy Podcasts
    • Top Music Podcasts
    • Top Womens Podcasts
    • Top Kids Podcasts
    • Top Sports Podcasts
    • Top News Podcasts
    • Top Tech Podcasts
    • Top Crypto Podcasts
    • Top Entrepreneurial Podcasts
    • Top Fantasy Sports Podcasts
    • Top Political Podcasts
    • Top Science Podcasts
    • Top Self Help Podcasts
    • Top Sports Betting Podcasts
    • Top Stocks Podcasts
  • Podcast News
  • About Us
  • Podcast Advertising
  • Contact
Not in our directory?
Add Show Here
Podcast Equipment
Center

toppodcastlogoOur TOPPODCAST Picks

  • Comedy
  • Crypto
  • Sports
  • News
  • Politics
  • True Crime
  • Business
  • Finance

Follow Us

toppodcastlogoStay Connected

    View Top 200 Chart
    Back to Rankings Page
    Kids & Family

    The RV Atlas Podcast – RVFTA Podcast Network

    A weekly podcast from the writers of rvfamilytravelatlas.com, focusing on topics that relate to RV family travel. We review campgrounds, discuss tips and tricks for traveling with kids, and answer our readers’ most common questions. We also chat about food, gear, and those times when everything doesn’t quite go as planned.

    Advertise

    Copyright: © The RV Atlas, 2014-2021

    • Apple Podcasts
    • Google Play
    • Spotify

    Latest Episodes:
    6 Easy and Amazing Blackstone Recipes for Camping+Great Griddle Gear (With Campin’ Erin) Nov 02, 2026
    Show notes

    One of the best parts of camping is cooking outside, and few pieces of camping gear have changed the way we prepare meals at the campground quite like the Blackstone griddle. From classic pancakes and smash burgers to creative pasta dishes, sandwiches, and even desserts, there’s almost no limit to what you can cook on a flat-top griddle. But here’s the thing: the best campground recipes aren’t necessarily the most elaborate. When we’re camping, we want delicious food that doesn’t require hours of preparation, a complicated ingredient list, or a kitchen full of equipment. We want to feed our families, spend time together, and get back to enjoying the campground. That’s exactly why we love the recipes from Campin’ Erin, one of our favorite camping and outdoor cooking content creators. Erin is a Virginia-based RVer who shares campground reviews, camping gear recommendations, hilarious videos about RV life, and plenty of creative Blackstone recipes. She’s also a good friend of The RV Atlas, and we’ve had the opportunity to cook together while filming episodes of Camp Griddlemore. Erin started cooking on a basic 22-inch Blackstone griddle around 2020, initially thinking it would be something her husband used for the occasional burgers and hot dogs. Instead, she fell in love with outdoor cooking and began experimenting with increasingly creative recipes. Today, she’s known for making delicious, approachable meals that real families can recreate at home or at the campground. We invited Erin back to The RV Atlas (check out her previous episode on Virginia state parks right here) to share six of her favorite Blackstone recipes, along with her go-to cooking accessories, favorite campground discoveries, and advice for making outdoor meals easier. Whether you’re a brand-new Blackstone owner or someone who has been cooking on a griddle for years, there’s something here you’ll want to try on your next camping trip. Listen to the complete episode of The RV Atlas by clicking on the media player above or subscribing to the RV Atlas wherever you get your favorite shows! 1. Chicken Taco Tortellini: A Creamy, Cheesy Blackstone Dinner Chicken taco tortellini might sound like an unusual combination, but it’s one of Erin’s favorite new recipes. She first made it over the summer and has already returned to it several times. It’s also been a hit with her followers, many of whom have recreated the dish and shared their enthusiasm. The combination of seasoned chicken, cheese-filled tortellini, Alfredo sauce, and taco seasoning creates a creamy, flavorful meal that’s easy to prepare on a campground griddle. Ingredients for Chicken Taco Tortellini Boneless, skinless chicken breasts Refrigerated cheese tortellini Taco seasoning Alfredo sauce Shredded cheese Vegetables of your choice Water for steaming the tortellini Erin prefers refrigerated tortellini because the pieces are generally larger and hold up well on the griddle. Frozen tortellini can also work, but she recommends thawing it first. How to Make Chicken Taco Tortellini on a Blackstone Start by butterflying the chicken breasts so they’re thinner and cook more evenly. Season the chicken with taco seasoning and place it on the heated Blackstone. Cook the chicken thoroughly, then chop it into bite-sized pieces directly on the griddle using a sturdy scraper or chopping tool. Erin loves this technique because it eliminates the need to transfer the chicken to a cutting board. Once the chicken is cooked, move it to the side or temporarily remove it from the griddle. Add the refrigerated tortellini to the cooking surface along with a little water. Cover it with the Blackstone hood or a large basting dome to create steam. This step is important because the tortellini needs enough moisture and heat to become tender. Jeremy admits that when he first started cooking pasta on his Blackstone, he didn’t steam it long enough. Once he figured out the technique, however, he became a believer. When the tortellini is tender, add the chicken back to the griddle. Mix in the Alfredo sauce, additional taco seasoning, vegetables, and shredded cheese. Toss everything together until the sauce is warm, the cheese has melted, and the ingredients are evenly combined. The result is a rich, cheesy pasta dish with plenty of taco flavor. Why This Recipe Is Perfect for Camping This is exactly the kind of dinner we love for a Friday night arrival. After driving to the campground, setting up the RV, and getting everyone settled, nobody wants to spend an hour preparing dinner. Chicken taco tortellini comes together quickly and can feed a hungry family without requiring several pots and pans. It’s also easy to scale up when camping with friends. Erin makes this recipe on her 22-inch Blackstone, proving that you don’t need a huge griddle to prepare a satisfying family dinner. 2. Walking Tacos: The Ultimate Customizable Campground Meal Sometimes the simplest recipes are the biggest hits, and walking tacos are a perfect example. They’re easy to prepare, fun for kids, and ideal for camping with a group because everyone can customize their own meal. The concept is simple: cook seasoned taco meat, open individual bags of chips, and let everyone add their favorite toppings directly into the bags. No plates are required, and cleanup is minimal. Ingredients for Blackstone Walking Tacos Ground beef Taco seasoning Individual bags of chips Shredded cheese Salsa Sour cream Guacamole Diced tomatoes Beans Jalapeños, onions, or other favorite taco toppings The chip selection is where things get interesting. Erin prefers Fritos, while Jeremy is a traditional Doritos fan. Their kids sometimes make choices that the adults find questionable, including Cool Ranch Doritos and even Cheetos. But that’s part of the fun. How to Make Walking Tacos on a Blackstone Brown the ground beef directly on the Blackstone, breaking it into small pieces as it cooks. Add taco seasoning according to the package directions or your preferred recipe. While the meat cooks, arrange the toppings on a picnic table so everyone can build their own meal. Open the individual chip bags, gently crush the chips if desired, and add a scoop of seasoned beef. Finish with cheese, salsa, sour cream, guacamole, and any other toppings. Grab a fork and enjoy. Why Walking Tacos Work So Well for Families One of our favorite things about walking tacos is that picky eaters and adventurous eaters can enjoy the same meal. A child might want nothing more than seasoned beef, shredded cheese, and Doritos. An adult can load up the same basic ingredients with peppers, onions, jalapeños, salsa, and guacamole. Everyone gets exactly what they want without requiring separate meals. Walking tacos are also a terrific choice for camping with another family, hosting friends at your campsite, or feeding a group of kids. And here’s an important meal-planning tip from Erin: cook extra taco meat and save it for Blackstone nachos later in the weekend. That simple bit of planning makes another campground meal even easier. 3. Chicken Bacon Ranch Subs: A Fresh and Filling Camping Dinner Chicken bacon ranch is a classic flavor combination, and Erin’s version transforms it into a hearty sandwich that’s perfect for the campground. The concept is similar to making a chopped chicken salad and stuffing it into a sub roll or pita. It’s fresh, flavorful, filling, and easy to customize. Ingredients for Chicken Bacon Ranch Subs Boneless, skinless chicken breasts Cooked bacon Sub rolls or pita bread Lettuce Shredded cheese Ranch dressing Tomatoes Onions Salt, pepper, garlic, or your favorite all-purpose seasoning How to Make Chicken Bacon Ranch Subs Season the chicken breasts with your preferred seasoning blend. Erin likes keeping this step simple, using an all-purpose seasoning or a combination of salt, pepper, and garlic. Cook the chicken on the Blackstone until it reaches a safe internal temperature, then chop it into small pieces directly on the griddle. While the chicken cooks, chop the lettuce, tomatoes, and onions. In a large bowl, combine the lettuce, shredded cheese, cooked bacon, ranch dressing, and chopped chicken. Add enough ranch to coat everything without making the filling overly wet. Scoop the mixture into sub rolls or pita pockets. Finish with tomatoes, onions, or any other toppings your family enjoys. Erin recommends adding some toppings individually rather than mixing everything together, particularly when cooking for family members who don’t like tomatoes or onions. The Secret to a Great Chicken Bacon Ranch Pita Erin has made variations of this recipe using pita bread, but she insists that the quality of the pita makes a huge difference. Her favorite pitas came from Costco. Unlike thinner grocery store varieties that can tear when stuffed, these were large, fluffy, and sturdy enough to hold a generous amount of filling. Jeremy had a funny coincidence to share: Stephanie had recently brought home the very same pitas from Costco, and he immediately made himself a scrambled egg pita sandwich. The recommendation wasn’t sponsored. They simply agreed that a good pita can make an ordinary sandwich considerably better. An Easy Friday Night Camping Dinner This recipe is another excellent option for arrival night. Jeremy likes dividing campground dinners into two categories: Friday night meals and Saturday night meals. Friday night dinners should be quick and easy because everyone is arriving, setting up, and getting settled. Saturday nights offer more time to experiment, prepare a more involved meal, and enjoy cooking outside. Chicken bacon ranch subs fit perfectly into that Friday night category. They’re substantial enough to satisfy hungry campers without requiring complicated preparation. 4. Texas Toast French Dips: A Delicious Twist on a Classic Sandwich Of all the recipes Campin’ Erin shared, this one has a special place in our hearts. Jeremy and Shawn visited Erin’s home in Virginia to film two episodes of Camp Griddlemore, and one of the recipes they made together was her Texas Toast French Dip sandwiches. They were absolutely delicious. In fact, Jeremy has already made them several more times at home. The combination of buttery garlic Texas toast, warm roast beef, melted provolone, and savory au jus creates a rich, comforting sandwich that’s especially appealing during fall camping season. And best of all, it’s incredibly easy. Ingredients for Texas Toast French Dips Texas toast Sliced roast beef Au jus Provolone cheese slices High Plains Steak Seasoning Fresh parsley, chopped How to Make Texas Toast French Dips on a Blackstone Finely chop fresh parsley and set aside for garnish. Pour the au jus into a saucepan and heat on the griddle over high heat until hot. Remove from heat and set aside. Spread the roast beef evenly on the griddle. Sprinkle with High Plains Steak Seasoning and cook until warmed through. Transfer the warmed roast beef into the saucepan with the au jus. Stir to coat the meat and keep warm. Place Texas toast on the griddle and cook until golden brown. Flip each slice. Place one slice of provolone on each piece of toast. Add a portion of the roast beef onto each slice of toast, then top with another slice of provolone. Cover (dome) the sandwiches to melt the cheese completely. Sprinkle chopped parsley over the sandwiches and serve with a side of warm au jus for dipping. Erin’s Secret to the Perfect Texas Toast French Dip One of the most important tips Erin shared is to place a slice of provolone directly on the Texas toast before adding the roast beef. The cheese creates a barrier between the bread and the meat’s juices, helping prevent the toast from becoming soggy. Jeremy considers this a pivotal technique: protect the Texas toast! The second slice of provolone goes on top of the roast beef, and covering the sandwiches with a basting dome helps melt the cheese into a delicious, gooey layer. Why Texas Toast French Dips Are Perfect for Fall Camping There’s something especially satisfying about a hot, cheesy sandwich on a chilly evening. The warm au jus, buttery toast, and melted cheese make this recipe feel like comfort food. It’s also a great choice when you want something a little more interesting than burgers or hot dogs without spending much more time cooking. The sandwiches are messy, delicious, and absolutely worth a few extra napkins. More Ways to Use Texas Toast on the Blackstone Erin has experimented with several other Texas toast sandwiches, and the possibilities are nearly endless. One version uses frozen meatballs warmed on the griddle with marinara sauce, then layered onto Texas toast with cheese. Another features homemade ground chicken meatballs coated in breadcrumbs and smashed on the griddle. Erin tops them with marinara and cheese for a chicken Parmesan-inspired sandwich. Sloppy Joes are another great option. The garlicky flavor and sturdy texture of Texas toast make it a surprisingly versatile foundation for all kinds of campground meals. 5. Blackstone Nachos: A Family-Style Dinner with Easy Cleanup Nachos are another campground classic, but Erin has a particularly clever technique for preparing them on a Blackstone. Instead of assembling the nachos directly on the griddle, she uses a baking sheet. It’s a simple trick that makes cooking, serving, and cleanup easier. Ingredients for Blackstone Nachos Tortilla chips Cooked, seasoned ground beef Shredded cheese Beans Salsa Jalapeños Tomatoes Sour cream Guacamole Any other favorite nacho toppings You’ll also need a baking sheet that fits comfortably on your griddle and aluminum foil for lining it. How to Make Nachos on a Blackstone Start with fully cooked taco meat. This is an ideal opportunity to use leftover ground beef from walking tacos or another taco dinner. Line a baking sheet with aluminum foil. Place the baking sheet directly on the Blackstone cooking surface. Spread a layer of tortilla chips across the sheet, then add the cooked taco meat, beans, and shredded cheese. If you’re using beans, Erin recommends warming them before adding them to the nachos because they may not heat thoroughly during the short time the nachos spend on the griddle. Cover the nachos with the griddle hood or a large basting dome to help melt the cheese. Erin sometimes adds a little water to the griddle underneath the baking sheet to create steam. Once the cheese has melted, carefully remove the baking sheet and bring it directly to the picnic table. Finish with cold toppings like salsa, sour cream, guacamole, and fresh vegetables. Why the Baking Sheet Makes Such a Difference There are several advantages to this method. First, the nachos don’t make a mess directly on the griddle surface. Second, the foil-lined sheet simplifies cleanup. And third, the entire tray can move directly from the griddle to the picnic table. That makes it perfect for family-style dining. Everyone can gather around, grab their favorite nachos, and enjoy the meal together. Erin uses a baking sheet that fits neatly on her 22-inch Blackstone, which is her preferred griddle for camping. This is also a terrific recipe for entertaining friends at the campground. Make a large tray, set it in the middle of the picnic table, and let everyone dig in. 6. Blackstone Cookies: Yes, You Can Bake Dessert on a Griddle! Most people purchase a Blackstone thinking about breakfast foods, burgers, and sandwiches. But one of the most enjoyable parts of owning a griddle is discovering all the unexpected things you can cook on it. Cookies are a perfect example. Erin has experimented with several varieties of refrigerated cookie dough and developed a simple method for making cookies at the campground without using an oven. It requires a little trial and error, but it’s a fun activity for families. Ingredients and Equipment for Blackstone Cookies Refrigerated cookie dough A baking sheet Parchment paper A Blackstone griddle with a hood or large basting dome Optional fros…

    Full show notes at the publisher

    2026 Hershey RV Show Rig and Gear Highlights (with Joshua Sheehan from RV Gear & Far) Oct 21, 2026
    Show notes

    Every year, America’s Largest RV Show in Hershey, Pennsylvania, offers an incredible opportunity to see what’s new in the RV industry. From lightweight campers and affordable travel trailers to luxurious fifth wheels and innovative camping accessories, the show provides a fascinating look at where RV design is headed. But with hundreds of RVs on display, how do you separate genuinely useful innovations from features that simply look impressive on the showroom floor? For this year’s Hershey RV Show recap, we welcomed Joshua Sheehan from RV Gear & Far back to The RV Atlas to share his favorite RVs, floor plans, and gear discoveries from the 2026 show. Joshua has been RVing for nearly eight years, starting with pop-up campers before moving into a 35-foot travel trailer. He and his wife spent more than two years traveling full-time with their twin boys before establishing a home base in the Midwest. Through his RV Gear &. Far YouTube channel, Joshua focuses on practical RV gear reviews, maintenance advice, and helping RV owners determine which products actually make sense for their needs. That practical perspective is exactly what makes his Hershey picks so interesting. Rather than concentrating exclusively on the most expensive or luxurious RVs, Joshua selected models that solve real problems for campers. His favorites range from compact Coleman travel trailers and lightweight Aliners to innovative Ember floor plans and premium fifth wheels from Keystone, Open Range, and Brinkley. And after touring the RVs, he headed inside the Giant Center to find some interesting new gear and gadgets. Here are Joshua’s favorite RVs and camping products from the 2026 Hershey RV Show, along with the features that made them stand out. Listen to the complete episode of The RV Atlas below by clicking on the media player above or subscribing to the RV Atlas wherever you get your favorite shows! Coleman 23TX: A Compact Toy Hauler with a Side-Entry Garage One of Joshua’s most interesting discoveries was the Coleman 23TX, a travel trailer that combines family-friendly sleeping accommodations with an unusually compact toy-hauler design. Traditional toy haulers generally feature a large rear garage accessed through a ramp door. That works beautifully for campers transporting ATVs, motorcycles, or other large recreational vehicles, but not everyone needs an enormous garage. For families transporting bicycles, smaller recreational equipment, or bulky camping supplies, all that garage space can be unnecessary. The Coleman 23TX takes a different approach. What Makes the Coleman 23TX Different? The 23TX is approximately 27 to 28 feet long, with a dry weight around 5,000 pounds. Its most distinctive feature is a side-entry garage located toward the front of the trailer. Instead of opening from the rear, the ramp opens on the campsite side. That might sound like a small change, but it’s surprisingly practical. Many campsites require RVers to back their trailers close to trees, landscaping, or the edge of the site. A traditional rear toy-hauler ramp may be difficult or impossible to lower after parking. The side-entry design allows campers to access their equipment without worrying about clearance behind the RV. The garage is large enough for bicycles, dirt bikes, and potentially a small four-wheeler, depending on the equipment’s dimensions and weight. The front garage area also incorporates bunks, making the space multifunctional. A Different Approach to the Main Bedroom The Coleman 23TX uses another unusual feature to maximize interior space: a hard-sided rear bed slide. Instead of dedicating the front of the trailer to a permanent queen bedroom, the main bed slides out from the rear of the RV, extending over the dinette area. Joshua compared the concept to a hybrid camper, except that the slide-out is fully hard-sided. The main living area includes a kitchen, bathroom, and dinette. The result is a compact travel trailer that offers sleeping accommodations for a family of four along with secure storage for outdoor equipment. Who Is the Coleman 23TX Best For? Joshua sees this floor plan working particularly well for active families with two children. For families that regularly bring bicycles, outdoor gear, and other recreational equipment, having a dedicated enclosed storage area could eliminate many of the challenges associated with transporting equipment on exterior racks or in the tow vehicle. We can certainly appreciate that advantage. When our family owned a toy hauler, we primarily used the garage for bicycles, kayaks, and camp cooking equipment rather than motorized recreational vehicles. A smaller garage like this would have worked beautifully for much of our gear. There are some compromises. Joshua pointed out that campers may need to unload equipment from the front garage before accessing the bunks. He also felt that the floor plan becomes less practical for families larger than four. Jeremy found online prices in the upper $30,000 range, making the Coleman 23TX an intriguing option for buyers looking for a relatively affordable, compact toy hauler. Coleman Lantern 25RK: Convertible Twin Beds or One King Bed Joshua’s second Coleman pick wasn’t necessarily about an entirely new type of RV. Instead, it highlighted a simple floor-plan innovation that could make a travel trailer useful for a much wider variety of camping trips. The Coleman Lantern 25RK features a convertible bedroom configuration that allows owners to choose between two twin beds and one large king-size sleeping area. One Bedroom, Two Different Configurations In a conventional travel trailer bedroom, the queen or king bed is usually permanently positioned in the center of the front bedroom. The Coleman Lantern 25RK takes advantage of a platform extending over the front pass-through storage area, along with movable bed supports. Owners can position the mattresses together to create a king-size bed or separate them into two twins with a walkway between them. The conversion allows the same RV to accommodate different traveling companions without requiring anyone to sleep on a dinette or sofa. For a couple taking a weekend trip, the king configuration makes perfect sense. For a fishing trip with a friend, a father-and-son adventure, or a getaway with another family member, the twin-bed arrangement may be considerably more comfortable. Why Flexible Bedrooms Are Becoming More Appealing This is an innovation we’re increasingly seeing throughout the RV industry. Jeremy mentioned similar convertible sleeping arrangements in newer nüCamp and inTech models. The appeal is straightforward: one RV can accommodate several different styles of travel. That flexibility becomes especially valuable as families change. Parents who initially purchase an RV for camping with young children may eventually find themselves taking more trips as a couple or traveling with friends. The Coleman Lantern 25RK offers that adaptability in an entry-level travel trailer. Joshua emphasized that the Coleman lineup remains relatively affordable, with traditional stick-and-tin construction. But entry-level pricing doesn’t mean manufacturers can’t introduce thoughtful, practical features. Sometimes the most useful innovations are also the simplest. Ember Touring 2850DBL: A Travel Trailer That Changes with Your Family The Ember Touring 2850DBL was one of Joshua’s most enthusiastic picks from the entire show. And by the end of the conversation, it was easy to understand why. This travel trailer combines a dedicated primary bedroom with Ember’s innovative modular interior system, allowing owners to reconfigure the rear living space as their needs change. Ember Touring 2850DBL Specifications Joshua shared the following approximate specifications: Length: Just under 33 feet Dry weight: Approximately 7,300–7,400 pounds Freshwater capacity: Approximately 55 gallons Gray water capacity: Approximately 70 gallons Black water capacity: Approximately 35 gallons Pricing observed: Around $80,000 The Touring is a premium travel trailer designed for buyers looking for upgraded components, substantial amenities, and the ability to take longer trips. Joshua highlighted Ember’s use of Furrion Chill Cube air conditioning systems and the CURT suspension system found on Touring models. But the most compelling feature is the flexible rear living space. The EmberTrack System EmberTrack is a wall-mounted system that allows owners to reposition or replace furniture and accessories within designated areas of the RV. Instead of permanently installing traditional bunk beds, Ember incorporates mounting tracks that can accommodate different configurations. Owners can use the space for bunks, a desk, or additional storage. The components can be repositioned as needed, and certain bunk configurations can be moved upward to open up the floor space. Imagine purchasing an RV when your children are in elementary school. During those early years, you might want traditional bunk beds. As the kids become teenagers and start joining fewer family trips, you could convert part of that space into an office. Later, when you’re primarily traveling as a couple, the same area could become storage for bicycles, hobbies, or other gear. The ability to change the layout without replacing the RV is a major selling point. A Dedicated Bedroom Makes the Difference Ember has used modular interior concepts in other models, but Joshua particularly appreciated seeing the system incorporated into a larger travel trailer with a separate primary bedroom. The Touring 2850DBL has a front bedroom with a closing door, providing privacy that isn’t always available in smaller, more flexible RV layouts. There are also two exterior entry doors, a fold-down outdoor kitchen area, and a rear opening that can create a large window overlooking the campsite. That rear space can be configured as an office with a view or even used as a screened area for pets. Ember has demonstrated the concept as a catio, an enclosed outdoor-style space for cats. It’s a great example of how one floor plan can serve very different kinds of campers. Why This Floor Plan Could Save Families Money The longer we RV, the more we appreciate floor plans that can evolve with our lives. We’ve experienced firsthand how quickly family camping needs change. When our boys were younger, dedicated bunks were essential. Now that they’re teenagers, not everyone joins every trip. A traditional bunkhouse can eventually become an RV filled with beds that are rarely used. The EmberTrack system addresses that problem directly. And there’s a financial benefit. Trading RVs frequently can be expensive, especially when depreciation and transaction costs are factored into the equation. An RV that works for young children, teenagers, working adults, and eventually couples traveling alone could potentially remain useful for many more years. That long-term adaptability is what makes the Ember Touring 2850DBL particularly exciting. Keystone Montana 3600RO: A Fifth Wheel Designed for Working on the Road Remote work has become an important consideration for many RV buyers, and manufacturers have responded by incorporating dedicated office spaces into more floor plans. The Keystone Montana 3600RO is a particularly interesting example. This luxury fifth wheel includes a front bedroom, a spacious main living area, and a dedicated rear office. While rear-office floor plans aren’t entirely new, Joshua appreciated several thoughtful details that make this one especially practical. A Rear Office with a View The rear office includes an L-shaped sit-stand desk positioned near large windows. Rather than squeezing a small workspace into an awkward corner, Montana provides a dedicated room with generous headroom and views of the campsite. For anyone spending several hours a day working remotely, that distinction matters. The office also has its own exterior entrance on the service side of the fifth wheel. That door allows owners to enter and exit the office without walking through the entire RV. But Joshua noticed another potential advantage. Secure Storage for Bicycles and Equipment The office includes floor-mounted tie-down tracks that can be used to secure equipment. For travelers who bring bicycles or other valuable gear, the exterior office entrance makes it possible to load equipment directly into the rear room. The bikes can remain secured and out of sight during overnight stops without occupying the main living area. It’s a clever combination of workspace and storage. Dedicated Storage for Dirty Camping Gear Joshua was equally impressed by another Montana feature: rear pull-out storage drawers located underneath the office floor. These shallow drawers are designed for the equipment every RVer needs during campsite setup and breakdown. Think sewer hoses, water hoses, electrical cords, leveling blocks, and wheel chocks. The drawers are approximately eight inches deep, making them well suited to smaller equipment rather than bulky camping supplies. That separation is particularly useful because much of this equipment becomes dirty during a camping trip. Instead of mixing sewer accessories and muddy leveling gear with clean outdoor equipment in one enormous storage compartment, owners can keep everything organized in dedicated spaces. Jeremy found prices around $115,000 for the Montana 3600RO, placing it firmly in the premium fifth-wheel category. For full-time travelers or RVers who regularly work from the road, however, the combination of a dedicated office and thoughtful storage deserves serious consideration. Aliner: Lightweight A-Frame Campers with Surprising Features After exploring several larger travel trailers and fifth wheels, Joshua turned his attention to one of the most recognizable names in lightweight camping: Aliner. Rather than selecting a single floor plan, he wanted to highlight the brand’s overall approach to compact RV design. Both Joshua and Jeremy started their RV journeys in pop-up campers, and both still appreciate the simplicity and connection to the outdoors that those campers provide. But anyone who has owned a traditional canvas pop-up also knows the challenges. Wet canvas must be dried before storage. Setup and breakdown take time. And maintenance can become frustrating when camping trips end in bad weather. Aliner’s hard-sided A-frame design offers a different compromise. Why Aliners Are So Appealing Aliners fold down into compact trailers that are relatively easy to tow and store. Once at the campground, the hard-sided roof panels lift into place, creating the familiar A-frame shape. Setup can take just a minute or two. Joshua was particularly impressed by newer designs that incorporate expanding dormers and additional interior headroom. Some models also include surprisingly sophisticated features for such small campers. One example is an in-floor shower configuration that provides enough standing height for a six-foot-tall camper. That’s a remarkable feature in a trailer weighing approximately 2,300 pounds dry. The Bathroom Compromise Of course, compact RV design always involves tradeoffs. Some Aliners have portable or concealed toilets with limited privacy, while others don’t have a toilet at all. These aren’t the spacious bathrooms found in a large travel trailer or fifth wheel. For some campers, that’s an immediate dealbreaker. For others, having a toilet available for a middle-of-the-night bathroom trip is more than enough. Jeremy falls firmly into the second category. He appreciates having a basic bathroom option but is perfectly happy using campground bathhouses for most of his needs. Joshua suggested that an Aliner might be the perfect type of camper to rent before purchasing. That would allow prospective buyers to determine whether the advantages of lightweight towing and quick setup outweigh the compromises of compact living. Easy Towing and Garage Storage Another major advantage i…

    Full show notes at the publisher

    A Haunted RV Roadtrip to America’s National Parks: With Shannon Minner Oct 14, 2026
    Show notes

    America’s national parks are filled with breathtaking scenery, incredible wildlife, and fascinating history. But some of these beautiful destinations also have a darker side. From Civil War battlefields where visitors report seeing ghostly soldiers to abandoned mining towns, mysterious mountain forests, and historic lodges with unexplained footsteps, there are plenty of places where an ordinary national park adventure can take a spooky turn. Just in time for Halloween, we’re welcoming Shannon Minner back to The RV Atlas for the fourth installment of our annual Haunted RV Road Trip series. Shannon is a school librarian, longtime RVer, and paranormal enthusiast who has spent 20 years working with a local ghost-hunting team. She knows a thing or two about tracking down a good ghost story, and this year she’s taking us to five of America’s most intriguing haunted national park destinations. We’re exploring Gettysburg National Military Park, Death Valley National Park, New River Gorge National Park and Preserve, Great Smoky Mountains National Park, and Crater Lake National Park. Along the way, Shannon shares the legends surrounding each destination, specific places to explore, campground recommendations, and important safety tips for visitors. Whether you’re a dedicated believer in the paranormal, a skeptic who loves a good ghost story, or simply an RVer looking for a different kind of national park adventure, these destinations offer plenty of reasons to plan a trip. Listen to the complete episode of The RV Atlas podcast in the media player above–or wherever you get your favorite shows! Gettysburg National Military Park, Pennsylvania: Ghosts of the Civil War Gettysburg is one of the most historically significant destinations in the United States, and it’s also widely considered one of the country’s most haunted places. The three-day Battle of Gettysburg in July 1863 resulted in an estimated 46,000 to 51,000 casualties, including soldiers killed, wounded, captured, or missing. With that much suffering concentrated in such a small area, it’s easy to understand why Gettysburg has inspired generations of ghost stories. Jeremy and Stephanie visited Gettysburg with their boys when they were young and remembers feeling the emotional weight of the battlefield. At Devil’s Den, the kids happily scrambled over the enormous boulders while the adults reflected on the terrible events that had unfolded there. That contrast between a beautiful place to explore and its tragic history can feel unsettling, even in broad daylight. Haunted Places to Visit in Gettysburg Devil’s Den Devil’s Den is a dramatic collection of massive boulders that played an important role during the second day of the Battle of Gettysburg. The area witnessed intense fighting and enormous loss of life. Many soldiers who died during the battle were initially buried where they fell or in temporary graves. According to paranormal lore, the violent deaths and unsettled circumstances surrounding these burials may help explain the battlefield’s reputation for hauntings. Even without a ghost sighting, Devil’s Den is a memorable stop for visitors interested in Civil War history. Sachs Covered Bridge Located a short drive from the main battlefield, Sachs Covered Bridge is another popular destination for paranormal enthusiasts. Local ghost stories tell of Confederate soldiers who were allegedly executed at the bridge after attempting to pass themselves off as Union soldiers. Visitors have reported seeing apparitions of soldiers around the structure. The bridge is worth visiting for its historic architecture and scenic setting, regardless of whether you encounter anything supernatural. Jennie Wade House The Jennie Wade House tells one of Gettysburg’s most tragic civilian stories. Jennie Wade was a 20-year-old seamstress who was helping her sister care for a newborn when fighting broke out in Gettysburg. While preparing bread, she was struck and killed by a bullet that passed through two doors. She is remembered as the only civilian killed directly by gunfire during the battle. Today, visitors to the house have reported unexplained sensations, including feeling pushed, scratched, or pinched by something they cannot see. The historic house is a popular stop for both history enthusiasts and ghost hunters. Gettysburg National Cemetery Gettysburg National Cemetery is the final resting place of thousands of Union soldiers and the location where Abraham Lincoln delivered the Gettysburg Address. It’s an important place for reflection and remembrance. Visitors should be particularly respectful of cemetery regulations and visiting hours. Ghost Tours in Gettysburg One of the best things about Gettysburg is the variety of organized ghost tours available. Visitors can choose from family-friendly walking tours, paranormal investigations using ghost-hunting equipment, haunted pub crawls, and even carriage tours. Shannon has participated in paranormal investigation tours and appreciates the opportunity to explore historic locations with knowledgeable guides. Organized tours are also a sensible way to enjoy the spooky side of Gettysburg without trespassing on private property or entering restricted areas. Where to Camp Near Gettysburg Gettysburg Battlefield KOA Gettysburg Battlefield KOA is one of Shannon’s personal favorites, and Jeremy agrees. In fact, he considers it one of the top KOA campgrounds we’ve visited over the years. Shannon particularly loved the heavily shaded campsites. The campground also offers a swimming pool, miniature golf, a dog park, and family activities. During Shannon’s 2019 visit, the campground organized a Gettysburg photo hunt that encouraged families to explore the campground and battlefield while completing challenges. With RV sites, tent camping, and cabin accommodations, this KOA works well for different kinds of travelers. Artillery Ridge Campground Artillery Ridge is another popular option among members of our RV Atlas community. The campground is conveniently located near battlefield trails, museums, and monuments. Shannon also discovered that the campground has advertised a complimentary historical ghost walk on select weekends. For visitors planning a haunted Gettysburg getaway, that combination of campground convenience and ghost-themed activities makes Artillery Ridge particularly appealing. Death Valley National Park, California: Ghost Towns and Mysterious Apparitions With a name like Death Valley, it’s no surprise that this national park has its share of eerie legends. Death Valley is famous for its extreme temperatures, remote desert landscapes, and abandoned mining communities. While the park’s natural beauty is extraordinary, the combination of isolation and remnants of long-forgotten settlements creates an atmosphere that can feel genuinely unsettling. Shannon recommends several historic destinations for visitors interested in exploring the paranormal side of Death Valley. Haunted Places to Explore Near Death Valley Rhyolite Ghost Town Rhyolite is an abandoned mining town located outside the national park boundary near Beatty, Nevada. During the early 1900s, Rhyolite was a thriving community with hotels, stores, schools, an ice plant, and electrical facilities. But the boom was short-lived, and the community was largely abandoned by 1916. Today, the ruins provide a fascinating glimpse into the region’s mining history. According to local ghost stories, visitors have reported seeing a mysterious figure known as the Brown Shadow Man. The apparition is described as wearing a long duster coat and a wide-brimmed hat. Whether or not you believe those stories, walking through an abandoned desert town surrounded by deteriorating buildings and wide-open wilderness is certainly an atmospheric experience. Leadfield Ghost Town Leadfield was another mining settlement, this one dating to the 1920s. Unlike some Western boomtowns that flourished for years, Leadfield’s mining operation was remarkably short-lived. The settlement declined after the ore proved disappointing. Remnants of the town include foundations, wooden structures, and sealed mine tunnels. Leadfield is listed on the National Register of Historic Places and offers another opportunity to explore the history of Death Valley’s mining era. Because reaching remote historic sites can involve difficult roads and terrain, visitors should research access conditions before attempting the trip. Amargosa Opera House and Hotel Located in Death Valley Junction, the Amargosa Opera House has one of the most unusual stories on Shannon’s list. In the 1960s, New York dancer Marta Becket discovered the abandoned theater while traveling through the desert with her husband. Captivated by the building, she eventually moved to the area and restored it. When audiences were small, Becket painted an elaborate audience on the theater walls so she would never have to perform to an empty house. The opera house became her artistic home for decades. Today, the property is associated with stories of unexplained activity, including claims that Becket’s spirit remains connected to the theater. Historic theaters already have a naturally mysterious atmosphere, and the Amargosa Opera House’s extraordinary history makes it an especially interesting stop. Where to Camp in Death Valley Furnace Creek Campground Furnace Creek Campground is conveniently located near the Furnace Creek Visitor Center. The campground offers a combination of RV sites, tent sites, and group camping areas, with some sites providing hookups. Reservations are available during designated periods, and the campground can be popular during the cooler months. Visitors should not expect extensive resort amenities. Shannon notes that cell service and internet access can be unreliable or nonexistent, and the campground does not provide showers or laundry facilities. Flush toilets are available. Stovepipe Wells RV Park Stovepipe Wells is another option for RVers who want to stay within the Death Valley area. Shannon highlights its relatively small number of full-hookup RV sites and access to nearby trails, sand dunes, and other park attractions. The Stovepipe Wells area also offers access to services and a swimming pool associated with the resort property. Important Safety Tips for Death Valley Death Valley demands serious preparation, whether you’re searching for ghosts or simply sightseeing. Make sure your vehicle is in good working condition, fill your fuel tank before entering remote areas, and carry plenty of drinking water. Cellular service is limited throughout much of the park, so download maps that work offline and never assume you’ll be able to call for help. Flash flooding is another important concern. Desert storms can create dangerous conditions with very little warning, so always check weather forecasts and follow National Park Service alerts. Most importantly, do not allow the excitement of visiting a ghost town to override common sense about extreme heat, road conditions, or restricted areas. New River Gorge National Park and Preserve, West Virginia: Ghostly Railroad Legends West Virginia is filled with mountain scenery, historic coal towns, and generations of Appalachian folklore. New River Gorge National Park and Preserve is best known for its spectacular bridge, whitewater rafting, and rugged landscape. But the region’s industrial history also provides plenty of material for ghost stories. Shannon discovered one of the park’s most interesting historic communities almost by accident during a family trip. Thurmond: A Historic Railroad Ghost Town While attempting to find the New River Gorge Bridge, Shannon’s family followed their GPS and ended up in Thurmond. The unexpected detour turned into a memorable experience. During the early 1900s, Thurmond was a bustling railroad community where coal shipments and passenger trains supported a thriving local economy. Hotels, boarding houses, and businesses served railroad workers and visitors. The town’s banks were once among the wealthiest in West Virginia. But changes in railroad technology, declining mining activity, and the Great Depression contributed to Thurmond’s eventual decline. Today, visitors can explore the preserved historic community. The National Park Service maintains a number of buildings, and the historic Thurmond Depot serves as a seasonal visitor center. A working railroad still passes through town, adding to the atmosphere. According to local paranormal stories, visitors have reported unexplained voices, shadowy figures, and the sensation of being watched. Two particularly memorable legends involve a headless railroad conductor carrying a lantern and a phantom hitchhiker who supposedly appears along remote roads before mysteriously disappearing. Jeremy was fascinated by both stories, although he made it very clear that he has absolutely no intention of picking up a phantom hitchhiker or boarding a train with a headless conductor. One important planning note: The roads into Thurmond are narrow and winding. The National Park Service discourages bringing large vehicles or towing campers into the historic town. Leave your RV at the campground and explore in a smaller vehicle. Sandstone Falls Sandstone Falls is another beautiful destination with a spooky reputation. A boardwalk provides access to views of the impressive waterfalls and surrounding landscape. Visitors have reported hearing unexplained whispers, experiencing sudden drops in temperature, and seeing apparitions near the falls. Of course, the natural scenery alone makes Sandstone Falls worth visiting. The paranormal stories simply add another layer of intrigue. Where to Camp at New River Gorge Adventures on the Gorge Adventures on the Gorge offers a wide variety of accommodations, including RV camping, traditional campsites, glamping tents, cabins, and vacation homes. The property also features recreational amenities such as a swimming pool, disc golf, and scenic overlooks. One of the biggest advantages is the opportunity to book guided outdoor adventures, including whitewater rafting. You can spend the day experiencing the thrills of the New River and then enjoy a ghost story around the campfire at night. National Park Service Campgrounds New River Gorge National Park and Preserve also offers several primitive camping areas. These campgrounds provide a more rustic experience than a developed private campground. Many sites are first-come, first-served, with limited facilities and no hookups. Access roads may be gravel or dirt, and not every campsite is suitable for an RV. Campers should carefully review the specific campground’s access requirements, vehicle restrictions, and available amenities before arriving. Safety Tips for New River Gorge The New River is beautiful, but it can also be dangerous. Strong currents, rocky banks, and sudden underwater drop-offs make swimming hazardous in many areas. Visitors planning overnight boating or backpacking trips should consult park rangers and obtain appropriate trail and river maps. Primitive campers should bring sufficient food, water, and supplies rather than assuming services will be available nearby. Great Smoky Mountains National Park: Appalachian Ghost Stories and Unspoken Rules Great Smoky Mountains National Park is one of America’s most beloved outdoor destinations. But the misty forests, historic settlements, and deep Appalachian storytelling traditions also make it one of the country’s most atmospheric places for ghost stories. Jeremy has always felt that certain areas of the Smokies have an unusually mysterious quality, particularly Cades Cove. Even during the daytime, fog drifting through the mountains and abandoned historic buildings can create an eerie feeling. Shannon agrees, and she believes the Smokies are among the best destinations in the country for visitors interested in paranormal folklore. The Unspoken Rules of Appalachian Folklore Before sharing her f…

    Full show notes at the publisher

    A Solo Campervan Trip to Mueller State Park in Colorado with Kerri Cox from Travels with Birdy Oct 03, 2026
    Show notes

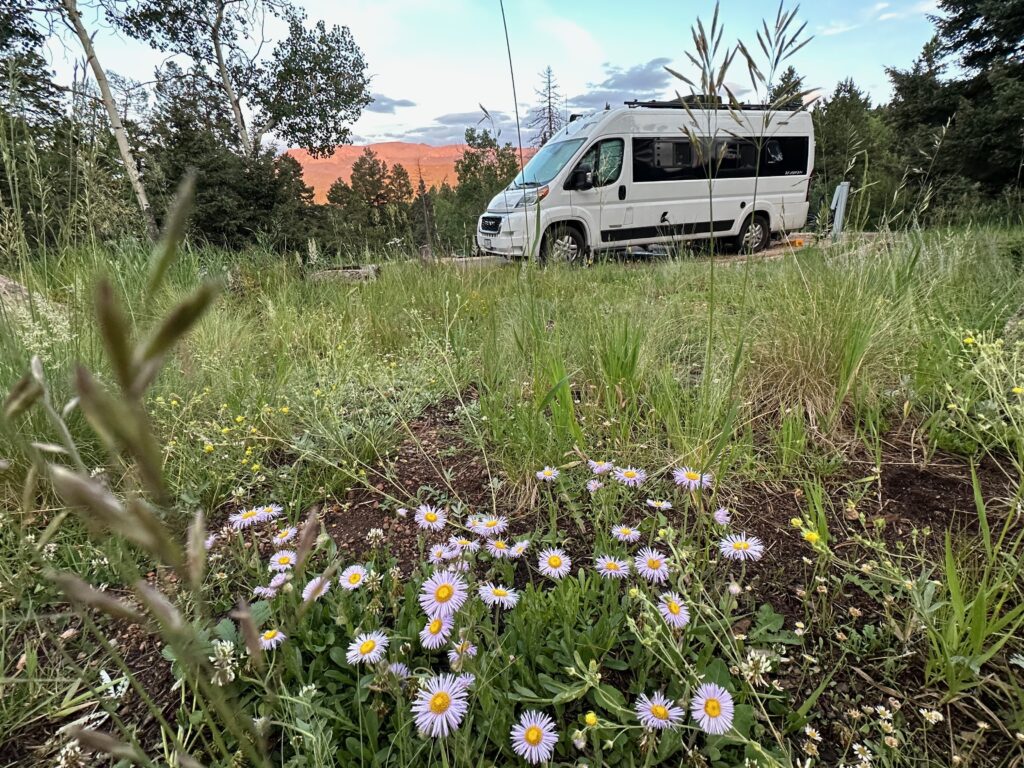
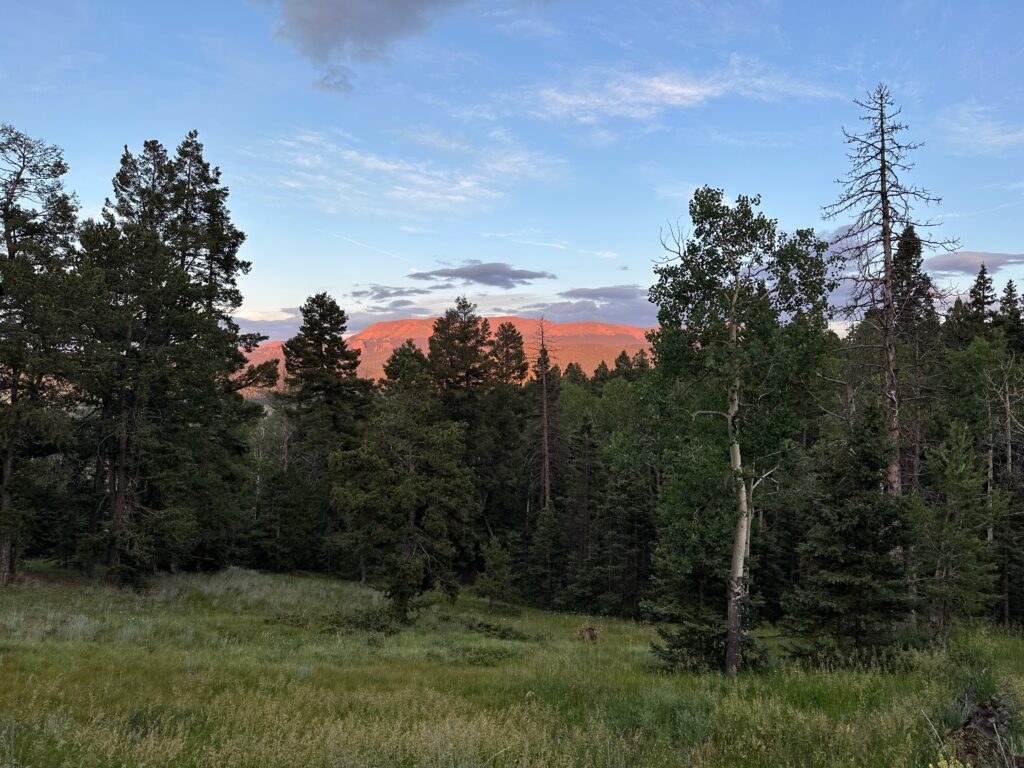
    Ponderosa pines, Rocky Mountain peaks, gorgeous campsites…Colorado’s Mueller State Park just might be one of the nation’s prettiest campgrounds. It is classic camping at its best. Our longtime correspondent Kerri Cox is with us to share a campground review of Mueller State Park, which has become a favorite home away from home for her over the years. And, she selected this familiar favorite for her very first solo van trip.

    Here’s a guest post from Kerri. To hear our full conversation, including Kerri’s top campsite picks, click play on the media player above or look for The RV Atlas on your favorite podcast app.

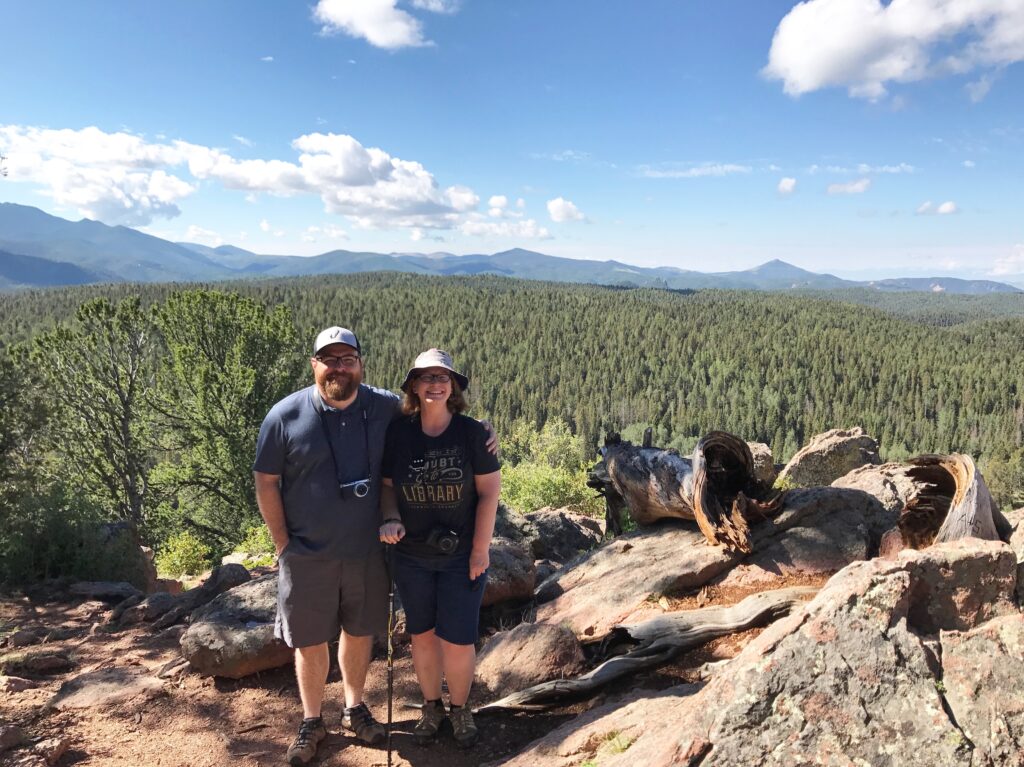
    Though I don’t live in Colorado, it’s become my favorite place to visit due to the easy drive to the mountains from my home in Missouri. You might have heard me talk about it again and again and again on the podcast over the years. I first fell in love with Mueller State Park nearly 10 years ago and have returned five or six times as a place to enjoy nature and relaxation. I consider it my annual “reset” before the school year begins.

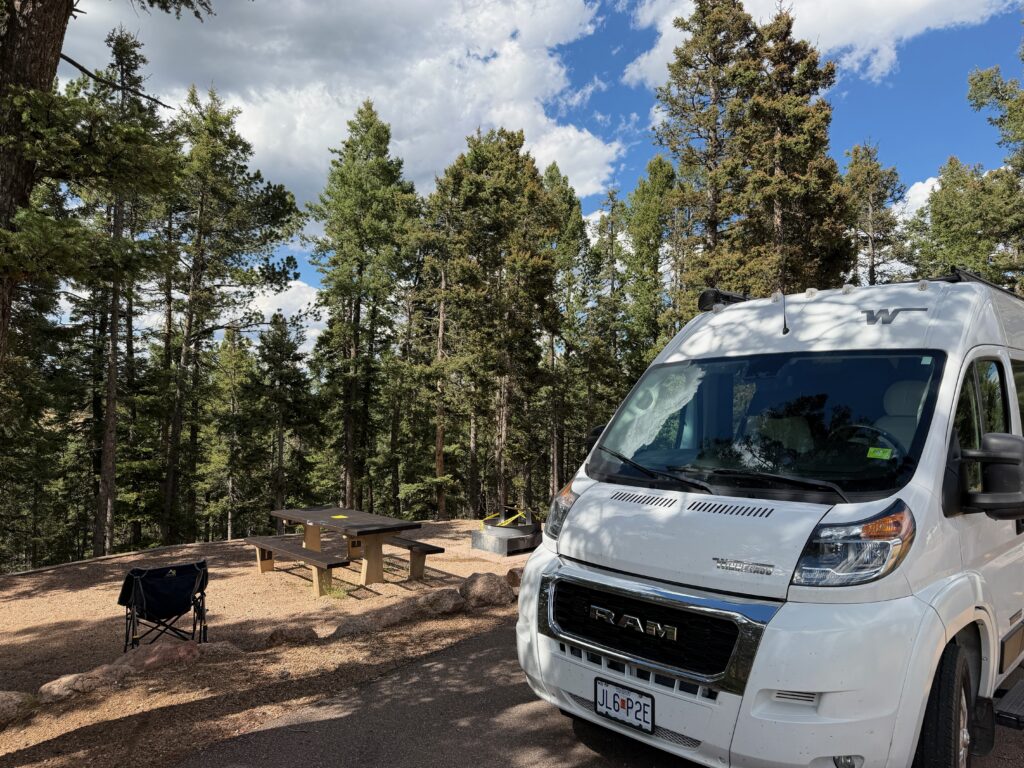
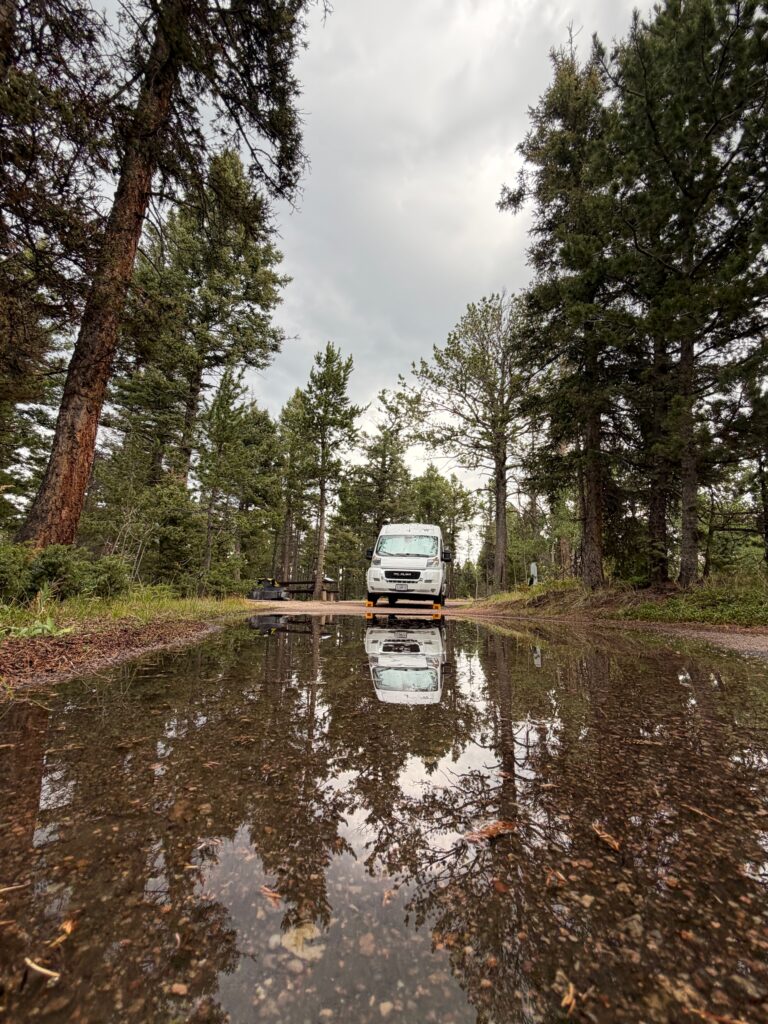
    Since Russell and I didn’t have a good chance for a getaway together this summer, when he was heading off to a game convention in Indianapolis, I decided it would be the perfect time for my first solo van trip in my beloved Class B van, AKA “Birdy.” It was a familiar place to practice the unfamiliar experience of a big solo drive and full setup. Since I booked late, I ended up with a different campsite for each night, giving me even more of an opportunity to explore the park.

    First, here are 5 things make Mueller State Park especially special:

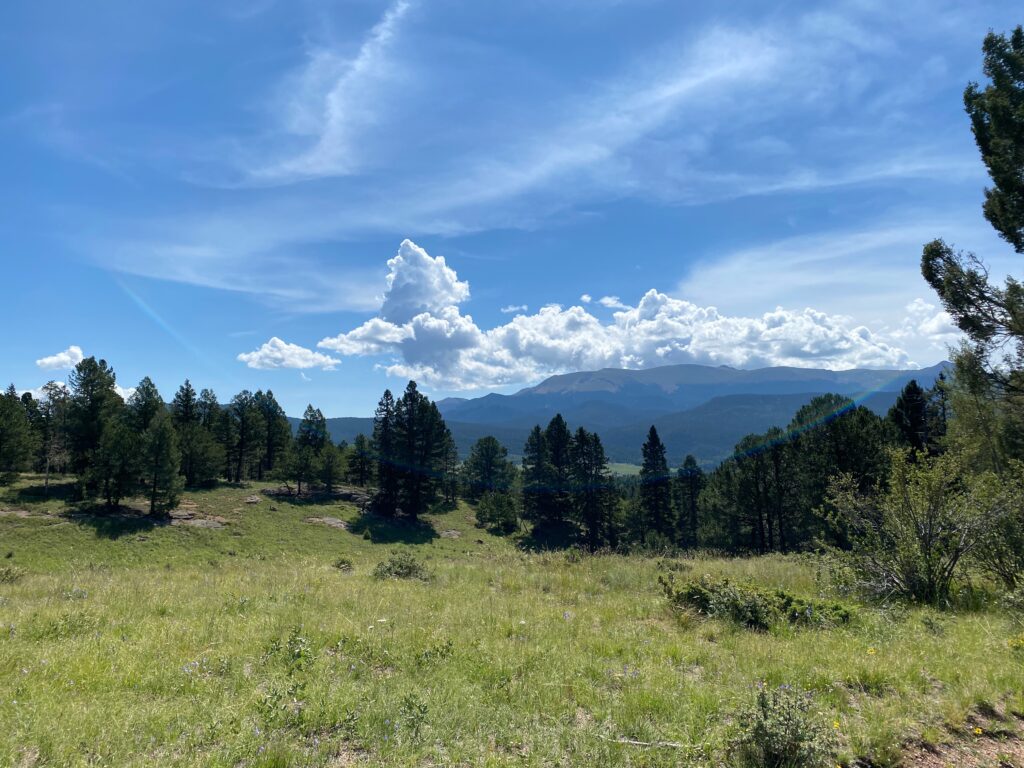
      1. Amazing panoramic views of Pikes Peak and surrounding mountains
      2. Elevation is truly IN the mountains
      3. Large campsites with some privacy
      4. Surrounded by pines, aspens, and wildlife
      5. True classic camping experience!

    Where is Mueller State Park?

    Some campgrounds work best as basecamps you use to explore other destinations, but Mueller State Park is a campground I go to just to stay in the campground. It encompasses all of the mountain vibes without requiring driving on mountainous roadway (when coming in from Colorado Springs).

    Mueller State Park is located approximately 45 minutes west of Colorado Springs, making it close enough for a day trip but a little too far away to drive in and grab a meal. The drive “up” Highway 24 from Colorado Springs is pretty interesting, passing by some of the city’s iconic red rocks and a few small mountain towns.

    The main reason I go to Mueller State Park has less to do with its geographic location and more to do with its elevation. The park is located at app. 9,500 feet in elevation (pro tip: it’s not advisable to go directly to the park from the flatlands if you aren’t used to elevation; consider a stay in Colorado Springs for a night before continuing on).

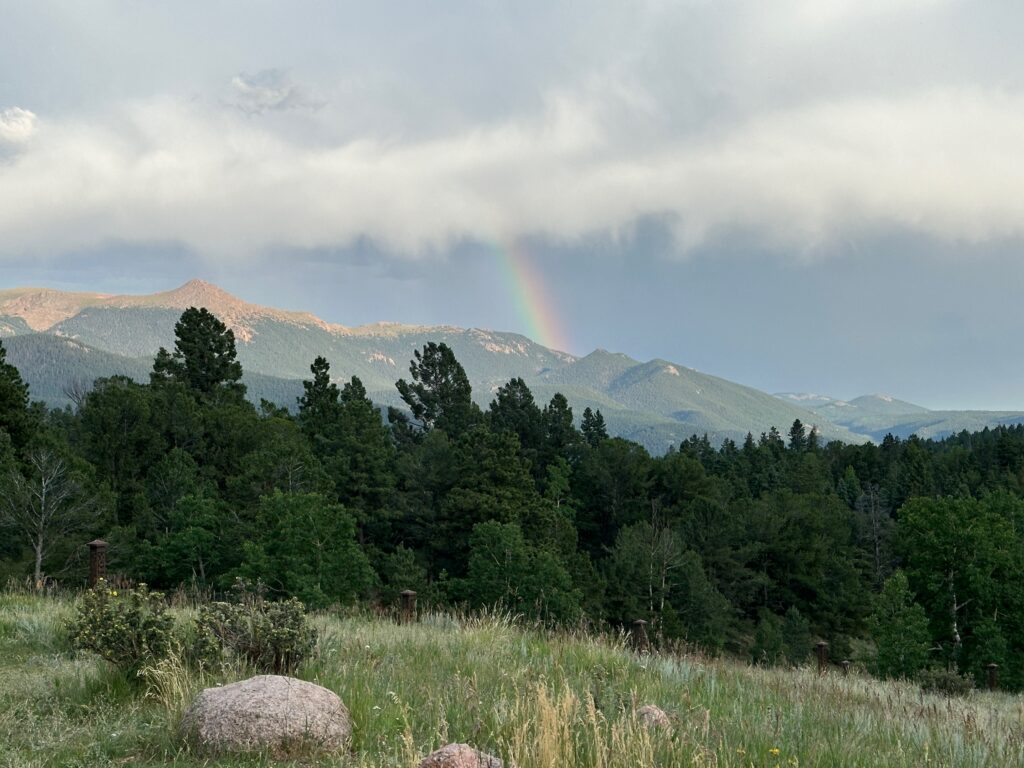
    Because of the elevation, the weather is much cooler in the summer, with highs in the 70s and low 80s. Monsoon rains hit daily in July and August but rarely wash out an entire day. Mueller is a great spot to experience Colorado’s golden aspens in the fall (with trees changing in September), and it offers camping and activities even in the snowy winter.

    What Amenities Does Mueller State Park Offer?

    • The Visitor Center shares details about the local wildlife, geology, and park amenties
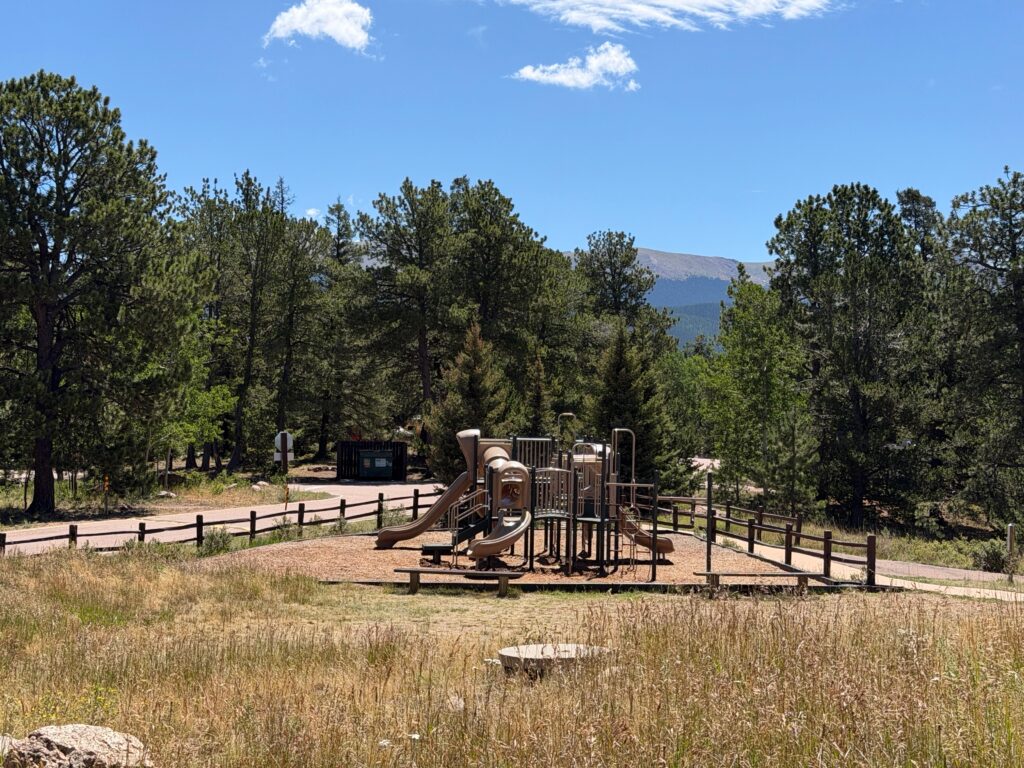
    • A large camper services station offers a playground, a laundry room, and showers. All are well maintained. There are picnic tables inside and out, providing a nice place to rest while waiting, and the outside seats offer good views of the park.
    • 2 important things to note about the comfort stations:
      • You may have to walk quite a ways uphill to reach them if you aren’t driving
      • The showers require quarters!

    • The park has nearly 50 miles of trails with varying degrees of difficulty (this website has good trail details with personal descriptions and lots of photos). The trails are mostly open to mountain biking and horseback riding but not to dogs.
    • My favorite is Grouse Mountain Trail, which is a mile out and back and takes you up to an overlook where you feel like you are at a mountain peak, with panoramic views of a swath of evergreens, Pikes Peak, and the Sangre de Cristo mountains.
    • Other activities include fishing (kids’ pond and backcountry fishing), lots of wildlife watching, snowshoeing, sledding, and more.
    • Note about phone and data signals: No public wifi is available. Due to the trees and mountains, cell signals, especially for data, can be very spotty. Sites that open toward meadows and have higher elevations have better signal. If you can’t get a signal at your site, go to the visitor center or camper services building for your best chance.

    Camping in Mueller State Park

    Important details about the campsites:

    • 136 campsites, including spots for RVs, tents, and groups
    • Walk-in tent sites are especially nice, with pushcarts for hauling your supplies.
    • Cabins and a background yurt are also available
    • Basic or Electric campsites only (no full hookups)
    • Potable water spigots and a dump station available
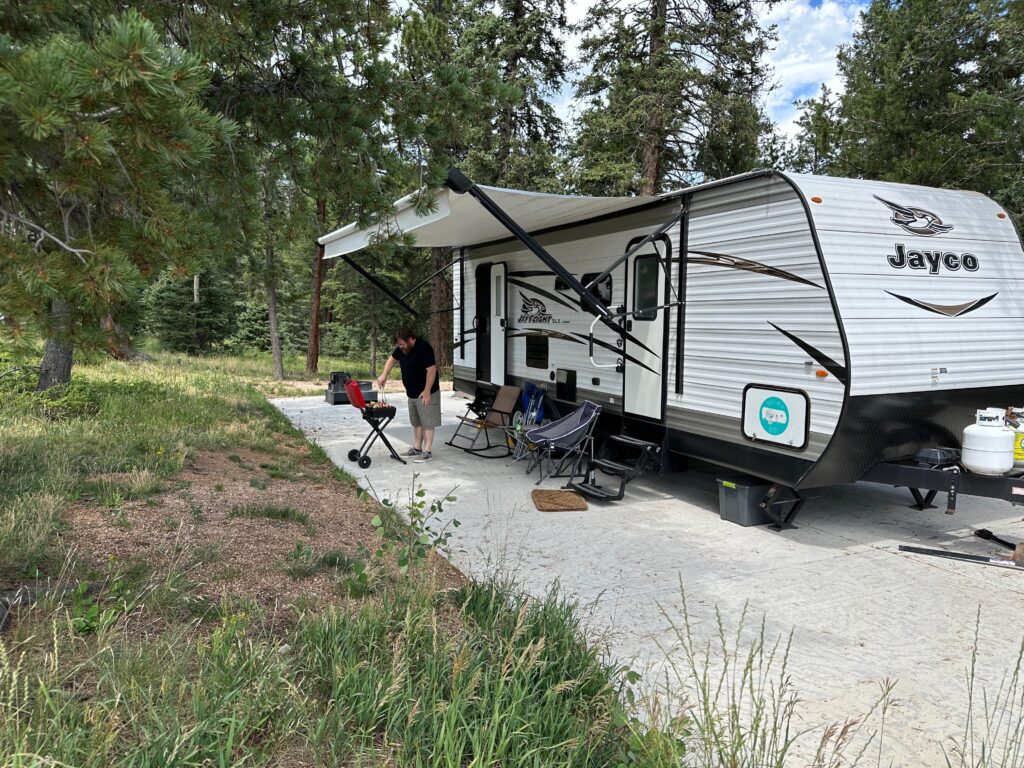
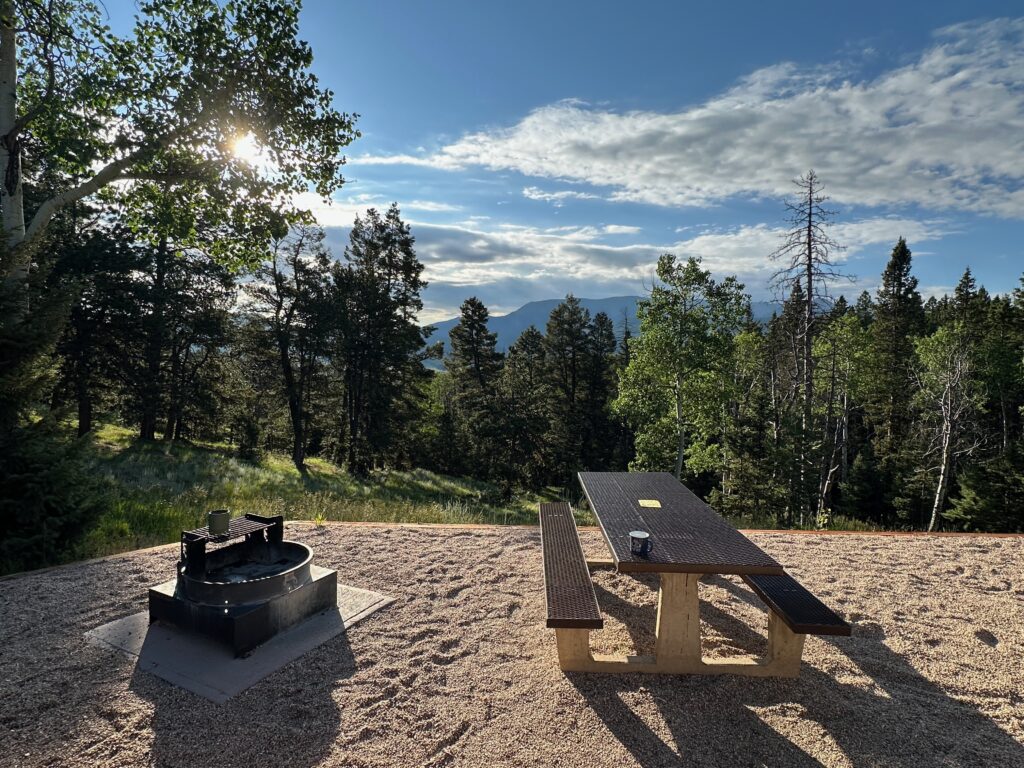
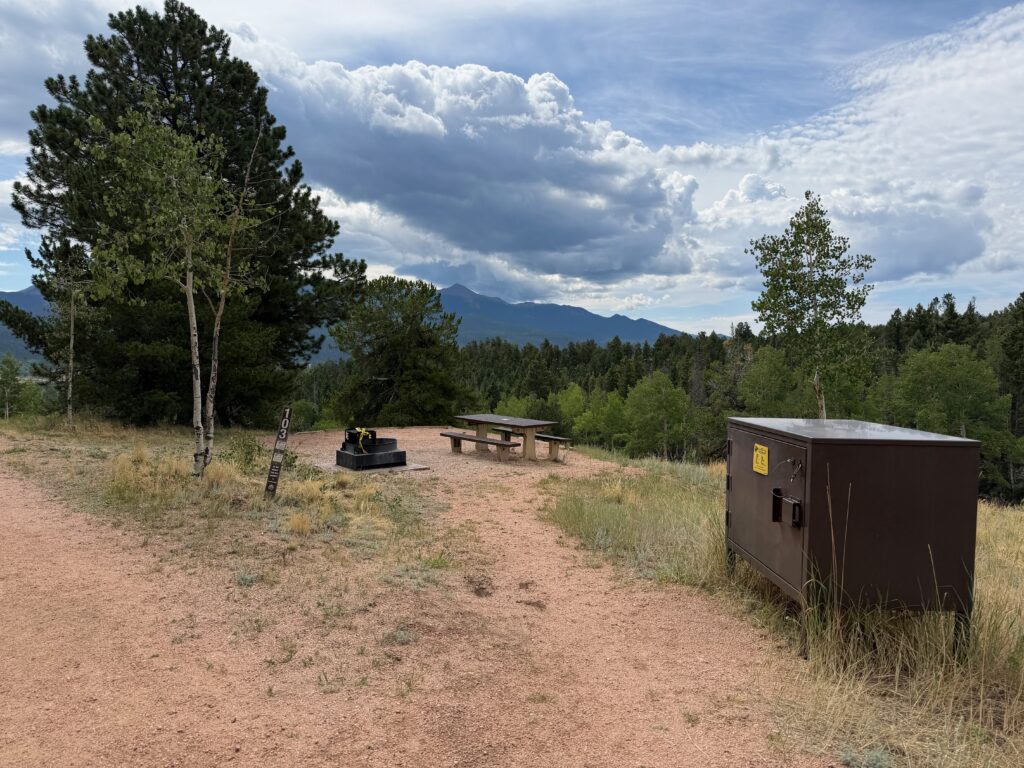
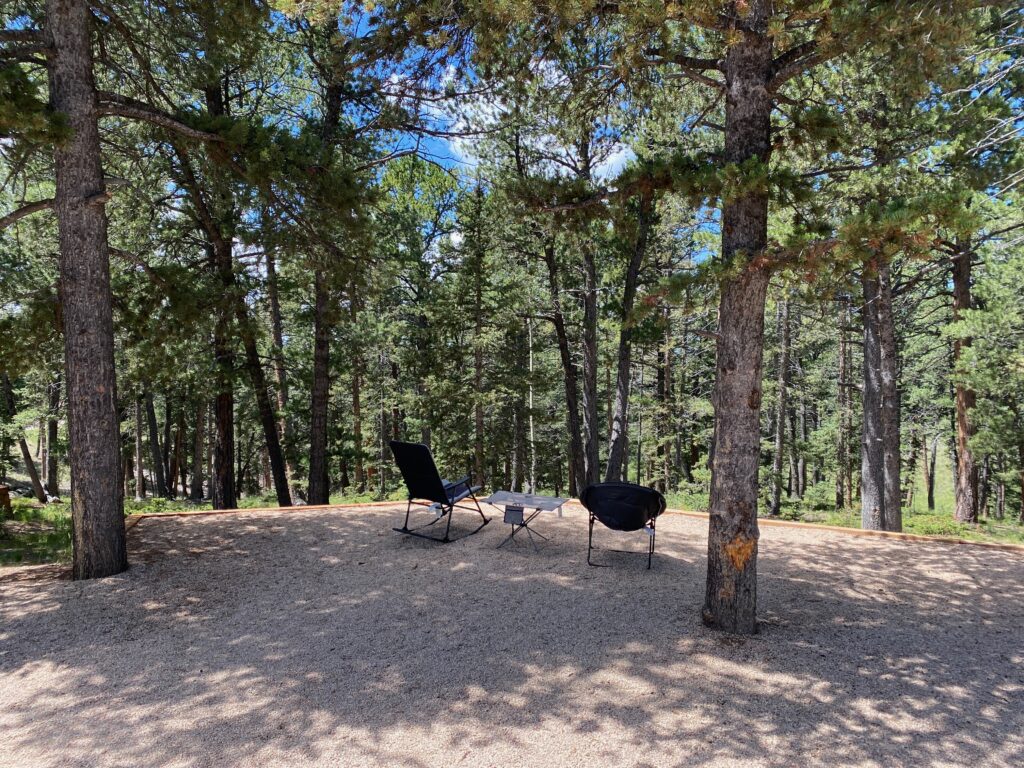
    • Sites are very spacious, with concrete parking pads, large gravel patios, a picnic table and a fire ring. Additional space is usually available for a tent

    Tips for booking at Mueller State Park:

    • It is open year round, though you will need to be mindful of roadways during the snowy winters
    • Booking well in advance is advised, especially if you’ll want to stay on a weekend and don’t have flexible plans
    • Bookable 6 months in advance
    • Later bookings are possible if you split your stay across sites, don’t stay on the weekend, or sign up for alerts about cancellations (pro tip: if you book on a computer instead of a phone, you can click on a calendar icon to see every site’s availability per night, allowing you to patch together different sites if you can easily move)
    • RV sites are $36 a night, but you must also pay $10 Colorado State Park entry fee per day per car upon arrival
    • For an excellent drive-through of the park’s campsite, check out this video.

    Camping loops at Mueller State Park:

    1. Peak View – This is one of my favorite loops. It is the smallest and has back-in sites with views of Pikes Peak from front of site. There is a trailhead here and a nice meadow with a pond.
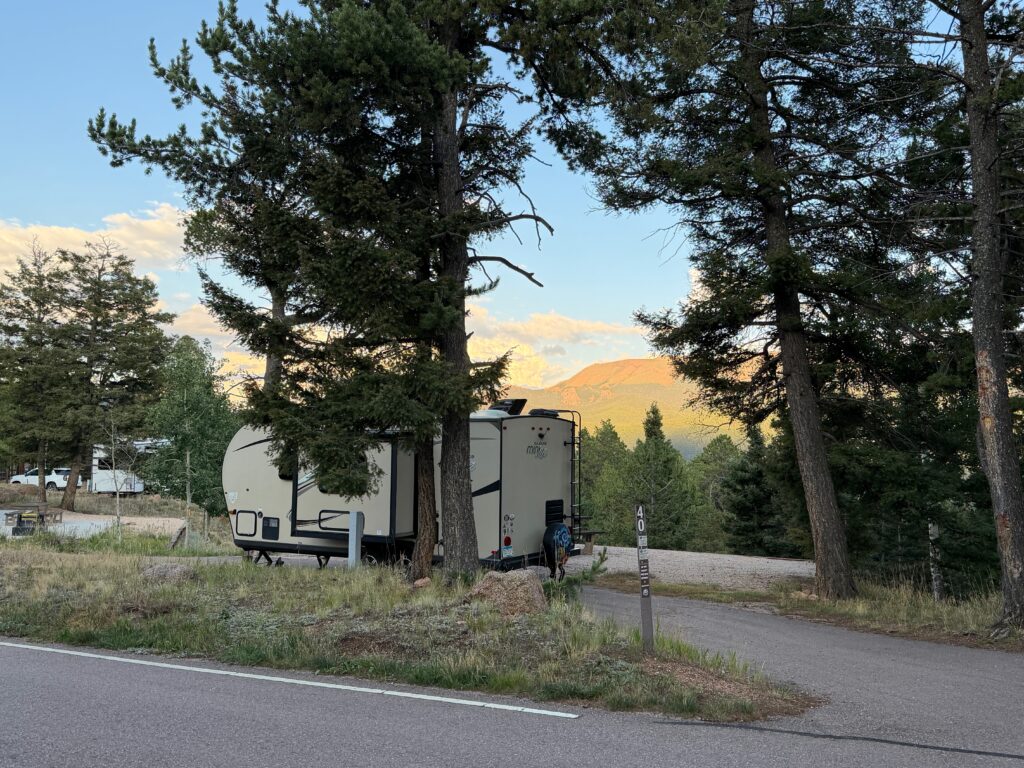
    2. Revenues Ridge – This includes mostly pull-through sites on the sides of the main road. These are not traditional pull-throughs and are shaped like the letter D, with pull-offs from the road and a curved driveway. These have the most road noise, but I like that the front of your campsite faces the trees instead of the road, giving you a lot more privacy than you would expect.
    3. Conifer Ridge – This loop offers a mix of sites facing Pikes Peak and woodlands.
    4. Grouse Mountain – This loop has the highest elevation, and similar views to Conifer Ridge in some spots. It has a mix of sites, including some with big boulders.

    If you want to hear the full campground review of Mueller State Park, including some favorite campsites and some to avoid, click play on the media player above or look for The RV Atlas on your podcast app.

    Venturing Outside of Mueller State Park

    While you can totally stay inside Mueller and relax and cook your own food, I enjoy driving around and doing some simple exploration.

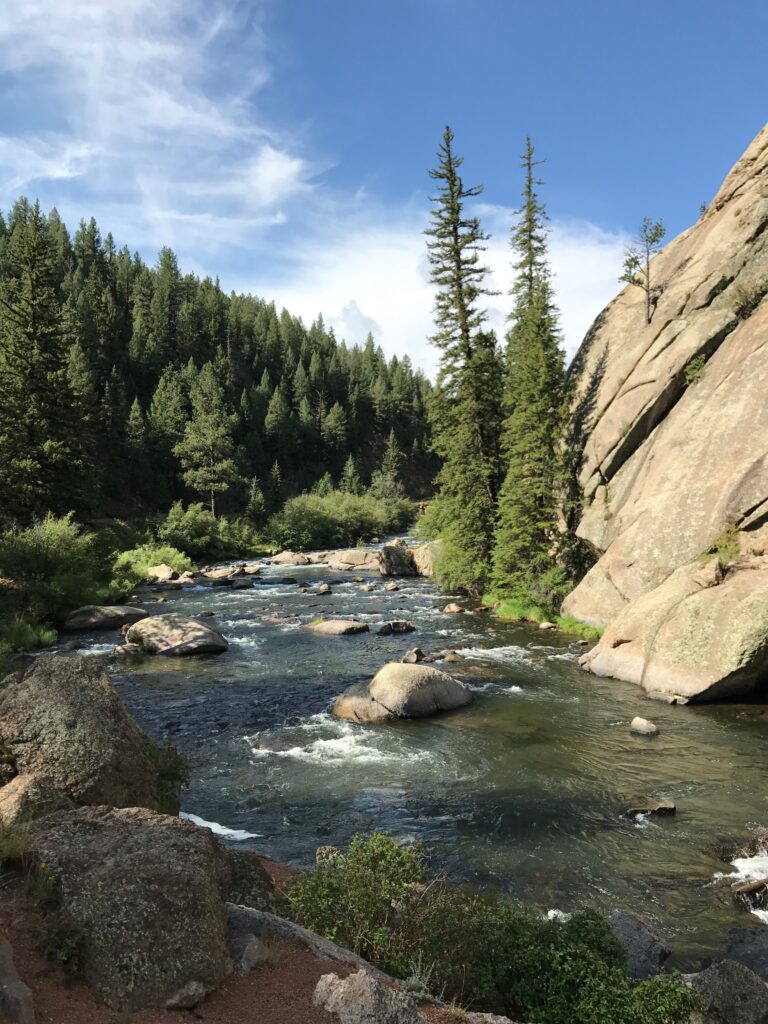
    • Eleven Mile Canyon Recreation Area (not to be confused with Eleven Mile State Park): This spot has all the beauty of Rocky Mountain National Park without the crowds. You can go fishing, play in the water, or just sightsee along the beautiful drive.
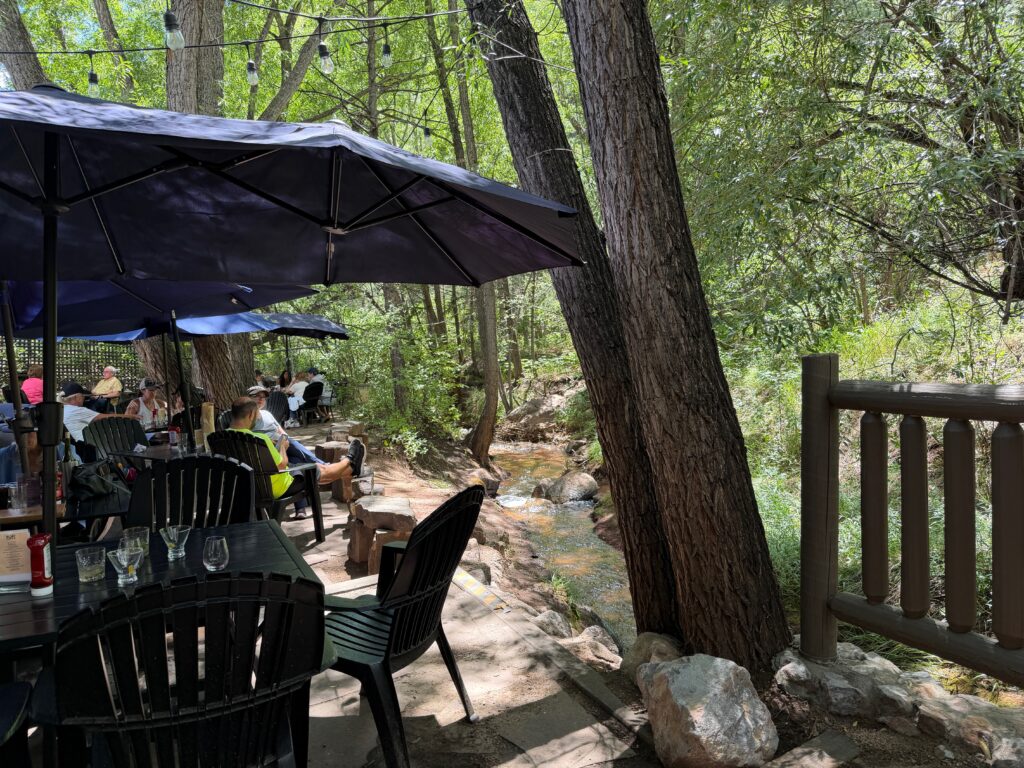
    • The towns of Cascade and Green Mountain are between Mueller and Colorado Springs. Cascade is home to my favorite restaurant, Wines of Colorado, which has a lovely patio along a creek and excellent food. Stop in Green Mountain to check out the cool, colorful “Skynet” art installation suspended above a pond.

    • Since it is just 15-20 minutes away, Woodland Park is great for dining, shopping, and exploring while staying at Mueller State Park. It’s probably what Estes Park was like 30 years ago or more.
      • Cafe Leo: Cute coffee shop with not-to-be-missed Norwegian Sweet Buns
      • Woodland Social: Cute dining spot along the main street
    • Divide is just 10 minutes from the park and has a small grocery store, a handful of local restaurants, and some other essentials. Two restaurants I’ve enjoyed here are McGinty’s Wood Oven Pub and Russ’s Place.
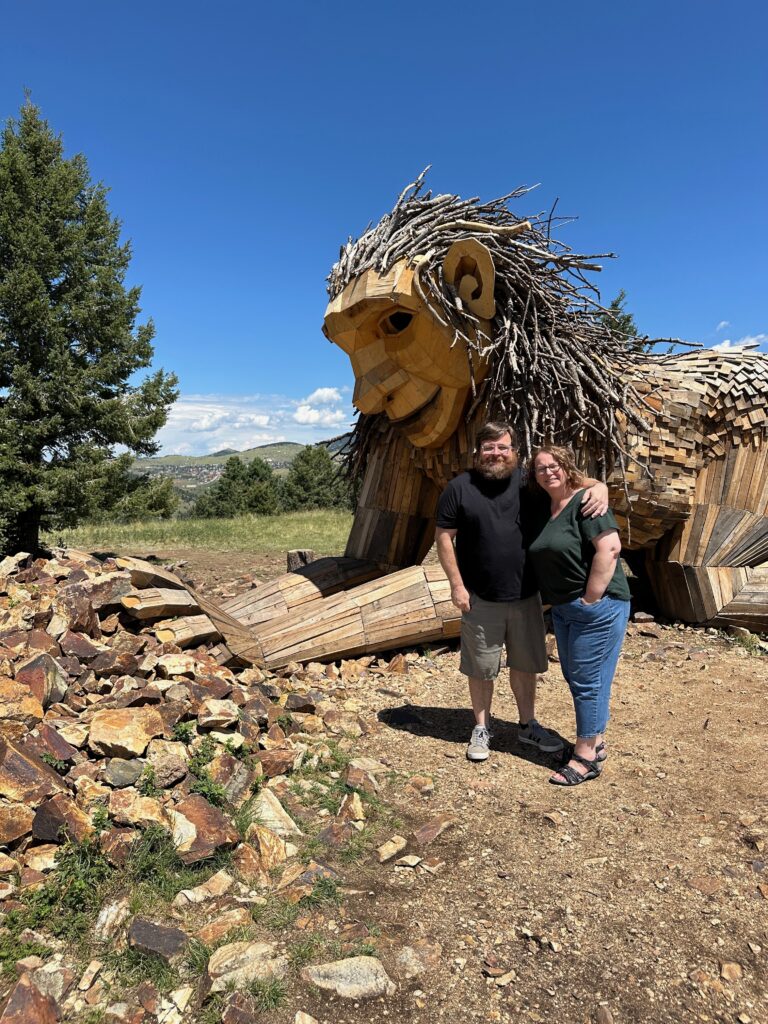
    • Though a bit of a further drive, Cripple Creek and Victor make for a fun day trip. They showcase mining history, roaming burros, and a giant troll statue by artist Thomas Dambo. Rita the Rock Planter is so cool to visit!

    Final Thoughts

    I hope this campground review of Mueller State Park helped inspire you to visit…although, I may regret sharing this special under-the-radar campground. Ultimately, I consider Mueller State Park “old reliable.” I know what to expect, and I love what I know! It was the perfect spot for my first solo van trip.

    The post A Solo Campervan Trip to Mueller State Park in Colorado with Kerri Cox from Travels with Birdy appeared first on The RV Atlas.


    An Epic RV Trip to Western Canada and the Canadian Rockies PT. 3 (Vancouver) Sep 27, 2026
    Show notes

    An epic RV trip through Western Canada doesn’t have to be all mountains, lakes, and national parks. After exploring Calgary, Banff, then Jasper, the Icefields Parkway, and several other spectacular destinations in the Canadian Rockies, Gretchen Holcombe and her family headed west toward Vancouver for the final leg of their adventure. This stop offered a completely different experience from the first two parts of the trip. Instead of filling every day with mountain hikes and scenic drives, the family mixed outdoor adventures with great coffee shops, historic sites, museums, restaurants, and some of Vancouver’s most popular attractions. They also discovered an excellent campground in the charming community of Fort Langley, found a workable strategy for getting into Vancouver, biked and drove through Stanley Park, crossed the famous Capilano Suspension Bridge, solved a murder mystery in Gastown, and finished their Vancouver adventures with a rainforest hike filled with waterfalls—and a surprising number of banana slugs. Here’s how to plan the Vancouver portion of an epic Western Canada RV trip. Driving from the Canadian Rockies to Vancouver Before arriving in Vancouver, Gretchen’s family spent a couple of days in Revelstoke, a mountain town that didn’t make it into the previous episodes simply because there was already so much ground to cover. Revelstoke is smaller and less touristy than Banff and Jasper, but it still makes a worthwhile stop on a Western Canada itinerary. The town is best known as a ski destination, but there is plenty to enjoy during the summer as well. The drive from the mountains toward Vancouver was also an experience in itself. Over roughly six hours, the scenery changed dramatically. The route moved from the mountains through a surprisingly dry, high-desert landscape before eventually entering the lush Pacific Northwest. It felt a little like compressing the geography of the western United States into a single day of driving. Where to Camp Near Vancouver Choosing a campground for a Vancouver RV trip presents an interesting dilemma. RVers can stay close to the city and sacrifice some campsite space, or camp farther outside Vancouver and enjoy a more traditional campground experience. Gretchen considered both approaches. Capilano River RV Park For RVers who want to prioritize easy access to Vancouver, Capilano River RV Park has an impressive location. The campground is just minutes from Stanley Park, making it an excellent base camp for exploring the city. Reviews of the campground frequently mention tight sites, which initially made Gretchen hesitant to book there. After visiting Vancouver and realizing just how convenient the location is, however, she reconsidered that decision. For a future visit, she might be willing to trade a little campsite space for such easy access to the city. Fort Camping in Fort Langley For this trip, the family chose Fort Camping in Fort Langley, about 45 minutes east of Vancouver when traffic cooperates. That meant a longer trip into the city, but the campground itself became one of the pleasures of the Vancouver stay. Fort Camping is located directly across the bridge from downtown Fort Langley. From the campground entrance, visitors can reach restaurants, coffee shops, stores, and attractions within minutes on foot. For RVers who love campgrounds that allow them to park the truck and walk into town, this is a terrific option. Most campsites are long, back-in gravel sites, although some pull-throughs are available. There isn’t a tremendous amount of privacy between sites, but there is landscaping, along with enough outdoor space for a picnic table and fire pit. During Gretchen’s stay, full-hookup sites were around $60 Canadian per night, making the campground feel like a particularly good value after accounting for the exchange rate. Amenities are fairly simple. There are laundry facilities, a small playground, and a seasonal camp store, but no swimming pool or extensive resort-style recreation. Showers are coin operated, so make sure you have some Canadian currency handy. A loonie is the Canadian one-dollar coin, while a toonie is the two-dollar coin. The campground also sits alongside a popular walking and biking path that can be followed toward town or farther along the river. But the biggest amenity here is really Fort Langley itself. Exploring Fort Langley Fort Langley is small, charming, and surprisingly packed with things to do. The family made it a goal to try a different coffee shop nearly every morning, which turned out to be a pretty great way to explore town. Republica Coffee Roasters Republica Coffee Roasters was one of Gretchen’s favorite coffee stops. In addition to drinks and a small selection of baked goods, it was a good place to buy coffee to take along for the next leg of the trip. Blacksmith Bakery Blacksmith Bakery paired excellent coffee with beautiful pastries and was good enough to warrant more than one visit. Wendel’s Bookstore & Cafe Wendel’s combines several of the RV Atlas’s favorite things: books, coffee, and breakfast. Unlike a simple coffee shop, Wendel’s has a full breakfast menu, and the family enjoyed breakfast outside on the patio one morning. Trading Post Eatery For a meal in town, Gretchen recommends Trading Post Eatery. The brewery is based in nearby Langley and has an eatery in Fort Langley with a lovely outdoor patio. There are plenty of other restaurants around town that Gretchen would like to try on another visit, but trips into Vancouver meant there were only so many meals available for exploring the local dining scene. Visit Fort Langley National Historic Site The actual Fort Langley is also within walking distance of the campground. Fort Langley National Historic Site is a Parks Canada site centered around a 19th-century fur trading post. Visitors can explore historic buildings, visit the blacksmith shop, interact with interpreters, and learn about life at the fort. Families should look for the kids’ activities available at Parks Canada sites. Children can complete activities and earn an explorer badge, similar in spirit to the Junior Ranger programs at U.S. national parks. Plan on spending a couple of hours here before wandering back into town—or simply walking back to the campground. Getting from Fort Langley into Vancouver The downside of staying in Fort Langley is obvious: you aren’t actually camping in Vancouver. Gretchen researched public transportation before the trip and hoped there might be an easy way to leave the truck behind at the campground. Unfortunately, getting from Fort Langley to Vancouver entirely by public transit required multiple connections. Vancouver itself has an excellent rapid-transit system, the SkyTrain, but it doesn’t currently extend to Fort Langley. The family experimented with two approaches during their three trips into Vancouver. For one visit, they drove approximately 30–35 minutes to the Scott Road Park & Ride. This worked particularly well because the station had a large surface parking lot, an important consideration for anyone driving a large tow vehicle that doesn’t fit comfortably in parking garages. From there, they took the SkyTrain approximately 35 minutes to Waterfront Station in downtown Vancouver. The elevated ride provided views of the water and city skyline and eliminated the hassle of downtown parking. However, the entire process took longer than simply driving. For the other two visits, they drove into Vancouver. The lesson? Match your transportation strategy to your plans for the day. The SkyTrain makes sense when you’re heading directly downtown and don’t want to deal with parking. Driving can be more efficient when you’re exploring attractions outside the city center. And regardless of which option you choose, try to avoid rush hour. Spend a Day at Stanley Park If Gretchen had to choose one Vancouver highlight, it would be Stanley Park. This enormous waterfront urban park combines rainforest, shoreline, trails, gardens, attractions, and the famous seawall into a destination that could easily fill an entire day. Gretchen’s oldest son Ari and his girlfriend Abby rented bikes and rode around the park, while the rest of the family explored by vehicle. The complete loop is roughly seven miles, making biking an excellent option for visitors who want to experience the park at a leisurely pace. Driving works well too, particularly if you want to stop at viewpoints and explore different areas along the way. For the driving tour, Gretchen recommends the GuideAlong app. The narrated tour points out worthwhile stops and also helps visitors decide what they can skip when time is limited. Stanley Park was one of those places where the family wished they had scheduled even more time. The combination of water, rainforest, and city views makes it feel surprisingly removed from an urban environment. After exploring, they regrouped at Stanley Park Brewing for pizza and beer. Gretchen would happily return and devote an entire day to Stanley Park. The Vancouver Aquarium, which they didn’t have time to visit, is already on her list for a future trip. Pair Stanley Park with Capilano Suspension Bridge Park One of Gretchen’s best Vancouver planning strategies was pairing Stanley Park with Capilano Suspension Bridge Park. Capilano is located just across the iconic Lions Gate Bridge and less than a 10-minute drive from Stanley Park. The family spent the afternoon exploring Stanley Park, ate dinner, and then headed to Capilano after 5 p.m. That timing had two major advantages. First, summer visitors arriving after 5 p.m. could take advantage of a 25-percent twilight discount during their visit. Second—and perhaps even better—the crowds had largely disappeared. The family could see the ropes and queue areas designed to handle daytime crowds, but during their evening visit there was hardly anyone waiting for the bridge. The famous suspension bridge stretches about 450 feet across the gorge, roughly 230 feet above the Capilano River. Gretchen found the amount of sway slightly more adventurous than she expected. But the suspension bridge isn’t the only attraction. Visitors can also explore elevated walkways through the trees and the Cliffwalk, a series of narrow walkways suspended along granite cliffs above the river. Allow a couple of hours to explore the property at a relaxed pace. Gretchen felt the experience was worth the admission price—particularly with the twilight discount and significantly smaller evening crowds. Solve a Mystery in Gastown Gastown is one of Vancouver’s most recognizable tourist districts, with cobblestone streets, Victorian-style architecture, shops, restaurants, and its famous steam clock. But Gretchen sometimes finds that simply walking through a tourist district can feel a little directionless. Once you’ve admired the buildings and watched the clock, what do you actually do? Her solution was Vancouver Mysteries. Instead of an app-based scavenger hunt, participants meet a costumed character at a physical location and receive a kit for solving a mystery. Gretchen’s family tackled a murder mystery that sent them around Gastown solving puzzles and looking for clues. The activity gave the family a reason to explore the neighborhood more carefully while keeping everyone engaged. And yes, they solved the mystery. Even better, they were told they had earned the highest score of the day. For families with older kids or teens who aren’t necessarily thrilled by the prospect of simply wandering through another historic district, experiences like this can be a great travel tool. Eat at the Old Spaghetti Factory After solving their Gastown mystery, the family headed to the Old Spaghetti Factory. This isn’t a recommendation for travelers looking for Vancouver’s most sophisticated culinary experience. It’s a recommendation for people who appreciate a little kitsch. The restaurant features over-the-top nostalgic decor, including a full-size trolley car inside the Vancouver location. The menu is classic Americanized Italian food, with meals offering multiple courses at a relatively affordable price for a major tourist district. For visitors from parts of the country without an Old Spaghetti Factory, it can be a fun taste of Pacific Northwest nostalgia—and an entertaining family meal after a day of sightseeing. Museum of Anthropology at the University of British Columbia The Museum of Anthropology on the University of British Columbia campus was another standout. The museum has an enormous collection of anthropological objects from around the world, but the Pacific Northwest collection makes an immediate impression. Large-scale works, including totem poles and other pieces created by Indigenous peoples of the region, are displayed in a dramatic gallery with a wall of glass. What Gretchen particularly appreciated was the organization of the enormous collection. Large collections can quickly become overwhelming, but the museum uses regions, themes, and smaller exhibits to give visitors a framework for understanding what they’re seeing. Some interactive elements also work particularly well for families. This is a museum where visitors could easily spend several hours. Nitobe Memorial Garden After spending a few hours indoors at the Museum of Anthropology, walk over to nearby Nitobe Memorial Garden. The small Japanese garden is also located on the University of British Columbia campus and is within walking distance of the museum. The garden features waterfalls, carefully designed landscaping, and peaceful pathways. It doesn’t require a major time commitment—the family spent roughly half an hour there—but that’s part of its appeal. After several hours inside a museum, it’s a lovely place to stretch your legs and slow down for a bit. Take a Day Trip to Golden Ears Provincial Park For one final dose of Pacific Northwest wilderness, head to Golden Ears Provincial Park. The park was about a 40-minute drive from Fort Langley and offered one of the family’s favorite hikes of the entire summer. Abby researched hiking options and chose the Lower Gold Creek Falls Trail, an approximately 3.5-mile out-and-back hike. The trail travels through towering rainforest alongside the water, with opportunities to walk down to pebble beaches and catch mountain views in the distance. The turnaround point features a double waterfall. But the waterfall wasn’t what captured most of the family’s attention. It was the banana slugs. Dozens and dozens of them. These enormous yellow slugs were scattered along the trail, along with darker slugs, and the family eventually started counting. Gretchen estimates they spotted at least 90. The banana slugs might have stolen the show, but the hike itself was beautiful, with rainforest, river scenery, mountain views, and the waterfall making it worthwhile even for visitors who are considerably less enthusiastic about giant slugs. The family also stopped at a pretty mountain lake on the return trip and briefly considered having a picnic—until they encountered some extremely bold geese who seemed quite interested in sharing lunch. Why Vancouver Works So Well on a Canadian Rockies RV Trip One of the biggest lessons from this three-part adventure is the value of variety on a long RV trip. It can sound ridiculous to imagine getting tired of stunning alpine lakes and mountain views in Banff and Jasper. But on a long family trip, even extraordinary scenery can eventually start to blend together. Combining national parks and wilderness destinations with cities can reset the rhythm of a trip. Spend one day hiking beside a glacier and another wandering through a museum. Follow several days of mountain scenery with coffee shops and restaurants. Give older kids and teens a chance to shop, bike through a city park, solve a murder mystery, or eat dinner somewhere fun. Gretchen admits that this isn’t just a strategy for keeping the kids happy. She enjoys the variety…

    Full show notes at the publisher

    The Complete Guide to America’s Largest RV Show in Hershey, Pennsylvania Sep 13, 2026
    Show notes If you’ve ever wondered what it would be like to see almost everything in the RV world in one place, the Hershey RV Show—officially known as America’s Largest RV Show—is your answer. Every September, this five-day event transforms the Giant Center in Hershey, Pennsylvania into a massive celebration of RV life. We’ve been attending for more than a decade, and we can tell you: this show isn’t just for people shopping for a new rig. It’s for anyone who loves RVing. Whether you’re a first-time buyer, a full-timer looking for the latest accessories, or a camping enthusiast who wants to see what’s new, this event has something for you. To listen to our interview with Heather Leach, the Executive Director of the PRVCA, click on the media player above–or subscribe to the RV Atlas podcast wherever you get your favorite shows.

    Show Overview

    • Dates: September 16-20th, 2026
    • Location: Giant Center, Hershey, Pennsylvania — right next to Hersheypark
    • Public Hours: Wed–Sat 9:00 AM–7:00 PM; Sun 9:00 AM–5:00 PM
    • Tickets & Info: largestrvshow.com (advance purchase saves money)
    • Official App: Search America’s Largest RV Show in your app store for maps, exhibitors, seminars, and more.

    This is the show’s 57th year, with the Giant Center serving as its home base since 2005.

    What Makes This Show Unique?

    Unlike many regional RV shows, Hershey is organized by manufacturers rather than dealers. That makes shopping and comparing much more efficient:

    • Brands are grouped together so you can head straight to the ones you’re interested in.
    • You can compare different models from the same manufacturer side by side.
    • Less bouncing between mixed-brand dealer areas; more focused time evaluating rigs.

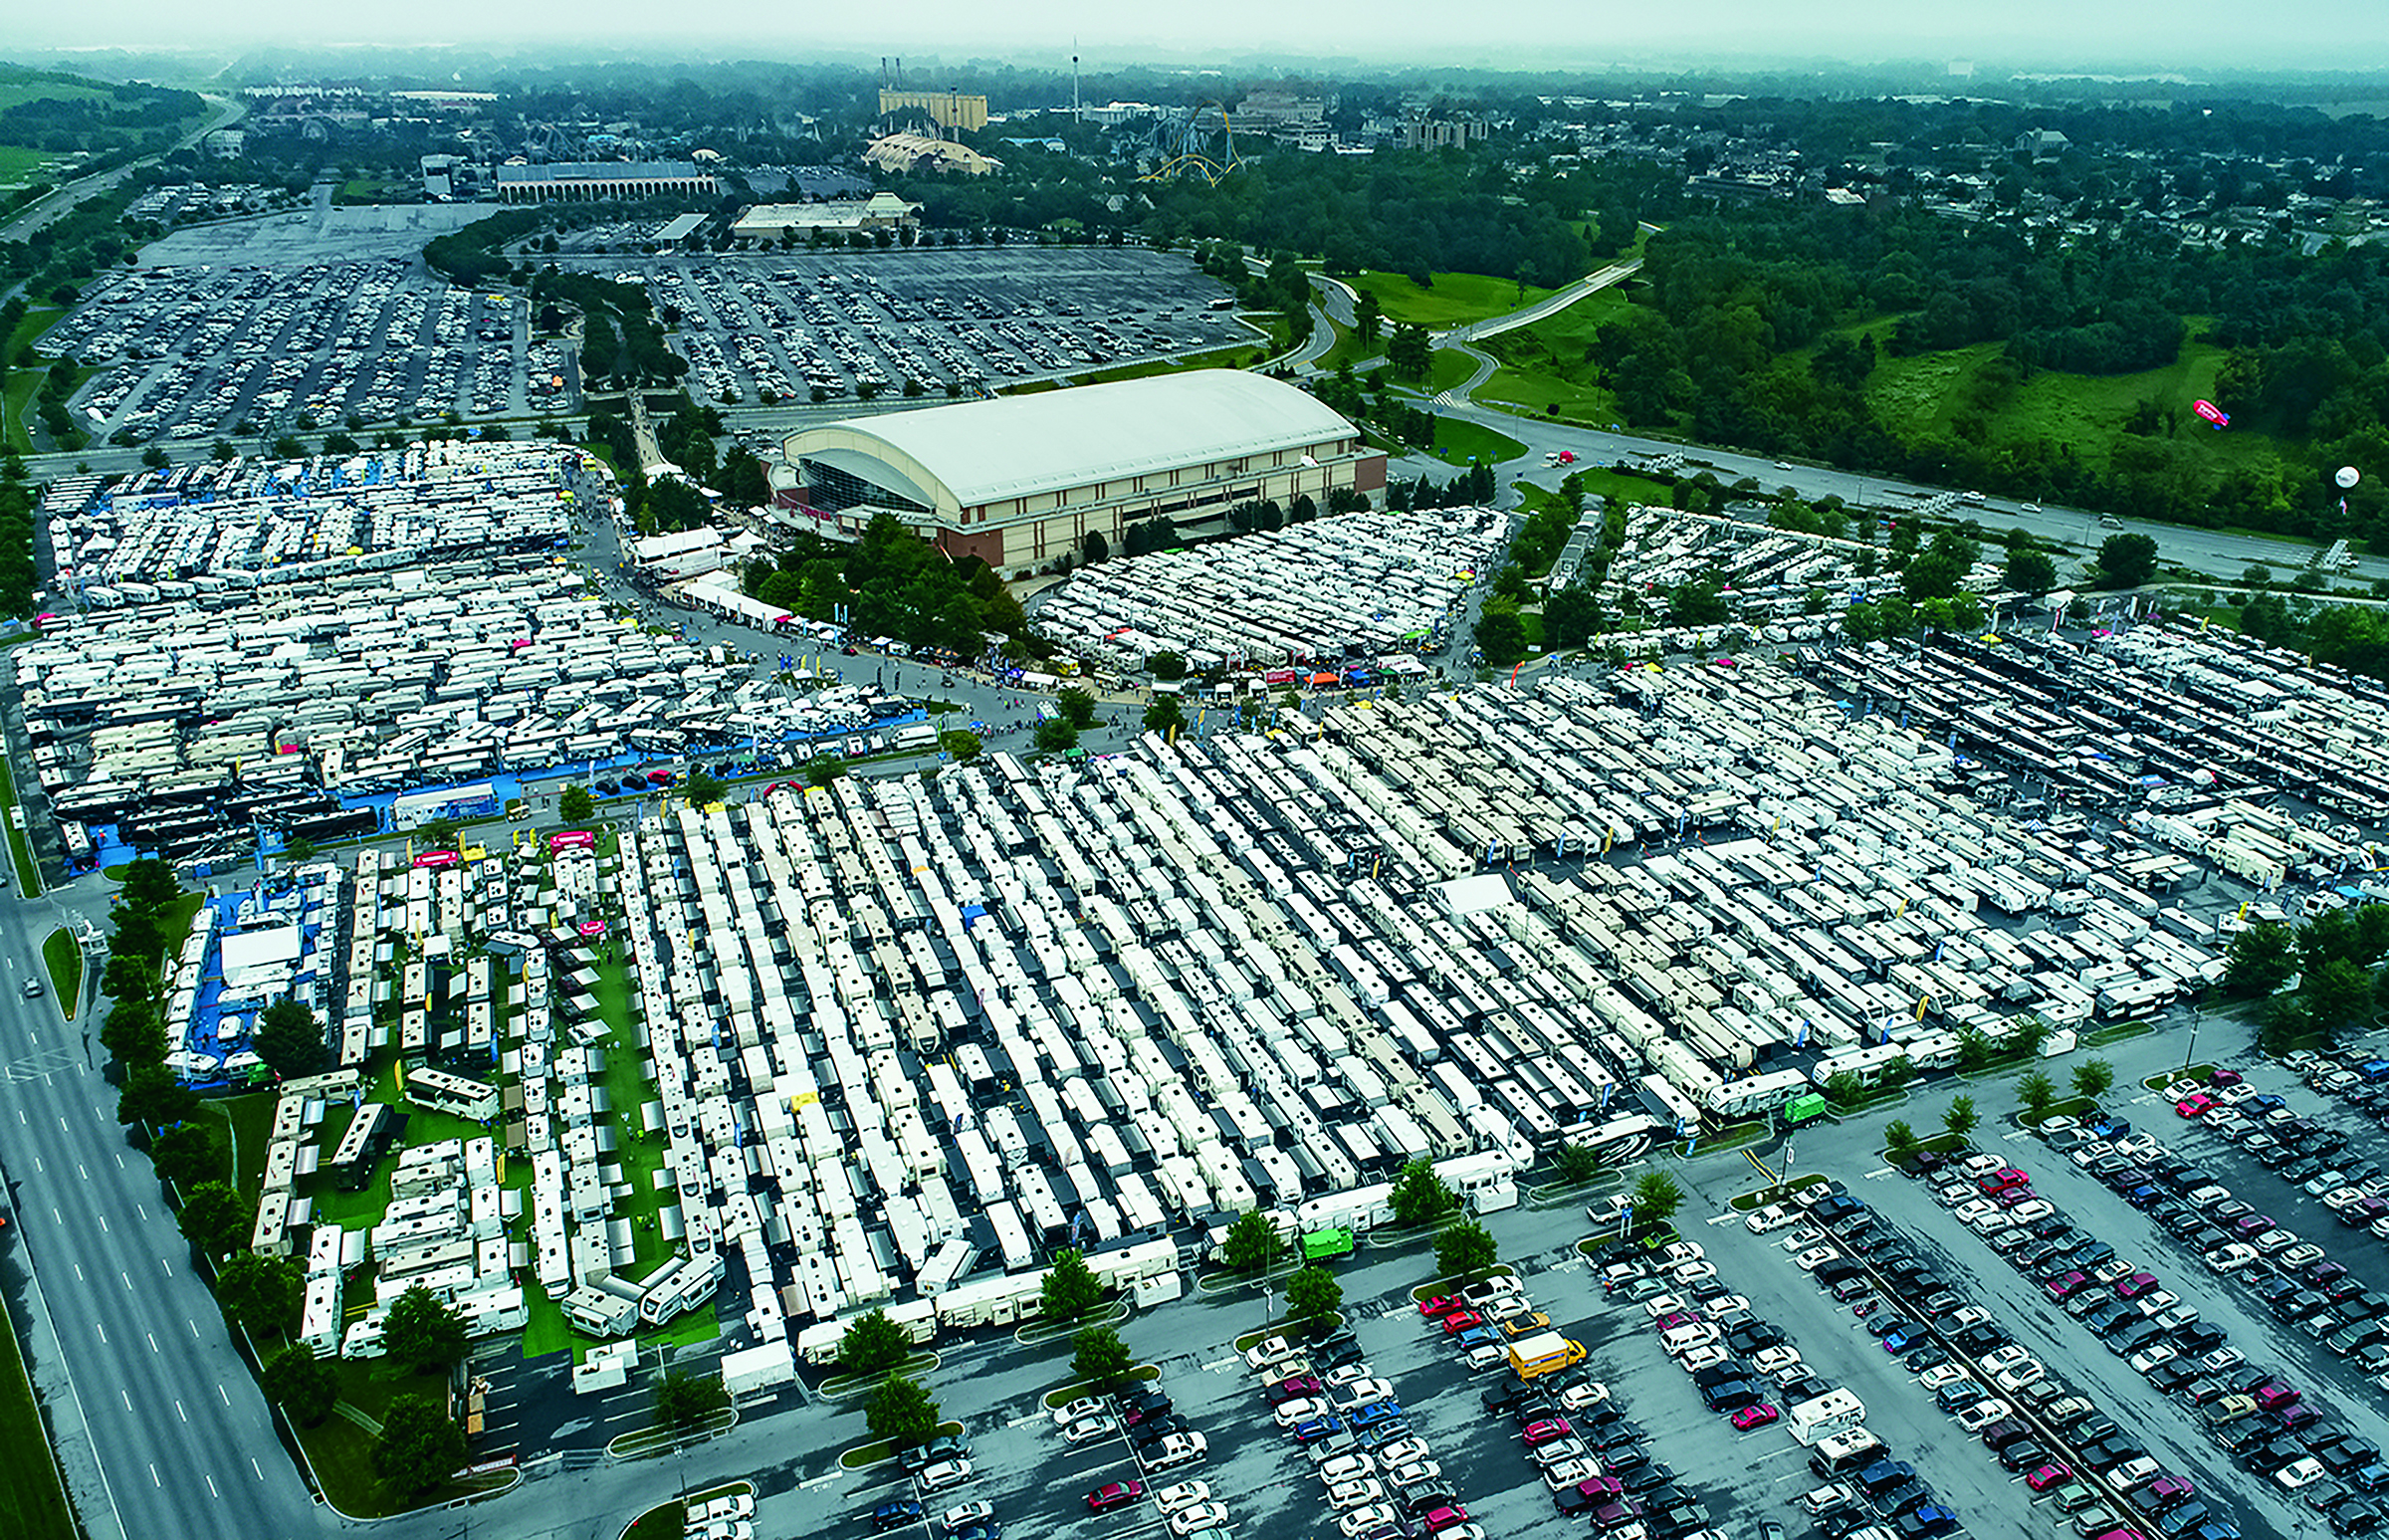
    You’ll find 1,400–1,500 RVs across every category—pop-ups, hybrids, travel trailers, fifth wheels, toy haulers, camper vans, Class C’s, and luxury Class A’s. See the up-to-date manufacturer list here: Manufacturers on Display.

    Plan Your Route: Maps, Layout & Strategy


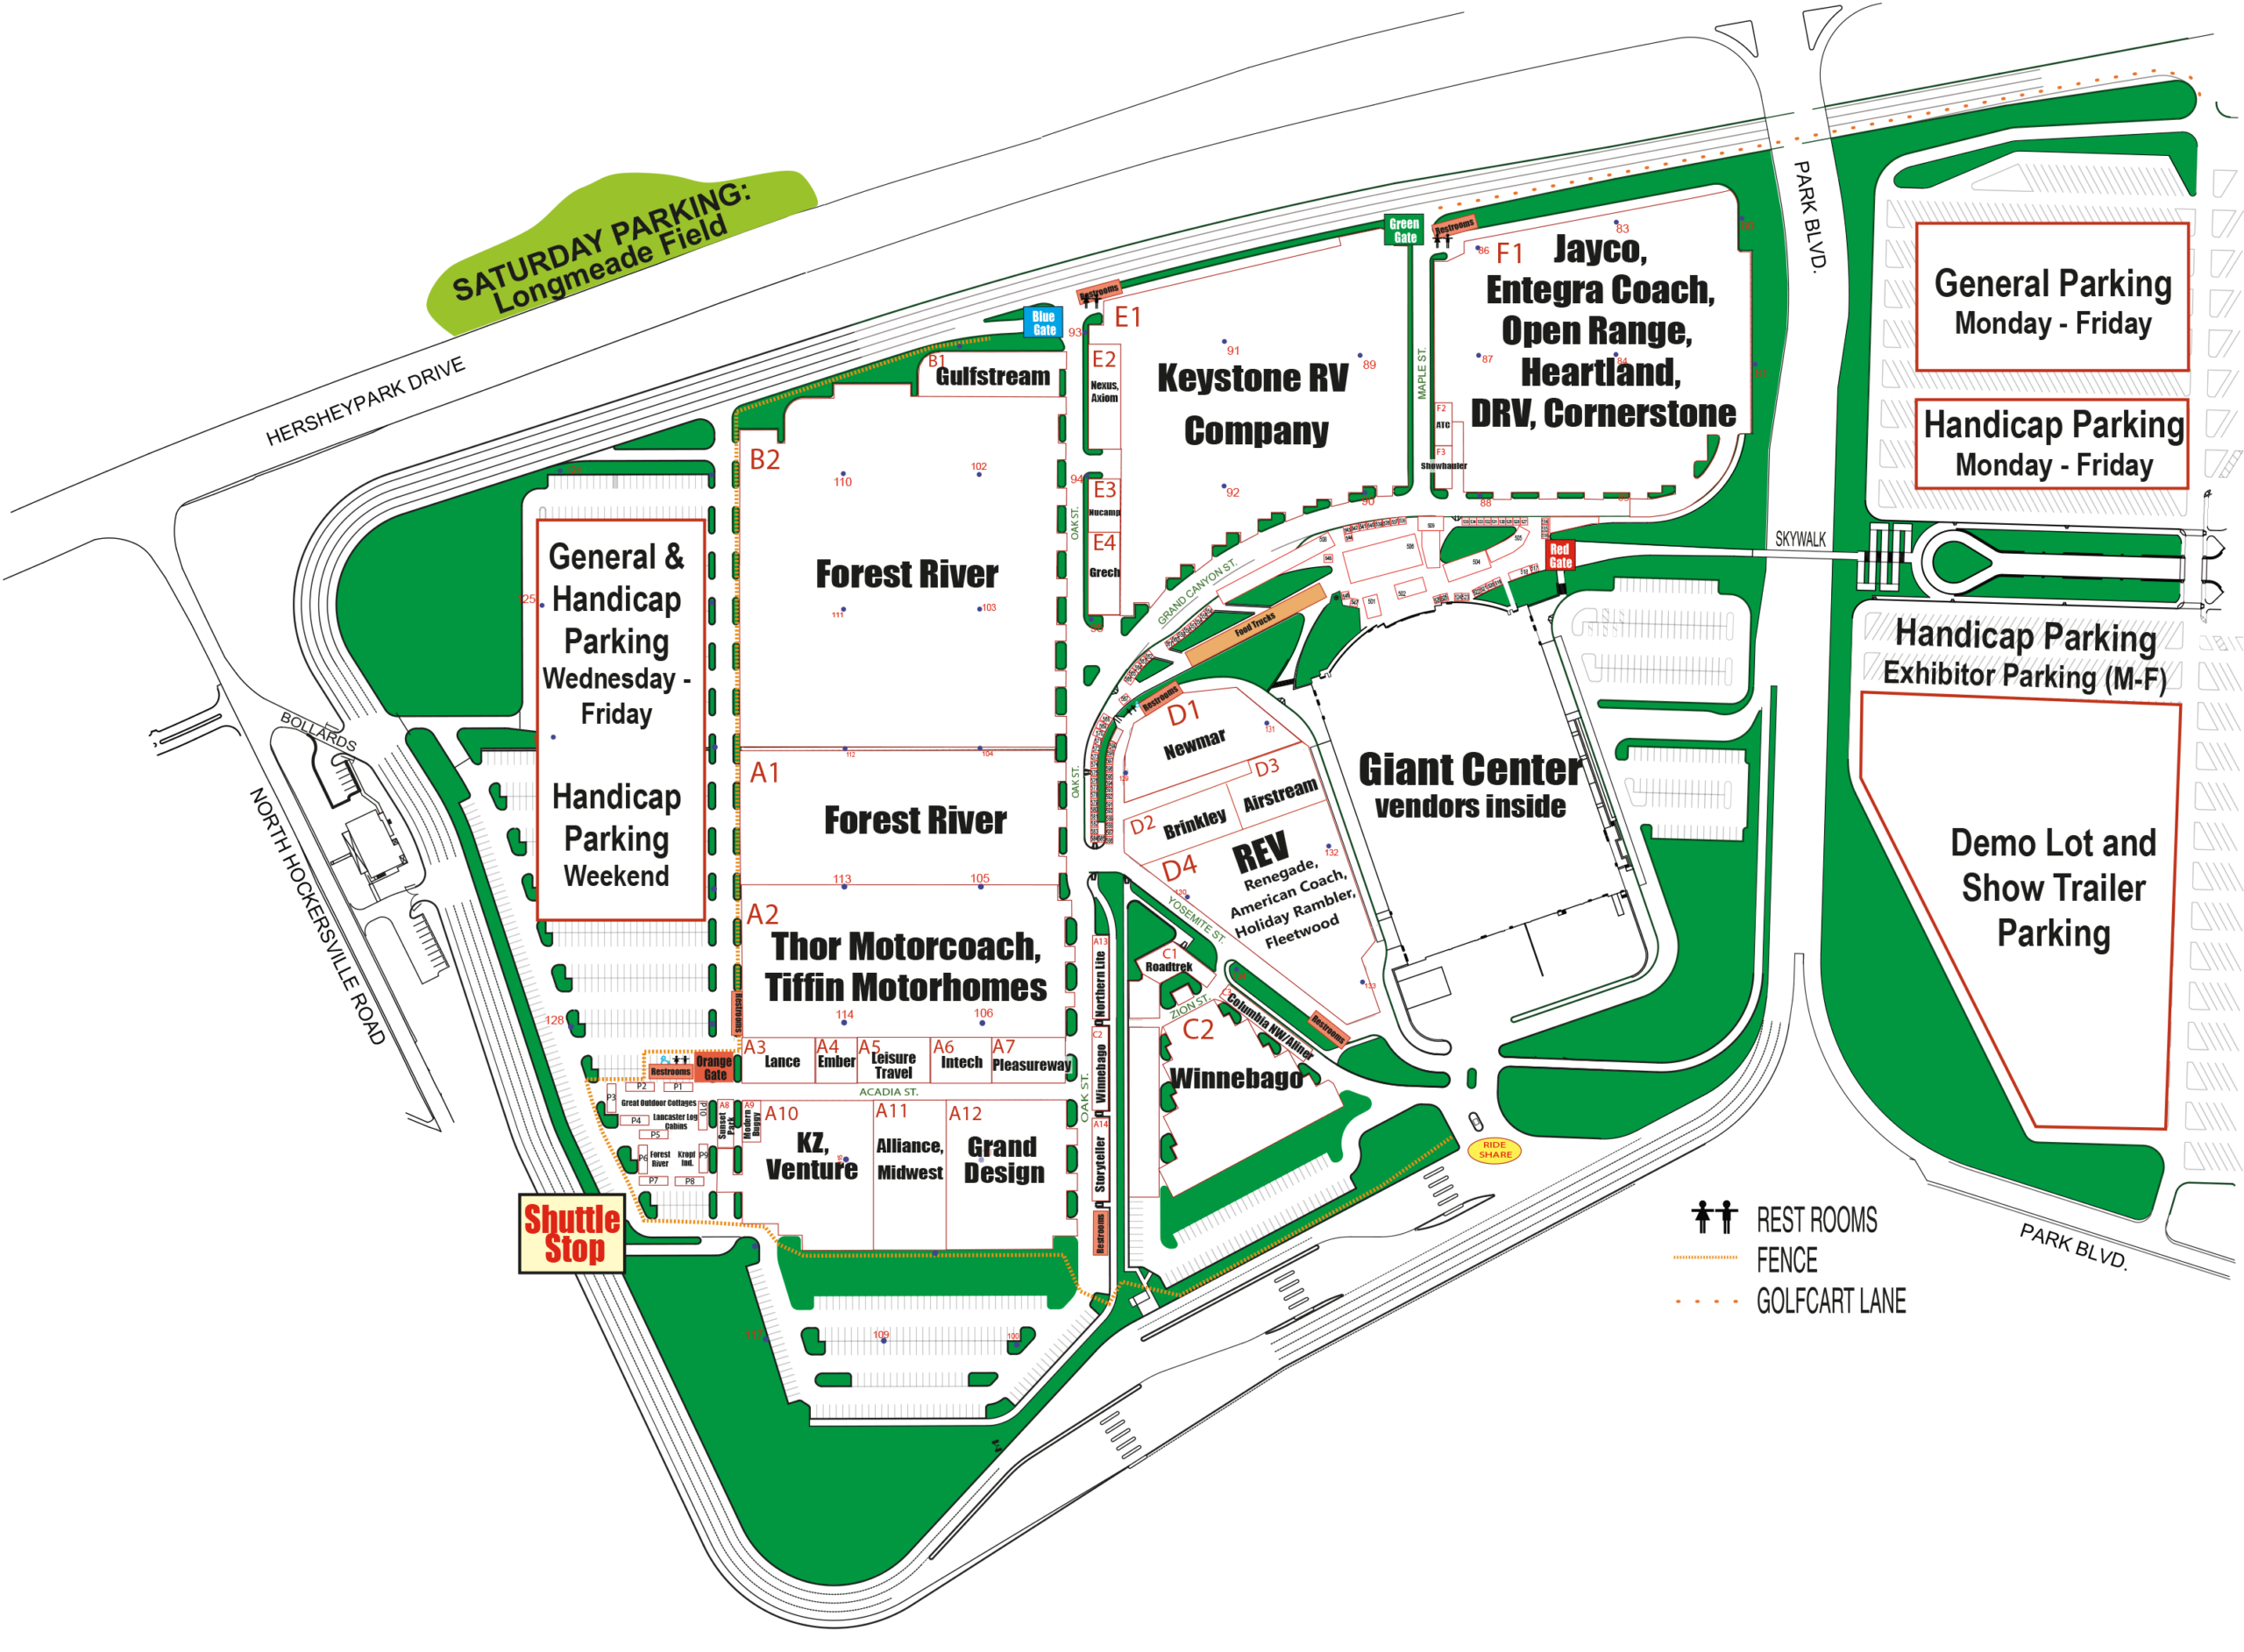
    The fastest way to beat getting overwhelmed is to arrive with a plan. Start by reviewing the Show Layout & Maps and building a route that clusters your must-see brands together. Grab a printed map at the entrance and keep the show app open on your phone for quick reference.

    Pro Navigation Tip: The outdoor map includes numbered light pole indicators. If you lose your bearings, find the nearest light pole, match its number to the map, and you’ll instantly know where you are.

    The Giant Center: A Show Within the Show

    Outside is all about RVs. Inside the Giant Center, you’ll find more than 200 booth vendors covering the rest of your RV life—gear, services, and destinations. Expect:

    • Campground and destination reps
    • RV accessories, parts, and maintenance products
    • Insurance providers, hitch/sway systems, and more
    • A downstairs “store” area similar to a dealership parts department

    Even if you’re not buying a rig this year, you can happily spend hours exploring gadgets and talking upcoming trips. For the evolving 2026 list, check Booth Vendors.

    Educational Seminars (Included with Your Ticket)

    Seminars run hourly inside the Giant Center and are included in your admission. Topics range from beginner basics to advanced skills:

    • How to choose the right RV
    • Maintenance and safety must-knows
    • Full-time RVing, work-on-the-road, and logistics (like mail and domicile)

    Industry experts present throughout the week. See the current schedules here: Seminars & Presenters.

    Influencer Meet & Greets

    Meet popular RV creators in the dedicated Influencer Tent by the West/Orange Gate. The lineup typically includes creators like Campin’ Erin, Half Fast Travelers, and more. Check times and additions here: Influencer Meet & Greets.

    Food & Entertainment

    • Indoor concessions (plus AC and seating) inside the Giant Center
    • Food trucks along the front of the building
    • New West Gate food court near the park model village with picnic tables
    • Roaming entertainment including a live band and a bike-borne ice cream themed comedy show

    Where to Stay: Dry Camping, Campgrounds & Hotels

    On-Site Dry Camping

    • First-come, first-served (no hookups)
    • Shuttle service runs between dry camping and the show
    • Historically plenty of space, but arrive early for convenience

    Nearby Hotels & Campgrounds

    Hershey has plenty of lodging thanks to Hersheypark. Book early. For official listings and distances, see Accommodations.

    Smart Shopping at a Manufacturer-Organized Show

    1. Define your category first. Are you comparing fifth wheels? Toy haulers? Class B vans? Focus your day on one or two segments.
    2. Use your camera. After 30+ walkthroughs, rigs blur together. Snap exterior shots and key interior features (plus the spec sheet) to review later.
    3. Note model names and lengths. That makes apples-to-apples comparisons easier when you get home.
    4. Plan for a second day if you can. Between outdoor displays, the Giant Center, and seminars, two days is ideal.

    Our Personal Tips for Enjoying the Hershey RV Show

    • Wear comfortable shoes. This is a big walking show—save the fashion shoes for dinner.
    • Start with a plan. Use the map and app to cluster must-see brands.
    • Hydrate & pace yourself. September is usually pleasant, but it can get warm.
    • Use the light-pole hack. Match the nearest pole number to your map to re-orient fast.
    • Build in Giant Center time. Gear, gadgets, campground reps—plus AC and lots of seating.
    • Seminars are included. They’re a huge value add—pick two or three that match your goals.

    For more quick-hit advice from years past, see our earlier post: 6 Quick Tips for Enjoying America’s Largest RV Show in Hershey, PA.

    FAQs

    Where is the show and what are the hours?
    At the Giant Center in Hershey, PA. Public hours are Wed–Sat 9:00 AM–7:00 PM and Sun 9:00 AM–5:00 PM.
    Are seminars included with admission?
    Yes. They run hourly inside the Giant Center. See the current schedules here: Seminars.
    Is buying tickets in advance cheaper?
    Yes—purchase via largestrvshow.com for a discount compared to day-of pricing.
    Is there on-site camping?
    Yes—dry camping is available on a first-come, first-served basis, with shuttle service to the show.
    Where can I see who’s exhibiting?
    Check the evolving lists for manufacturers and booth vendors. Also review the show layout & maps.
    Where do influencer meet & greets happen?
    At the Influencer Tent by the West/Orange Gate. See the schedule here: Meet & Greets.

    Where to Camp Near the Hershey RV Show

    If you prefer hookups over dry camping, these three campgrounds are great bases for the show:

    Hersheypark Camping Resort

    This campground is the closest option to the show. It offers RV sites with hookups, cabin rentals, and convenient access to Hershey attractions (including park shuttles in season). Expect a resort-style vibe and easy logistics.

    Elizabethtown / Hershey KOA

    This KOA is a short drive away with spacious sites, a pool, camp store, and family-friendly amenities. It’s a reliable basecamp with the classic KOA convenience factor.

    Jellystone Park Quarryville

    A bit farther than the other two but packed with activities—pools, water features, and theme-weekend fun for kids. This is a great choice if you’re turning the show into a family getaway.

    Final Thoughts

    The Hershey RV Show isn’t just a sales event—it’s a community gathering for everyone who loves RVing. Visitors come from all over the country, often turning the trip into a mini-vacation. Whether you’re here to buy, learn, shop, or simply soak up the RV lifestyle, you’ll find unmatched opportunities to connect with manufacturers, experts, influencers, and fellow RVers—all in one place.

    We’ll be there again this year inside the Giant Center—come say hello at our table inside the Giant Center and grab some “Where Should We Camp Next? books!

    The post The Complete Guide to America’s Largest RV Show in Hershey, Pennsylvania appeared first on The RV Atlas.


    Letchworth State Park: A Guide to “the Grand Canyon of the East” with Casita Dean May Sep 13, 2026
    Show notes

    There are some state parks that feel almost too grand to be state parks. They have the scenery, recreation, history, and sheer scale that we usually associate with our national parks. Letchworth State Park in Western New York is one of those places. Known as the “Grand Canyon of the East,” Letchworth stretches for roughly 17 miles along the Genesee River, where three major waterfalls tumble through a dramatic gorge surrounded by forested cliffs. There are miles and miles of hiking trails, historic sites, overlooks, a swimming pool, rafting, kayaking, interpretive programs, and enough attractions to fill several days without ever leaving the park. On this week’s episode of The RV Atlas podcast, our longtime correspondent Casita Dean May returns with an incredibly detailed review of Letchworth State Park. Dean and his wife Laura spent six nights camping here as the final stop on a 21-day summer road trip that also included Geneva State Park in Ohio and Watkins Glen State Park in New York. After nearly 600 nights of camping in 18 states—primarily at state parks—Dean ranks Letchworth among his top three state parks and says it might even take the number-one spot. That is high praise from someone who has done a whole lot of state park camping. To listen to our interview with Casita Dean May about Letchworth State Park please click on the media player above or subscribe to the RV Atlas wherever you get your favorite shows! Where Is Letchworth State Park? Letchworth State Park is located in rural Western New York, about 45 miles south of Rochester and roughly 60 miles southeast of Buffalo. Dean and Laura arrived after spending a week at Watkins Glen State Park, which is only about 80 to 90 miles away. That makes these two legendary New York state parks an excellent pairing for a longer RV trip. One of the first things that surprised Dean and Laura was just how rural this part of New York is. We remember having exactly the same reaction when we traveled through Western New York with our boys years ago. Once you get away from the major population centers, you’ll find rolling hills, farms, cornfields, forests, and beautiful little villages. It can feel worlds away from the image many travelers have of New York. And Letchworth itself is enormous. The park is approximately 17 miles long, so don’t expect to park the truck at the campground and walk everywhere. Depending on where you’re headed, you may drive 20 or 25 minutes from the campground to reach a trailhead, overlook, or attraction. Dean and Laura spent three fairly committed days just exploring the park. That’s an important planning note. Letchworth isn’t a place where we’d recommend booking two nights and assuming you’ve seen it. Camping at Letchworth State Park Letchworth has a large, classic state park campground divided into eight loops. Dean describes the camping area as beautiful, wooded, and somewhat nostalgic. The campground has 257 campsites, along with an unusually large selection of cabins and other lodging options. Sites offer either 30-amp or 50-amp electric service, but there are no water hookups at individual campsites. Instead, each loop has several shared water spigots. Each loop also has restroom and shower facilities. Most campsites are gravel, and you’ll find everything from partial shade to deeply wooded sites. This is an older campground, so RVers should research individual sites before booking. Some sites can be uneven, and site lengths vary. Dean and Laura travel with a 17-foot Casita and had no trouble finding a suitable campsite. They also saw more large fifth wheels and motorhomes than they expected, so Letchworth certainly isn’t off-limits to big rigs. However, if you’re traveling with a larger RV, Dean recommends booking early and researching the individual site carefully. This is one of those campgrounds where experienced repeat visitors probably know exactly which sites work for their rigs. A Note About Campground Renovations One of Dean’s few criticisms of Letchworth involved the age of some campground facilities. This is something we’ve noticed at other New York state park campgrounds as well. The parks themselves are spectacular, and the campgrounds often occupy incredible locations, but some of the older bathhouses and infrastructure can feel dated. There is almost a charming nostalgia to it. Almost. We love campground nostalgia as much as anyone, but we’d also like a nice shower. The good news is that Letchworth is in the midst of significant bathhouse improvements. The park is replacing several campground shower buildings, and construction is affecting campsite availability during the 2026 season, with work extending into spring 2027. So if you’re planning an upcoming stay, pay particularly close attention to which loops are open when you make your reservation. Camping With Pets at Letchworth State Park Pet owners also need to be careful when selecting a loop. When Dean booked his trip, he specifically chose a pet-friendly loop because their beloved dog Gibbs was still traveling with them at the time. Sadly, Gibbs passed away before this trip. Not every camping loop at Letchworth allows pets, so don’t assume that simply selecting an available campsite means your dog can join you there. The park currently allows pets in designated camping loops and limits campers to two pets, with additional leash and vaccination requirements. This is definitely something to verify before clicking that reservation button. How Much Does It Cost to Camp at Letchworth? One of the best things about Letchworth is the price. Dean found the campsites remarkably affordable considering the quality of the destination. Current campsite rates are $30 to $32 per night, with an additional $5-per-night fee for out-of-state residents. That’s a tremendous value for a campground inside one of the most spectacular state parks in the country. During the episode, we couldn’t help noticing the tension between those incredibly low prices and the need for infrastructure improvements. We’re certainly not advocating for unnecessarily expensive state park camping. Affordable public campgrounds are incredibly important. But we’d also gladly pay a few more dollars per night if that money were dedicated to preserving and improving these extraordinary parks for future generations. Cabins, Cottages, and the Glen Iris Inn Letchworth also stands out for the sheer variety of accommodations available to non-RVers. The park has 81 cabins, ranging from rustic options to more developed accommodations, along with two impressive cottages: Maplewood Lodge and Parker’s Hideaway. Then there is an entirely different collection of accommodations associated with the historic Glen Iris Inn, including rooms at the inn itself as well as Pinewood Lodge, Pinewood Lofts, Caroline’s Cottage, the Stone House, and Chalet House. The Glen Iris Inn is particularly special because it overlooks Middle Falls. Dean joked that if someone told him he had to pick one place to live for the rest of his life—as long as he could escape during the harshest part of winter—the Glen Iris Inn overlooking Middle Falls wouldn’t be a bad choice. We can’t really argue with that. These lodging options also make Letchworth an excellent choice for a multigenerational camping trip or a vacation with friends who don’t own RVs. Don’t Expect Great Wi-Fi or Cell Service If you need to work from the campground, plan ahead. Dean and Laura found no campground Wi-Fi and struggled with cell service, frequently getting only one or two bars. Their solution was simple: embrace it. Dean is retired, so as he reminded us during the episode, “work” is a four-letter word. They downloaded entertainment to an iPad ahead of time and enjoyed being disconnected. We have to admit that when we pull into a campground and discover the Wi-Fi isn’t very good, there is sometimes a small sense of relief. It removes the temptation to check email and gives us permission to actually disconnect. But if you truly need connectivity during your stay, don’t assume you’ll be able to rely on your phone. What Makes Letchworth the “Grand Canyon of the East”? The Genesee River runs through the heart of Letchworth, cutting a dramatic gorge through the landscape. Cliffs rise as high as 600 feet, and the river passes over three major waterfalls: Lower Falls, Middle Falls, and Upper Falls. Surrounding everything is dense forest. The park offers approximately 66 miles of hiking trails, plus opportunities for biking, horseback riding, whitewater rafting, kayaking, swimming, snowmobiling, cross-country skiing, and other recreation. There are also nature programs, guided walks, historical interpretation, and even hot-air ballooning. This is why Letchworth feels more like a national park than a typical state park. There is simply an enormous amount to do. Hiking the Gorge Trail If you only have time for one hiking experience, Dean recommends focusing on the Gorge Trail. The trail runs roughly seven miles along the western side of the gorge and provides access to many of the park’s most famous views, including all three major waterfalls. You don’t have to hike the entire thing. In fact, most visitors probably shouldn’t. Because Letchworth is long and narrow, hiking the whole trail out and back would turn it into roughly a 14-mile day. Instead, Park Road parallels much of the gorge and provides numerous parking areas and access points. That allows you to create your own hiking itinerary. Drive to a parking area, hike a section of the Gorge Trail, return to your vehicle, continue down Park Road, and then access another section. For most visitors, that’s probably the best way to experience Letchworth. Serious Hikers Can Tackle the Finger Lakes Trail If seven miles doesn’t sound like nearly enough hiking, Letchworth has you covered. The Finger Lakes Trail travels along the more rugged eastern side of the park. Dean describes this side as considerably less developed, making it appealing to hikers looking for a more substantial backcountry experience. The trail through Letchworth also connects to the much larger Finger Lakes Trail system, opening up enormous possibilities for serious hikers. You could easily use Letchworth as a hiking base camp and never come close to running out of trail. The Autism Nature Trail One of the most unique recreational resources at Letchworth is the Autism Nature Trail, commonly called the ANT. Located near the Humphrey Nature Center, this approximately one-mile accessible trail was specifically designed to provide an inclusive nature experience for visitors with autism and other developmental disabilities. It features eight sensory stations that encourage visitors to experience and interact with nature in different ways. Dean and Laura walked the trail while exploring the nature center area and came away impressed. This is the kind of thoughtful park resource that makes us fall in love with the New York State Park system all over again. Explore the Mount Morris Dam The northern end of Letchworth offers an attraction that surprised Dean: the Mount Morris Dam. At first glance, he couldn’t figure out where the reservoir was. That’s because this isn’t a traditional dam creating a permanent lake. It is a dry dam designed for flood control. The Genesee River normally flows through it, while the area behind the dam can temporarily hold floodwater during periods of excessive rain or snowmelt. Dean was fascinated by the engineering and particularly enjoyed the interpretive signage explaining how the system works. There is also a visitor center in this area. For travelers who enjoy engineering, history, or simply learning how the places they visit actually work, it’s well worth heading to the northern end of the park instead of spending your entire trip around the waterfalls. Take Advantage of Letchworth’s Concessions For such a large park, Letchworth does a good job of providing places to grab a snack, drink, or meal while you’re exploring. The campground has a well-stocked camp store, along with another area selling local products such as honey, baked goods, and other treats. Elsewhere in the park you’ll find additional concessions. Near the dam, for example, Dean found the Dam Overlook Cafe and Gifts. The southern section has still more options, including concessions near the waterfalls. That matters more than you might expect. When you’re spending an entire day driving, hiking, and sightseeing through a 17-mile-long park, being able to grab a cold drink or lunch without leaving the park is incredibly convenient. Swimming at Letchworth State Park Letchworth also has a large swimming complex, which Dean describes as essentially an Olympic-sized pool accompanied by another substantial pool. Swimming is a great option for families who need a break from hiking and sightseeing. It’s also a reminder that these New York state parks aren’t just tourist attractions. They serve as important recreational spaces for surrounding communities. You could easily imagine local families spending summer days at Letchworth just to swim, picnic, and enjoy the park. Spend Time at the Humphrey Nature Center On the southern end of the park, make time for the Humphrey Nature Center. Unlike some of the campground facilities that show their age, Dean found the nature center modern, contemporary, and packed with information. Interactive exhibits explore the park’s geology, wildlife, plants, and river ecology, and trails from the nature center lead to destinations including Trout Pond and Inspiration Point. For families, we’d put this fairly high on the itinerary. It’s a great place to give kids some context for everything they’re seeing outside—and it works especially well if the weather isn’t cooperating with your hiking plans. Inspiration Point and the Council Grounds The southern portion of Letchworth also contains some of the park’s most interesting historical attractions. Dean recommends stopping at Inspiration Point, as well as exploring the Council Grounds and park museum. The history of this landscape extends far beyond its creation as a state park, and Dean was particularly interested in learning more about the Seneca people who lived here. The park preserves and interprets several sites connected to that history, including the story of Mary Jemison, who became closely connected with the Seneca community after being captured as a child and later played an important role in the history of the Genesee Valley. That history adds an entirely different layer to a Letchworth visit. You can come here for waterfalls. But you shouldn’t leave without learning something about the people who lived on this land long before it became a recreational destination. The Civilian Conservation Corps at Letchworth Another important chapter of Letchworth’s history came during the Great Depression. Between 1933 and 1941, four Civilian Conservation Corps camps operated at Letchworth, with approximately 3,000 men helping develop the park’s infrastructure. Dean has joined us on The RV Atlas before for an entire episode about the Civilian Conservation Corps, and his enthusiasm for the CCC came roaring back at Letchworth. The work these young men performed during the Depression helped create the parks Americans continue enjoying generations later. It’s also worth remembering when we look at aging infrastructure in our public parks. These places were created through enormous investments by previous generations. Maintaining them requires investment from ours. Lower Falls Of course, for many visitors, Letchworth is ultimately about the waterfalls. Start with Lower Falls, which Dean describes as approximately 70 feet tall. Reaching the best views requires descending more than 100 stairs from the Gorge Trail. One of the highlights here is the beautiful stone footbridge built by the Civilian Conservation Corps. Walk onto the bridge, turn toward the river, and Lower Falls appears upstream. It’s one…

    Full show notes at the publisher

    An Epic RV Trip to Western Canada and the Canadian Rockies PT. 2 (Jasper, Icefields Parkway) Sep 05, 2026
    Show notes

    Some RV trips are about the destination. Others are about the drive. And then there are those rare adventures where every single part of the journey feels like the destination. That is exactly what happened during the second leg of Gretchen Holcombe’s epic Western Canada RV trip. In Part One of this three-part series, we followed Gretchen and her family through Calgary and Banff National Park. This week, the adventure continues north along the Icefields Parkway to Jasper National Park, then back south to the Lake Louise area of Banff National Park, with an unforgettable side trip into Yoho National Park. This is the kind of RV trip that belongs on a bucket list. There are glacier-fed lakes, waterfalls, wildlife encounters, mountain hikes, incredible campgrounds, surprisingly good food, and some very important lessons about towing an RV through the Canadian Rockies. And while Banff may get more attention, Gretchen surprised us by admitting that if she could return to only one of the two parks, she might choose Jasper. It felt more relaxed, more rugged, and less crowded—and she left feeling like there was still plenty she hadn’t had time to see. To listen to our interview with Gretchen please click on the media player above or subscribe to the RV Atlas podcast wherever you get your favorite shows! Driving the Icefields Parkway With an RV The Icefields Parkway connects the Lake Louise area of Banff National Park with Jasper National Park. The drive is about 144 miles, but this is absolutely not a road you should think of simply as transportation between two destinations. The Icefields Parkway is an attraction all its own. Towering mountains surround the road almost continuously. There are glacier views, waterfalls, alpine lakes, hiking trails, and scenic overlooks scattered along the route. Gretchen’s best advice is simple: Do not rush it. Many travelers devote an entire day to the drive, stopping frequently for scenery and short hikes along the way. The Challenge of Scenic Pullouts With a Larger RV There is one significant downside if you’re towing a bigger travel trailer or driving a large motorhome. Not every scenic pullout is particularly RV friendly. Gretchen and her husband frequently found themselves looking at a turnout and debating whether they could safely fit. Sometimes they decided to keep driving. A Class B van or smaller RV will give you much more flexibility along this route. If you’re traveling with a bigger setup, be prepared to pass some of the smaller overlooks and concentrate on the larger stops. One of the easiest major stops is the Columbia Icefield Discovery Centre, which has a large parking area with dedicated RV parking. The family stopped there for lunch and enjoyed views of the Athabasca Glacier from the visitor complex. It’s also the departure point for the popular glacier tours that carry visitors onto the ice. Don’t Underestimate the Mountain Driving Here is one piece of advice Gretchen wished she had heard more clearly before the trip: The Icefields Parkway is still mountain driving. The road is well maintained and large RVs travel it every day, but there are substantial grades. Gretchen had actually worried more about other mountain passes later in their Western Canada journey. Instead, one long grade just past the Columbia Icefield Discovery Centre caught her off guard. She estimated that portions reached around a 12% grade. Their 2003 van handled the route, but they manually downshifted and found themselves using the brakes more than they normally would on mountain roads. Her advice for other RVers is not to avoid the Icefields Parkway. Quite the opposite. Just arrive prepared. Know how your tow vehicle performs on steep grades, understand how to downshift appropriately, and don’t assume that beautiful scenery means an effortless drive. Jasper National Park Feels Different From Banff Both Banff and Jasper showcase the spectacular scenery of the Canadian Rockies, but they have very different personalities. Banff is easier to access from Calgary and receives considerably more visitors. Jasper is more remote. That extra distance means fewer crowds and a noticeably different atmosphere. Gretchen found Jasper more relaxed and rugged. The town felt less touristy, and the logistics of their stay were easier because they were camping just outside downtown. Both parks are absolutely worth visiting. But when Jeremy asked Gretchen which one she would choose if she could only return to one, she picked Jasper. Camping at Whistlers Campground in Jasper National Park One of the biggest victories of this leg of the trip was getting a reservation at Whistlers Campground. After missing out on a national park campsite in Banff, Gretchen was able to reserve three nights at Whistlers, located only about five minutes outside the town of Jasper. And it became one of the family’s favorite campgrounds of the trip. Whistlers is enormous, with roughly 780 campsites, but it doesn’t necessarily feel that large because the campground is divided into smaller loops. Some loops offer full hookups, and Gretchen recommends being online as soon as reservations open if those sites are important to you. Their pull-through site was spacious and comfortable, and the campground’s mountain setting made a huge impression. Every direction seemed to offer another mountain view. Surprisingly Nice Bathhouses The bathhouses were another pleasant surprise. They appeared very new, were extremely clean, featured murals inside, and offered free showers. That last detail was especially noteworthy because free campground showers were not common during this portion of the trip. One amenity Whistlers did not have was laundry. Gretchen found campground laundry facilities surprisingly difficult to come by throughout the Canadian Rockies, so travelers planning a longer itinerary may want to think ahead about where they’ll handle that chore. Coffee at the Campground Another unexpected perk? A local coffee shop operated a small trailer at Whistlers where campers could buy coffee, tea, and pastries. It’s a simple amenity, but there is something especially wonderful about waking up in a national park campground surrounded by the Canadian Rockies and being able to walk over for a fresh cup of coffee. Wildlife Is Not Just a Possibility at Whistlers Wildlife sightings weren’t something Gretchen’s family had to go looking for. The wildlife came to them. They visited during elk calving season, when female elk can be especially protective. Campground staff gave plenty of warnings about keeping a safe distance. And those warnings were not theoretical. Elk regularly wandered right through the campground. One evening, Gretchen had to quickly bring the dog inside after he noticed an elk standing very close to their campsite. Then things got even more interesting. One morning, a neighboring campground loop was evacuated after a grizzly bear wandered through the area and spent some time investigating picnic tables. Food Storage Matters Campers were allowed to cook and eat outside, but food and cooking equipment could not simply be left unattended. Gretchen’s family would cook on the Blackstone, eat outside, and then immediately pack everything away into the RV or vehicle. In a place like Jasper, wildlife safety needs to become part of your normal camping routine. You don’t leave the grill sitting outside because you’ll “come back to it later.” You clean up. You store food properly. And you pay attention. Exploring Downtown Jasper Whistlers Campground’s location makes downtown Jasper incredibly easy to visit. Gretchen estimates the drive at roughly five minutes, and there’s also a bike path connecting the campground with town. They enjoyed wandering downtown, browsing shops, and eating at Jasper Brewing Company, where they sat outside and watched people pass by. One practical tip: extremely long freight trains regularly pass through Jasper. The family quickly learned to use an alternate route into town that avoided crossing the tracks whenever possible. Don’t Miss From Jasper With Love One of the most unexpected recommendations from the entire episode is a show called From Jasper With Love. Gretchen booked tickets on a rainy day without expecting too much. It became a surprise highlight. The two-man sketch comedy show is built around life in Jasper, poking fun at the town, the wildlife, and the experience of visiting the Canadian Rockies. One recurring character is Eddie the Elk, who is hilariously offended that bears and moose get all the attention while elk barely make it onto the souvenirs. The show is family friendly and worked especially well with Gretchen’s 13-year-old. If rain interrupts your hiking plans—or if you simply need a break from nonstop outdoor sightseeing—this is exactly the kind of quirky local experience that can make a trip more memorable. Valley of the Five Lakes Trail If Gretchen had to choose one personal highlight from Jasper, she picked the Valley of the Five Lakes Trail. The trail had been closed due to wildfire damage but reopened after extensive work, including reconstructed boardwalks. The family completed a roughly 3.5-mile loop with moderate elevation changes. The trail passes a series of colorful mountain lakes and areas where the landscape is already beginning to recover from wildfire. This is one of those hikes where the combination of scenery and variety keeps things interesting without demanding an all-day commitment. A Quick Shout-Out to Canadian National Park Bathrooms This may be the first RV Atlas article where we’ve enthusiastically recommended pit toilets. But here we are. Gretchen repeatedly noticed how clean and well maintained the facilities were throughout the Canadian national parks. Even pit toilets were surprisingly impressive. She saw maintenance crews regularly servicing and cleaning them, and the overall experience stood out enough that it became a legitimate topic of conversation during the episode. It might sound like a small thing. But clean restrooms, maintained trails, and visible staff presence can dramatically improve the visitor experience. And Gretchen felt Canadian national parks were doing an excellent job in that regard. Athabasca Falls Another easy Jasper-area recommendation is Athabasca Falls. The falls are accessible through a system of boardwalks and short trails that showcase not only the waterfall itself but also the canyons and rock formations carved by the water. You can make this a very quick roadside stop or spend around half an hour exploring the network of paths. For Gretchen’s family, it was absolutely worth the short detour back down the Icefields Parkway. Pyramid Island For something slower and easier, consider Pyramid Island. A bridge connects the mainland with the small island, where short trails provide views of Pyramid Mountain. The stop was particularly nice for Gretchen’s older dogs because it offered an easy outing without a demanding hike. It also makes a great photography stop, especially in the evening. Maligne Lake Maligne Lake is one of Jasper’s marquee attractions. The famous boat tour travels to Spirit Island and gets rave reviews from many visitors. Gretchen’s family ultimately skipped it. The cost would have been roughly $100 per person, and they had already spent quite a bit on the Banff Gondola earlier in the trip. They decided to visit the lake and hike instead. Then the weather intervened. By the time they arrived, steady rain had settled in, so they snapped a few photos, escaped into the gift shop and café for hot chocolate, and eventually headed back toward Jasper. Interestingly, Gretchen’s aunt and uncle happened to visit the area about a week later, took the boat tour, and loved it. Choose Expensive Activities Carefully This led to an important family travel discussion. When you’re traveling with several people, ticketed attractions add up quickly. A scenic hike might cost nothing. A waterfall might cost nothing. A family boat tour can suddenly add hundreds of dollars to your day. That doesn’t mean you should skip paid experiences. The Banff Gondola, for example, became one of Gretchen’s favorite memories from the earlier portion of the trip. But choosing the right splurges for your particular family can help keep a long RV vacation financially manageable. How Long Should You Stay in Jasper? Gretchen’s family spent three nights at Whistlers Campground. Was that enough? Mostly. They packed an impressive amount into those three nights, although rain interrupted some plans. Gretchen felt they easily could have filled another day, but for a larger itinerary covering Banff, Jasper, Lake Louise, Yoho, and eventually Vancouver, three nights felt reasonable. If Jasper is a major focus of your trip, we’d certainly consider adding another night. But three nights gives you enough time for a substantial introduction. Returning to the Lake Louise Area After Jasper, the family headed back down the Icefields Parkway toward Banff National Park. Yes, that meant backtracking. But there are worse roads to drive twice. Seeing the Icefields Parkway in the opposite direction simply offered another perspective on one of the most spectacular drives in North America. Their next base camp was the Lake Louise hard-sided campground. Hard-Sided Versus Soft-Sided Camping at Lake Louise Lake Louise has neighboring campground areas designated for hard-sided and soft-sided camping. The distinction exists because of bear activity. Tent campers, pop-ups, and other soft-sided accommodations use the soft-sided campground, which is surrounded by an electric fence. The soft-sided campground is more wooded and offers greater privacy, but it is generally better suited to smaller rigs. Gretchen’s family stayed in the hard-sided campground. One unusual feature is that many campsites use long pull-through driveways shared by two RVs. It sounds odd on paper, but Gretchen didn’t find it particularly bothersome. Most campers position their RVs so their non-door sides face one another, leaving the outdoor living areas pointed toward the woods. The only minor inconvenience is that you may need to run your electrical cord underneath the camper to reach the pedestal. Be Prepared for Trains and Weak Cell Service There are two practical drawbacks worth knowing before booking. Cell service is extremely limited. You may be able to find a signal by walking around, and there is Wi-Fi available in places such as the visitor center. The second issue is noise. Freight trains run extremely close to the campground at all hours. Gretchen could see the tracks from their campsite. If you’re a light sleeper, bring earplugs. Fortunately, the campground also offers easy access to beautiful walking trails along the Bow River. A Surprisingly Fun Bear Safety Program The adjacent soft-sided campground has an amphitheater where park staff offer interpretive programs. Gretchen’s family attended a bear safety presentation expecting a fairly traditional ranger talk. Instead, it included games, team competitions, drawing activities, and stories about individual bears that live in the park. They even learned about a well-known local bear nicknamed The Boss. It was educational, funny, and especially well suited to families with kids. Visiting the Lake Louise Village The small commercial area near the campground includes shops, restaurants, and a visitor center. “Village” might be a slightly generous term. But it provides useful services, Wi-Fi, and trip-planning information. The visitor center even tipped Gretchen’s family off to a geocaching adventure in the campground, which became another fun activity for their son. For a meal, they recommend Bill Peyto’s, located at a nearby hostel. They enjoyed the food, local beers, and—very importantly during a trip where connectivity was often limited—the comfortable upstairs seating area with Wi-Fi. You Need a Plan for Moraine Lake Two of the biggest attractions in th…

    Full show notes at the publisher

    The Best Appliances for the Best RVs: An Interview with Mark Howlett from Truma Aug 30, 2026
    Show notes

    Over roughly the last decade, we have used the Truma AquaGo in several travel trailers, the Truma Combi in our Ember, and the Alde hydronic heating system in our nüCamp TAB 320 CSS. More recently, we have also been spending time in a TAB 360 CS equipped with both Alde heat and the Truma Saphir air-conditioning system. After all of these experiences with Truma products, one thing has become very clear: their appliances can dramatically change how an RV feels at the campground when it comes to comfort and convenience. On this week’s episode of The RV Atlas Podcast, Jeremy sits down with Mark Howlett, President and CEO of Truma North America, for a deep dive into the company’s history, the differences between European and North American RV design, and the major Truma products available to RV owners today. To listen to our interview with Mark, click on the media player above or subscribe to the RV Atlas podcast wherever you get your favorite shows. Why We Pay Attention to the Appliances Inside an RV When people shop for an RV, it’s easy to focus almost entirely on the floor plan. Where is the bed? How big is the refrigerator? Does the dinette convert into a sleeping space? How much storage is there? Those things absolutely matter. But after years of RV ownership, we’ve learned to pay close attention to the components a manufacturer chooses as well. What furnace is installed? What water heater? What air conditioner? What suspension? What solar products are being used? Those choices can tell you quite a bit about what kind of ownership experience the manufacturer is trying to create. That is why Jeremy believes that when an RV manufacturer chooses Truma products they are making a statement about the quality of their RVs. That doesn’t mean every RV with a Truma appliance will automatically be perfect. But after using these products ourselves, we understand why so many premium manufacturers select them. Truma’s History Starts With Harry S. Truman One of the most surprising parts of our conversation with Mark was learning the history behind the Truma name. The company was founded in Germany in 1949 by Philipp Kreis, and the name was inspired by President Harry S. Truman. After World War II, Kreis benefited from the Marshall Plan as Germany rebuilt. He later wrote to Truman to thank him for that support and asked to name the company in his honor—dropping the final “n” to create Truma. The original signed correspondence with Truman is still preserved at Truma’s facility near Munich. Even more surprising is how the company actually started. Kreis began repairing and selling gas lanterns in postwar Munich, where street lighting was still badly damaged. By the 1960s, Truma had moved into RV heating systems that allowed European caravan owners to extend their travel season and even take their rigs on winter ski trips. Today, Truma has operations across Europe, North America, Australia, and Asia. Why European RV Design Matters in North America To understand Truma products, it helps to understand the RVs they were originally designed for. European caravans and motorhomes are generally smaller than the massive travel trailers, fifth wheels, and Class A motorhomes many Americans picture when they hear the word RV. Roads are narrower in Europe. Campsites can be tighter. Weight restrictions are often stricter. Fuel efficiency matters. Space matters. And noise really matters. Those constraints have encouraged European manufacturers to become extremely thoughtful about compact appliances. The Truma Combi is a great example. It combines the furnace and water heater into a single appliance roughly the size of a slightly oversized carry-on suitcase. Instead of dedicating separate spaces to a furnace and a water heater, one compact unit performs both jobs. That kind of engineering becomes especially valuable in the small-RV categories that continue to grow in North America: Class B vans, teardrops, truck campers, and overlanding rigs. The Hidden Luxury of a Quiet RV One of the themes that kept surfacing throughout our conversation was noise. Most RV shoppers do not walk through a dealership thinking, “How loud will this furnace be at 2:00 a.m.?” But they probably should. We’ve owned RVs where the furnace kicking on in the middle of the night would wake us up every time. We’ve used air conditioners so loud that once they were running, there was almost no point trying to watch television. Once you experience a quieter system, you realize how much those sounds affect the camping experience. Mark shared a great story from Truma’s early years in North America. The company had installed a Combi in a North American travel trailer and brought the RV to an OEM during a cold February visit. The engineering team stepped inside and immediately noticed that the trailer was warm. But they couldn’t hear the furnace. They asked whether it was actually running. Mark told them it was. Then he pointed out that they were literally sitting on top of it. The furnace was operating directly beneath them, and they still could barely hear it. That story perfectly captures something we’ve noticed ourselves. Sometimes you don’t realize how disruptive a traditional RV appliance is until you experience an alternative. Truma AquaGo: Continuous Hot Water Perfect for Family RVers The Truma AquaGo was our introduction to the brand, and it remains one of our favorite RV appliances. Traditional RV water heaters commonly use a six- or ten-gallon tank. That can work perfectly well—until several people need hot water in a row. When our boys were young, Stephanie would sometimes bathe all three kids and discover there was very little hot water left afterward for her to take a shower. The AquaGo completely changed that experience. With an on-demand system, we no longer had to carefully schedule showers or wonder who was going to get stuck with cold water. Everybody could get cleaned up, and Mom and Dad could still take a hot shower afterward. For a family of five, that felt luxurious. What Makes the AquaGo Different? One interesting detail Mark explained is that the AquaGo is not simply a traditional tankless heater. It includes a small temperature-stabilizing tank. That tank helps smooth out the temperature fluctuations that can occur when water pressure changes. Anyone who has camped at a busy campground has probably experienced that moment in the evening when everyone suddenly starts washing dishes and taking showers. Water pressure drops. With some on-demand heaters, the lower flow rate can make it difficult for the burner to operate consistently. Truma designed the AquaGo to function at very low flow rates—Mark said the system has been tested down to approximately 0.25 gallons per minute. The small internal tank also buffers temperature changes so you don’t suddenly get blasted with extremely hot or cold water when pressure fluctuates. AquaGo Maintenance Like other on-demand water heaters, the AquaGo does require maintenance. Hard water can create mineral buildup over time. Truma recommends annual decalcification as preventative maintenance and offers tablets designed for the cleaning process. Mark compared it to cleaning a coffee maker. That might sound like one more thing to add to your RV maintenance list, but it also helps explain why some AquaGo units installed more than a decade ago are still operating today. Can You Add a Truma AquaGo to an Existing RV? Yes. This is one of the most important distinctions in the Truma lineup. The AquaGo was designed with replacement installations in mind. It can generally replace common six- or ten-gallon RV water heaters, and Truma offers adapter solutions for larger existing openings. Installation should be handled through Truma or one of its trained authorized dealers. That approach is intentional. Truma wants the entire system—not just the appliance itself—to be installed correctly. For RV owners who love their existing rig but want a significantly better hot-water experience, the AquaGo is one of the most realistic Truma upgrades to consider. Truma Combi: Furnace and Water Heater in One Compact Package If the AquaGo is about maximizing the hot-water experience, the Truma Combi is about making extremely efficient use of space. The Combi combines: A furnace A water heater Variable-speed heating Multiple fuel options depending on the application All in one compact appliance. It can operate on propane, and depending on the model and vehicle, Truma also offers diesel and gasoline configurations. Unlike the AquaGo, however, the Combi uses a tanked water-heating system. That means owners should not assume that every appliance with the Truma name automatically provides endless hot water. The Combi experience is closer to a traditional tanked water heater—but with the furnace and water heater packaged together in one highly engineered system. Why Manufacturers Like the Combi Space savings are only part of the appeal. Truma works extensively with manufacturers to test how the heating system performs throughout an RV. At its Elkhart facility, Truma uses a climate chamber to evaluate many RVs before they go into production. Engineers can look at how warm air moves from front to back and side to side, then make recommendations about duct placement and overall system performance. That matters because a furnace isn’t very useful if one end of the RV is roasting while the bedroom stays cold. The goal is to create a more consistent interior temperature with less noise and fewer dramatic cycles. Truma’s Strong Presence in Class B Vans The Combi was an especially natural fit as Truma entered the North American market. Class B vans have limited interior space, so combining two appliances into one compact unit makes tremendous sense. One of Truma’s early North American partners was Winnebago, particularly with the Travato. Mark estimates that more than half of the Class B vans built in North America now typically use a Truma Combi system. That’s a remarkable shift for a company that officially established its North American operation only 13 years ago. VarioHeat: A Small Furnace for Small RVs Not every camper needs the combined furnace-and-water-heater setup of a Combi. That is where Truma VarioHeat comes in. The VarioHeat is a compact standalone furnace designed for small RV applications. Mark offered perhaps the best size comparison possible: he wears a size 14 shoe, and the furnace is roughly comparable to the box those shoes come in. That compact footprint gives manufacturers much more flexibility when designing truck campers, teardrops, small travel trailers, and overland rigs. VarioHeat also offers the same emphasis on low noise and efficiency that characterizes the broader Truma lineup. For certain direct-discharge furnace applications, Truma is also exploring VarioHeat as a retrofit option. Alde Hydronic Heat: A Completely Different Heating Experience Of all the systems we’ve used recently, Alde may provide the most distinctive experience. Unlike a forced-air furnace, Alde uses hydronic heating. A glycol solution circulates through the system and heats radiators located around the RV. Instead of blasting hot air through ducts, the system creates convection currents that gradually and evenly warm the interior. The result is an entirely different kind of heat. It feels more even. It feels less dry. It is incredibly quiet. And there is no traditional furnace blowing dust, pet hair, or other particles around the RV. After using Alde in our nüCamp TAB campers, we understand why European RV owners have embraced this type of system for years. Why We Love Having the Alde in Our TAB Jeremy describes the Alde almost like a little magic machine. The first time you turn it on, you may find yourself wondering whether anything is happening. There’s no loud furnace roar. There’s no sudden rush of air. Then several minutes later, you realize the entire interior is becoming warm. Another benefit we appreciate is the ability to use electric heat at a campground with hookups. That means we can maintain the interior temperature without burning through propane. The latest Alde 3030 Plus can also incorporate a continuous hot-water feature through a plate heat exchanger. For cold-weather campers, it is an exceptionally comfortable system. Truma Aventa: Quiet Rooftop Air Conditioning Heating isn’t the only place where Truma focuses on noise. The company currently offers the Aventa rooftop air conditioner in North America. It is available in both 13,500 BTU and 15,000 BTU versions, and newer models incorporate heat-pump functionality. The Aventa is designed to be: Low profile Energy efficient Quiet inside the RV Remarkably quiet outside the RV That last point is especially interesting. European campsites tend to place RVs closer together, so engineers think not only about what an appliance sounds like inside your camper but also about what your neighbor hears outside. That cultural difference influenced the product design. And once you start noticing noisy campground air conditioners, it’s difficult to stop noticing them. Truma Saphir: Moving the Air Conditioner Off the Roof The Truma Saphir takes an entirely different approach to air conditioning. Instead of mounting the AC on the roof, the Saphir is installed inside the RV, typically beneath a bed, dinette, bench, or floor area. Ductwork then distributes the conditioned air throughout the camper. That offers several advantages. For a teardrop like a TAB, putting a bulky air conditioner on the curved roof can be awkward. An interior-mounted system preserves the exterior profile. It can also free up valuable roof space for solar panels. And as more people begin towing with EVs or looking for better aerodynamics, keeping equipment off the roof may become even more valuable. The Saphir also provides heat-pump functionality in addition to air conditioning. Jeremy has been using the Saphir this summer in the TAB 360 CS and has been extremely impressed with its performance. Which Truma Products Can Be Retrofitted? This was one of the most practical parts of our conversation with Mark. Not every Truma product can simply replace an appliance in your existing RV. Here is the basic breakdown: AquaGo: Yes. Specifically designed to replace many standard RV water heaters. Aventa: Sometimes. Roof dimensions, vents, solar panels, and other equipment have to be evaluated first. VarioHeat: Possible in certain applications, particularly direct-discharge furnace installations. Combi: Generally OEM installation only. Alde: OEM installation only. Saphir: Generally not offered as a retrofit because of the extensive interior ducting required. The Combi and Alde systems integrate multiple utilities and components throughout the RV, which makes retrofitting them far more complicated than replacing a single water heater. Why Small RVs and Overlanding Are Such a Natural Fit Truma’s European heritage increasingly looks like an advantage in the North American market. Class B vans continue to be popular. Truck campers are attracting new attention. Overlanding companies continue to introduce smaller, more rugged campers. Many of those customers want exactly what Truma has spent decades designing: Compact equipment Low fuel consumption Low electrical demand Quiet operation Strong reliability Equipment capable of handling extended time away from hookups Mark said truck campers have become one of Truma’s growing segments. Overland manufacturers are also increasingly incorporating Truma systems as they move from small garage operations into larger-scale production. The “Truma On Board” Symbol Is Worth Noticing We spend a lot of time telling RV shoppers not to judge a camper solely by what they can see during a 15-minute walkthrough. The shiny countertops and big television are easy to notice. The quality of the hidden systems is harder to evaluate. That is why we think there is real value in looking at the brands a manufacturer c…

    Full show notes at the publisher

    An Epic RV Trip to Western Canada and the Canadian Rockies PT. 1 (Calgary and Banff) Aug 20, 2026
    Show notes

    This is a guest post by Gretchen Holcombe from Boxy Colonial on the Road. It is part one of a three-part series of podcasts about her family’s epic RV trip to Western Canada and the Canadian Rockies. In this first entry Gretchen take a close look at Calgary and Banff.

    Our family had been dreaming of a Canadian Rockies RV road trip for years. But we’d done several great trips to Rocky Mountain destinations in the US—Grand Teton, Glacier National Park, Rocky Mountain National Park—and we wondered if the Canadian side of things would just feel like more of the same. After spending a couple of weeks exploring the region over the summer, we can definitively say that the Canadian Rockies are at least as impressive as their counterparts to the south and that they show off in completely different ways and are well worth the trip no matter how many gorgeous mountains you’ve been lucky enough to visit in the past.

    Our Canadian Rockies adventure took us to four different national parks and included stays in four different campgrounds. In this post I’m talking about our first two stops: at the Okotoks Lions Campground outside of Calgary and at Bow Valley Provincial Park in Canmore, a few minutes away from Banff National Park.

    Calgary
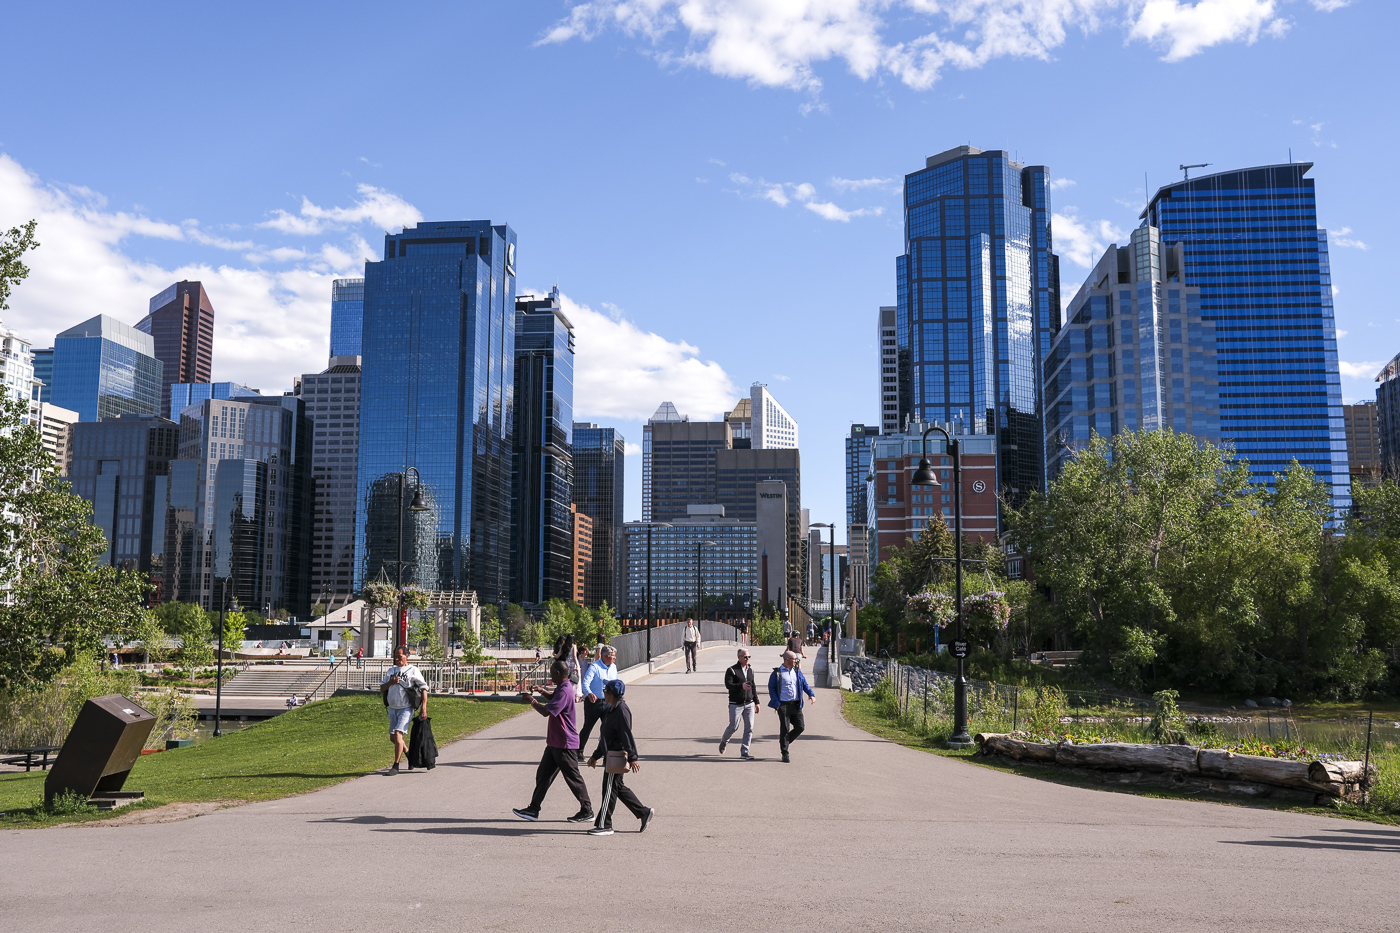
    Calgary, Alberta is an easy 80 mile drive from Banff and home to the closest major airport, so it’s a very common first and last stop for people who fly in to visit the Rockies. But it’s also a vibrant city in its own right with a ton to offer, so I recommend spending some time exploring here before rushing off to the mountains if you can.

    Okotoks Lions Campground
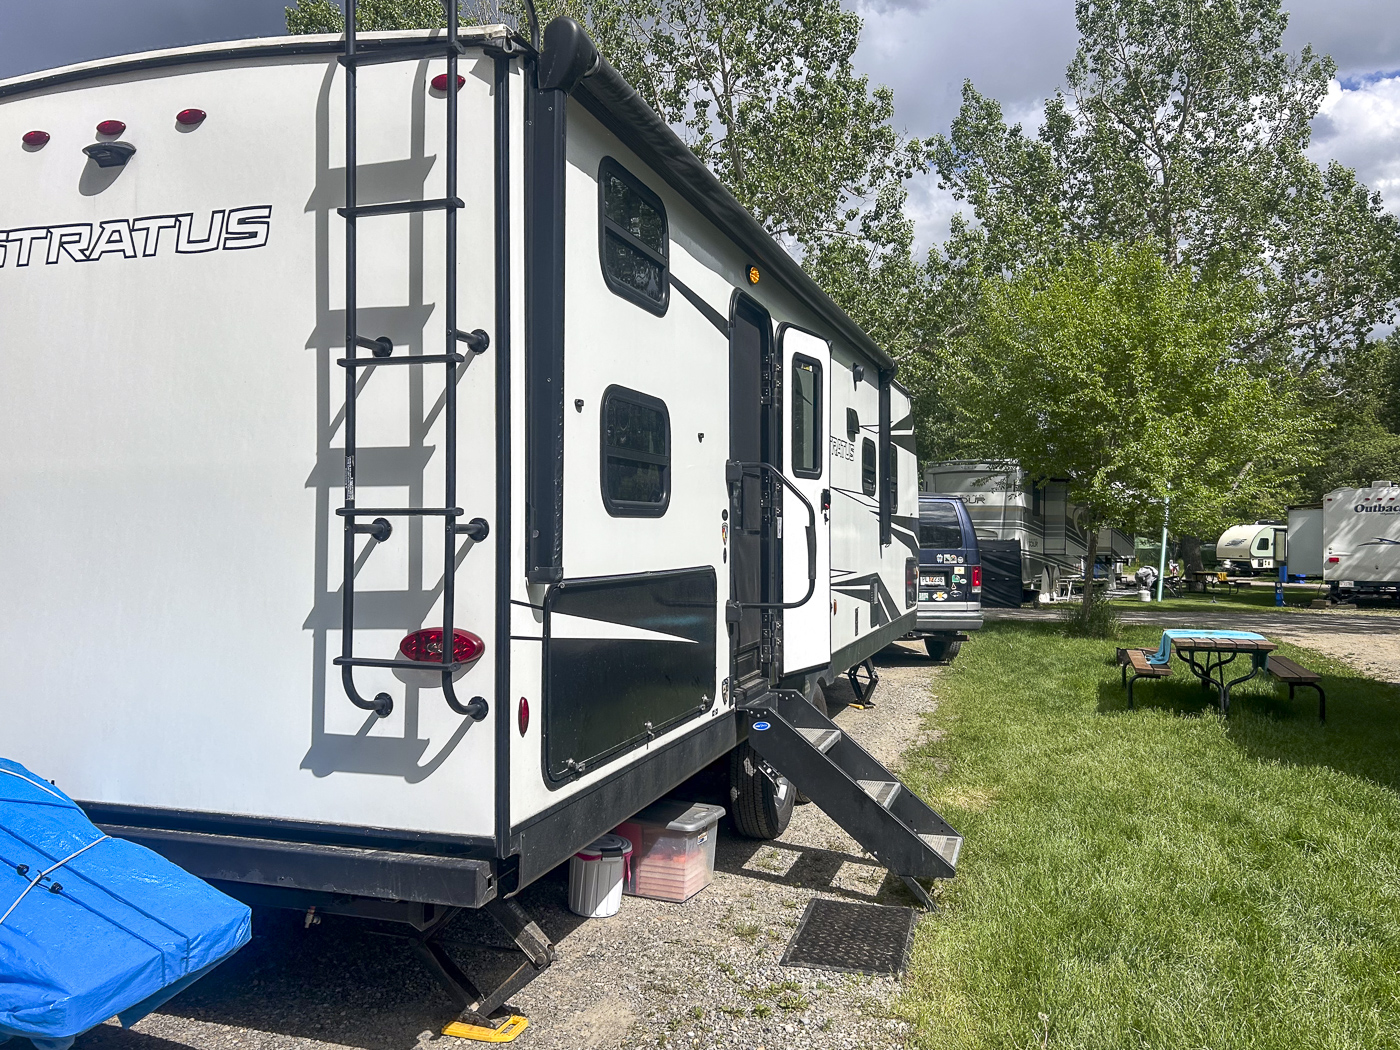
    Okotoks Lions Campground

    The Okotoks Lions Campground was our base camp for exploring the city. We were pleasantly surprised by how much we enjoyed spending time in the small suburban city of Okotoks as well; the campground is right on the Sheep River and is an easy pleasant walk along a paved path from the charming downtown area with shopping and restaurants. Everything else you might need as far as groceries and other services is a short drive away. The campground offers 55 spacious, well-maintained full hook-up sites for only $50 Canadian/night. There’s a small camp store, a clean and modern bathhouse (with pay showers), and a huge community playground right at the entrance to the campground. Wi-fi is available for a small daily fee, and we found it very speedy and reliable.

    Downtown Okotoks is packed with adorable coffee shops, bakeries, breweries, and shops. A couple of our favorites were 94 Take the Cake, with its quirky black and white decor and beautifully decorated baked goods, and Brew and Scoop Co. ice cream and coffee shop, with a great outdoor seating area in the heart of town.

    Things to do in Calgary
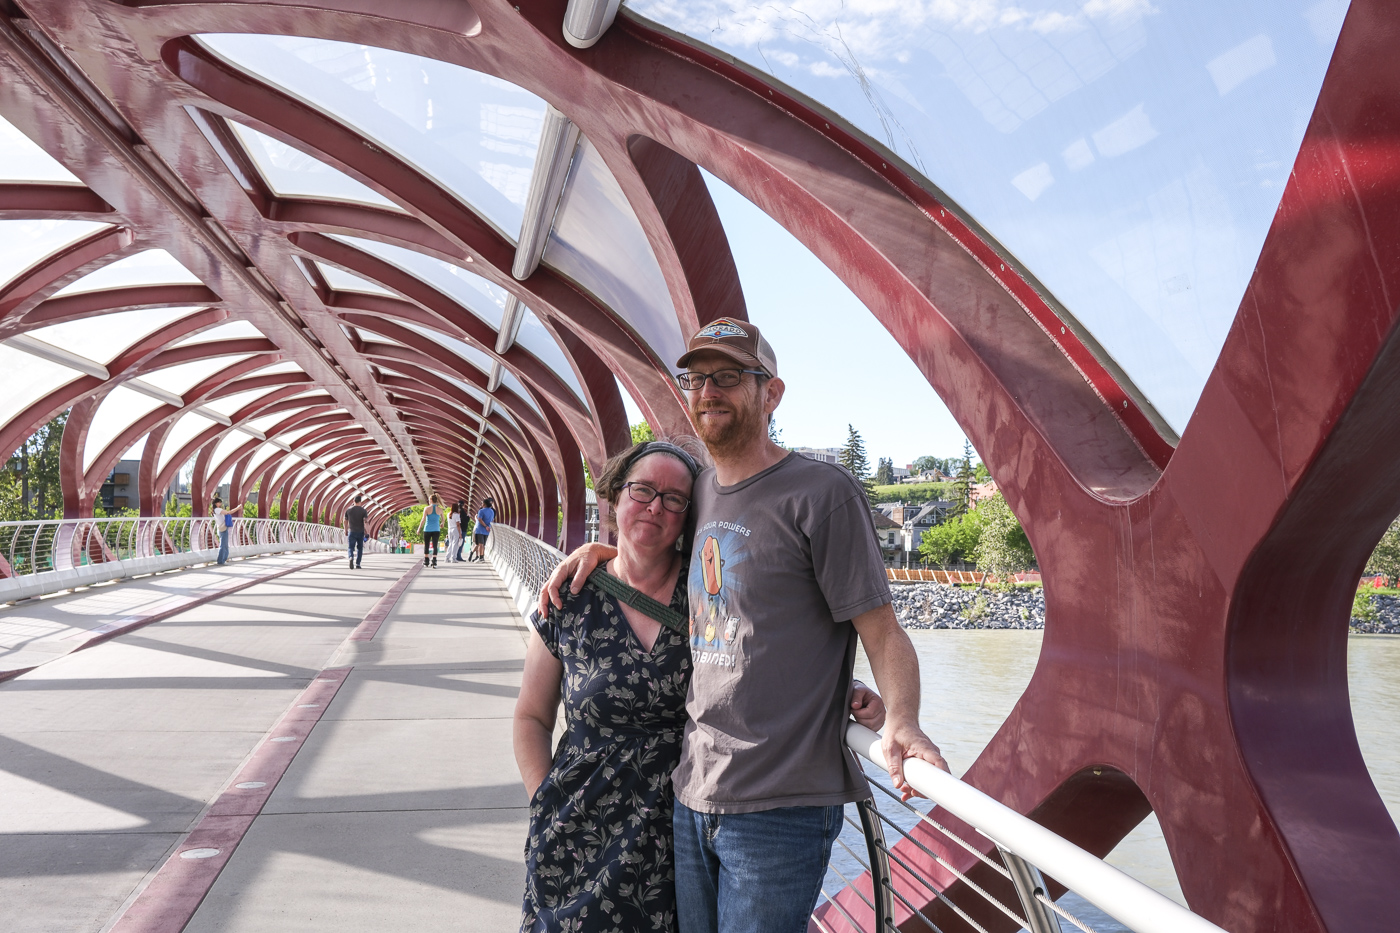
    The Wilder Institute’s Calgary Zoo might be our favorite zoo we’ve ever visited, largely on the strength of its very playful polar bears. It’s Canada’s most visited zoo and has over 1000 animal residents; in addition to the polar bears, we were especially fond of the penguin and grizzly bear habitats. If you happen to be there on a Sunday, the Sunday Safari buffet brunch is an excellent value; my husband and son still reminisce fondly about the chocolate fountain.
    I came across a self-guided walking tour on the Fearless Female Travel blog, and we used this as our guide to exploring some of Calgary on foot. The tour took us through the stunning public library, past some fun public art, and finally to the lovely urban oasis of Prince’s Island Park and the iconic Peace Bridge. From there we made our way to the hip neighborhood of Kensington and stopped in for snacks and games at the Hexagon Board Game Cafe.

    Canmore and Banff National Park

    Bow River Campground
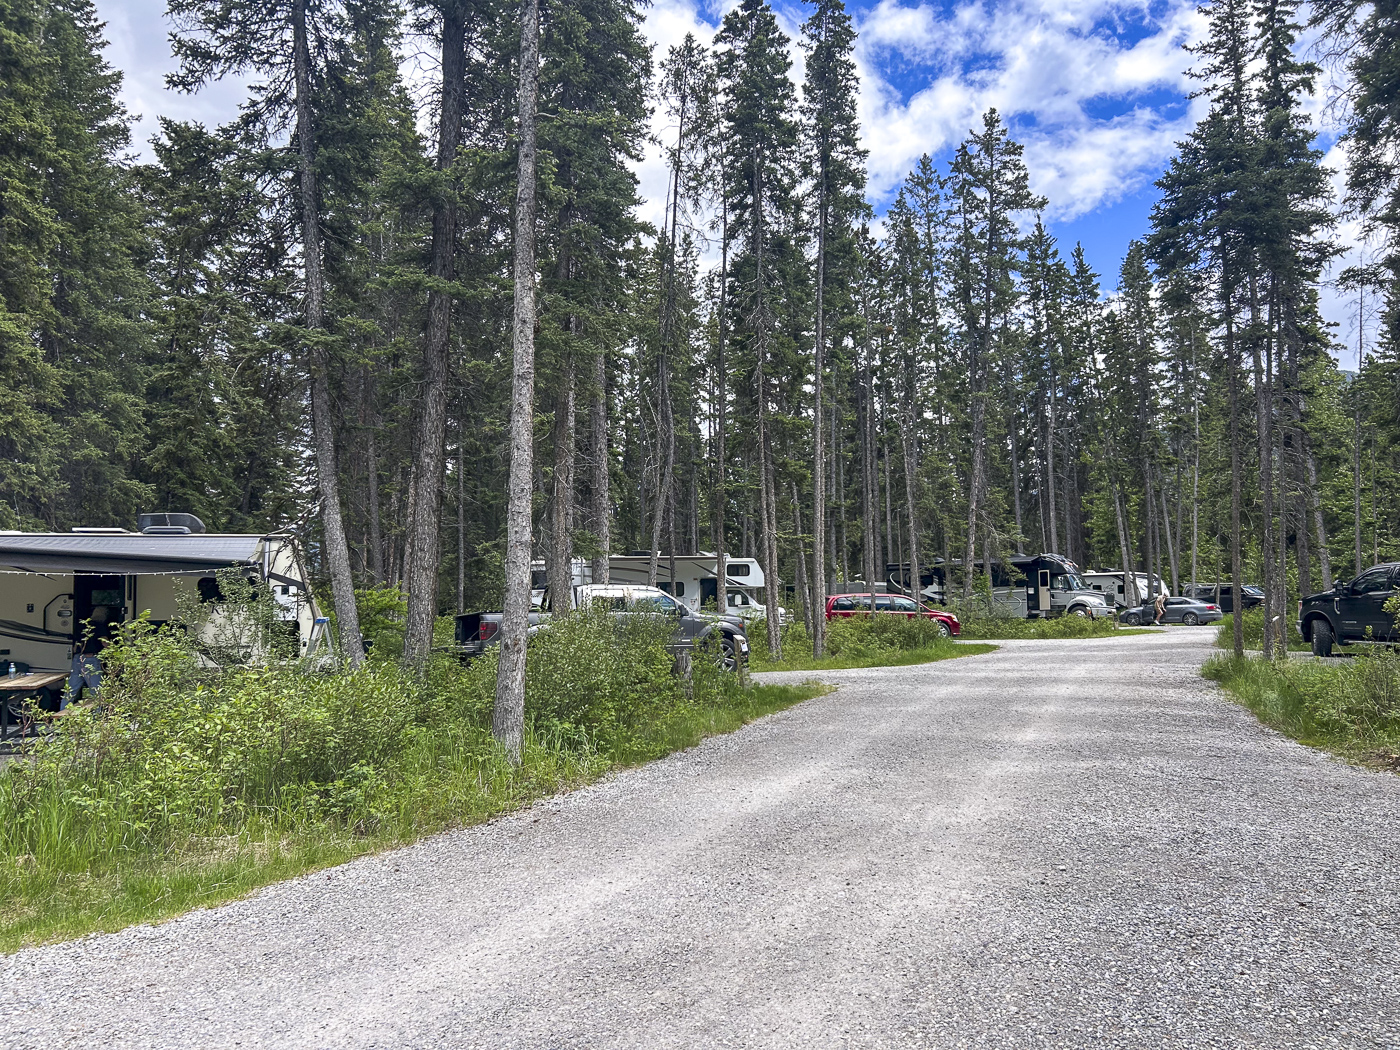
    Bow River Campground

    To be honest, Bow River Campground was not our first choice for this leg of our trip. We’d planned to stay at Tunnel Mountain Trailer Court right near the town of Banff. However, reservations proved even more competitive than I had anticipated, and we found ourselves shut out even though I was online the second reservations opened up. Luckily, Bow River is a terrific alternative just down the road in Canmore. A lot of people actually prefer staying in Canmore when visiting Banff National Park because it’s a little more laid back and less congested.
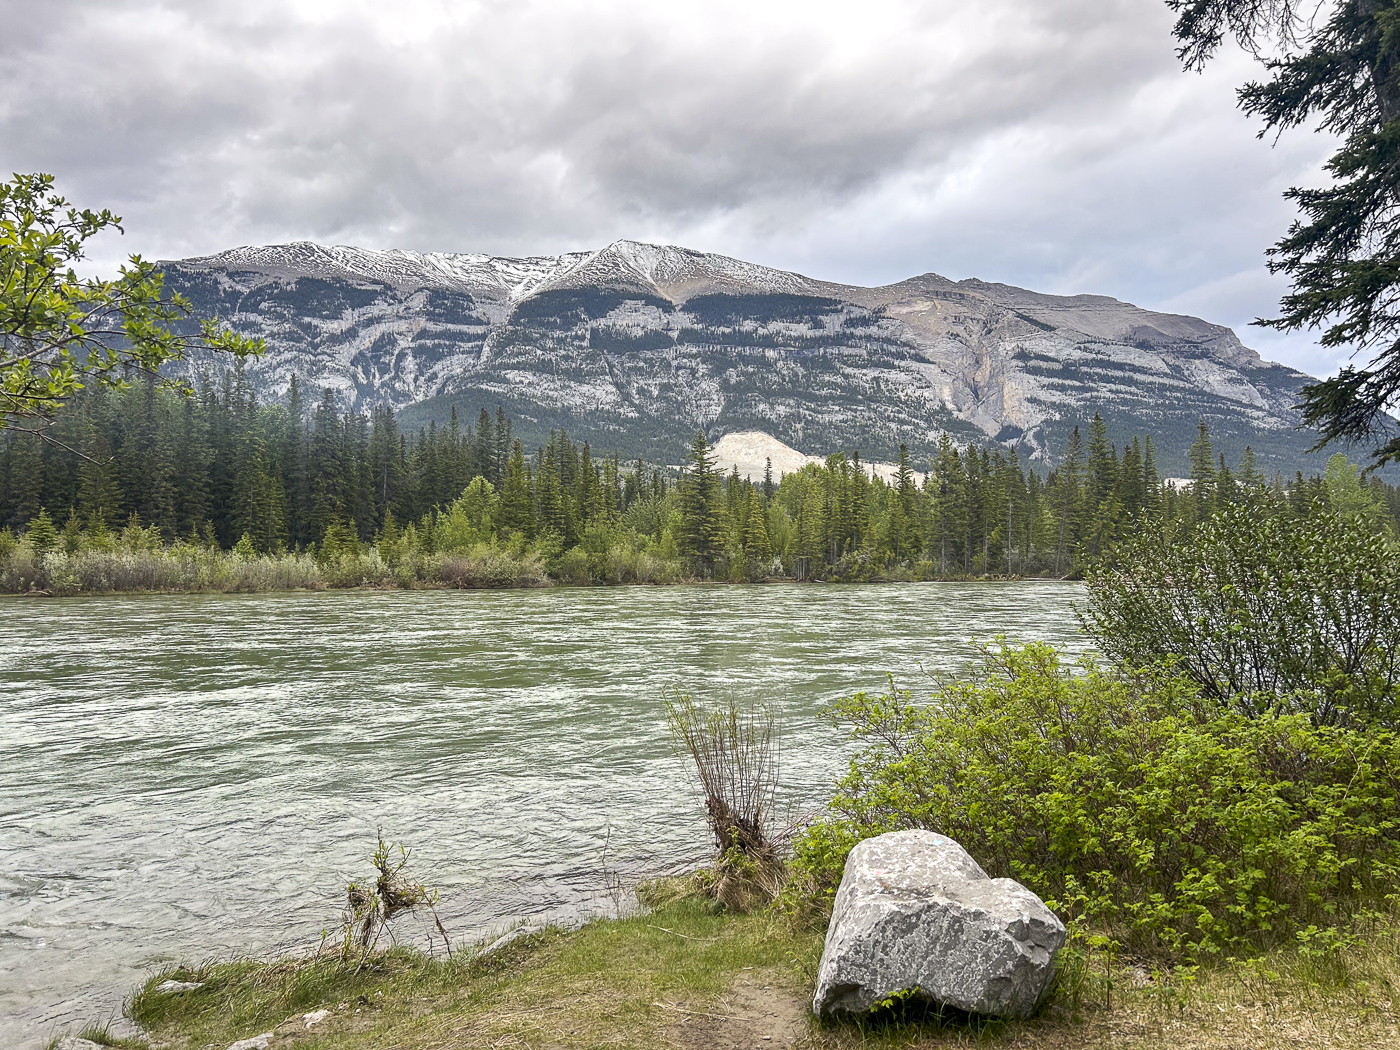
    Bow River Campground

    As the name suggests, Bow River Campground is right along the Bow River and about a 10 minute drive from Canmore or a 25 minute drive from Banff. There are 56 water/electric sites here for $47 CAD/night. The sites are wooded and private. A number of them back right up to the river. There’s one bathhouse at the entrance to the campground with pay showers, along with vault toilets inside the camping loops. Roads here are fairly narrow and might be tight for larger rigs, although we did see a number of larger motorhomes and fifth wheels that managed okay. Note that you’re very much in bear country here and need to maintain a clean campsite (no food left out; put all cooking equipment away in a vehicle when you’re not using it).
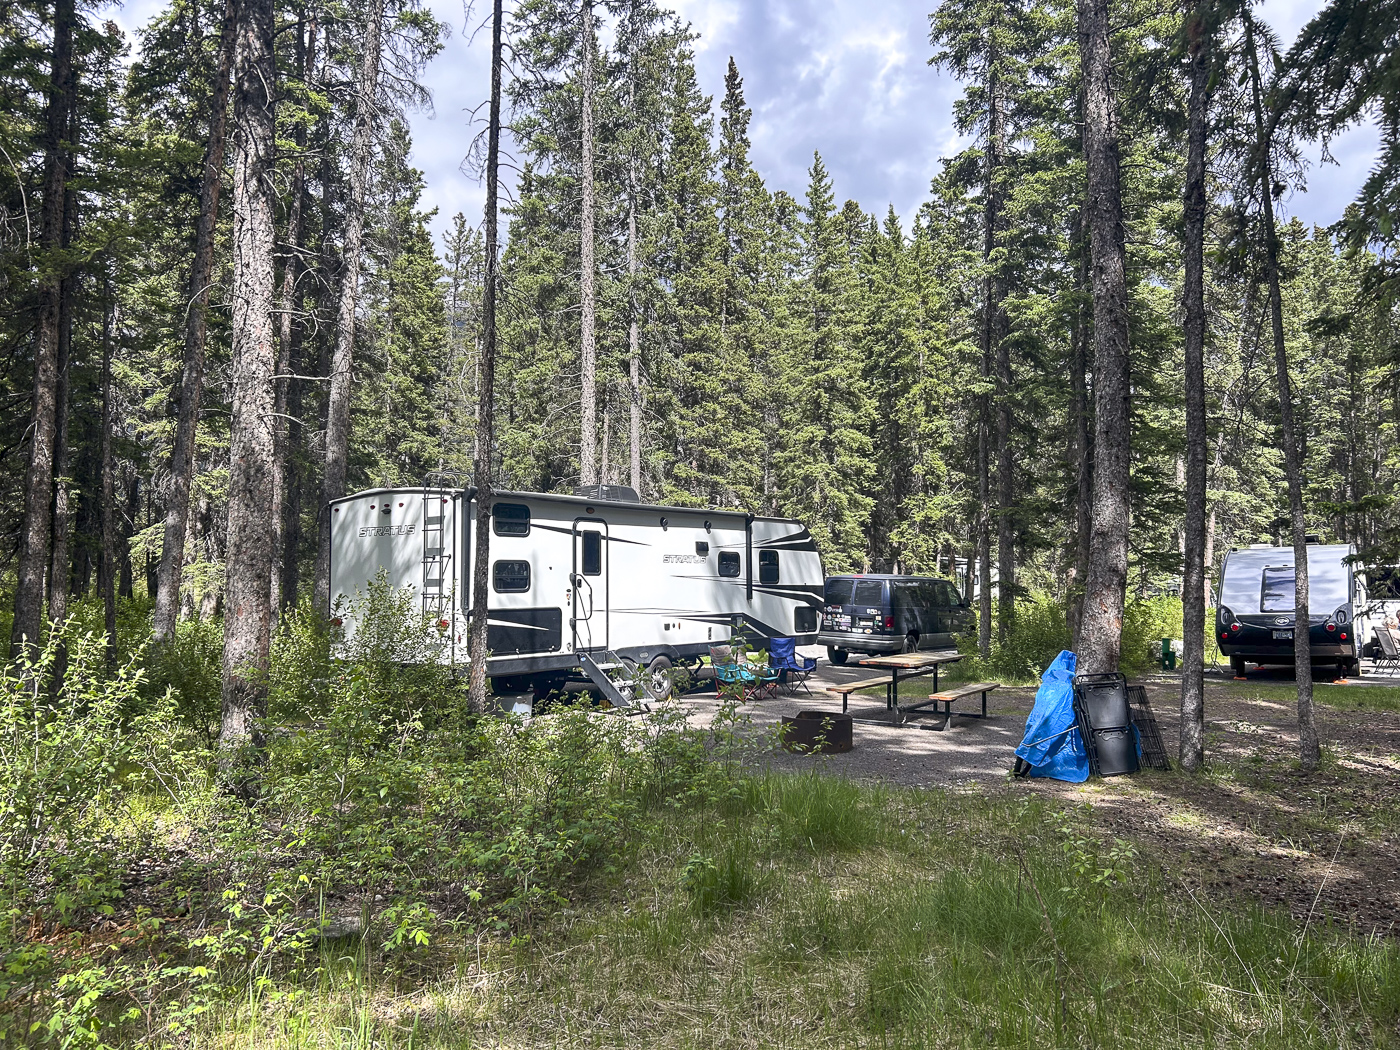
    Bow River Campground

    One inconvenient quirk here is that there’s no on-site dump station. There’s one in the provincial park’s other campground, Bow Valley, but that’s 20 minutes down the road to the east. We were heading west when we left, so we used the public dump station in the town of Banff instead. Also note that you’ll need to pay for a Kananaskis Conservation Pass in addition to (and separate from) the camping fees. It’s $15/day or $90/year, so do some math and figure out which makes sense based on how long you’re staying. You can buy the pass online, but cell service is spotty in the campground so it’s probably best to do it before you get there.

    Canmore

    Canmore is a great little mountain town with a downtown full of shopping and restaurants and amazing views in every direction. We enjoyed dinner and local beers at the Grizzly Paw Pub and then took an after dinner stroll along the Policeman’s Creek Boardwalk. This is an easy walk right in town and served as a great introduction to the kind of stunning mountain scenery we were going to be immersed in for the next couple of weeks.

    Banff National Park
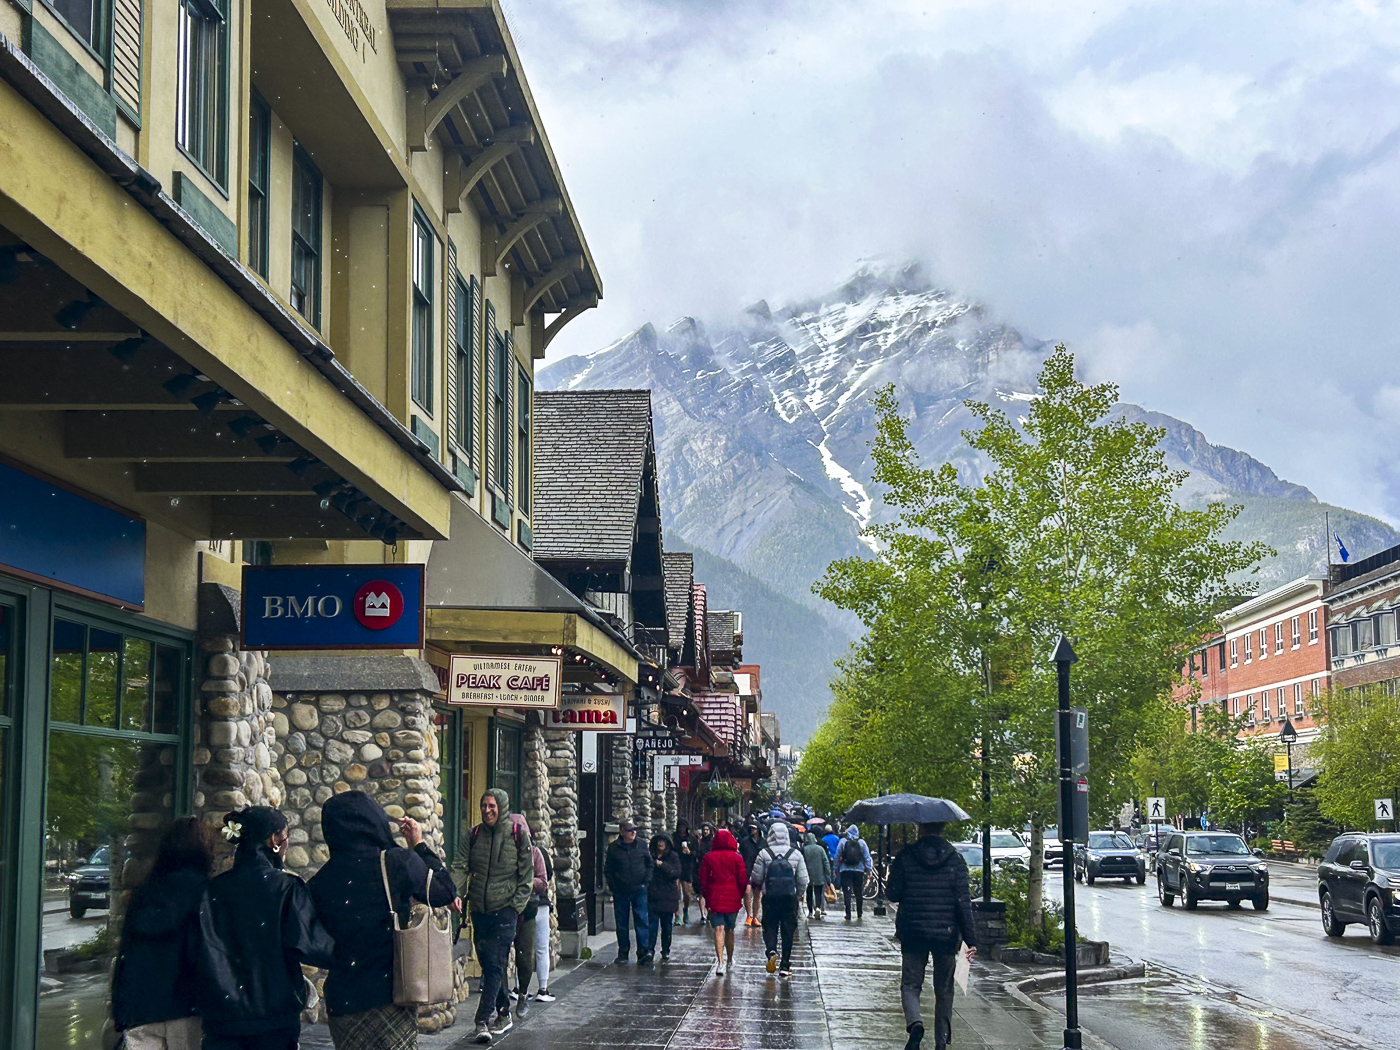
    Town of Banff: This is where you go for all your souvenir shopping and for great restaurant options, but be prepared to fight the crowds! Parking can be tough and expensive, but if you’re able to walk a few blocks you can park for free in the large lot at the train station at the edge of town. We were very impressed with the pizza and beer as well as the atmosphere at Three Bears Brewery and Restaurant. The Cascade of Time Garden is a lovely little spot right at the end of the main strip. And just outside of town (a nice walk or a quick drive) you can visit the Bow Falls viewpoint for views of both the waterfall and the Fairmont Banff Springs hotel.
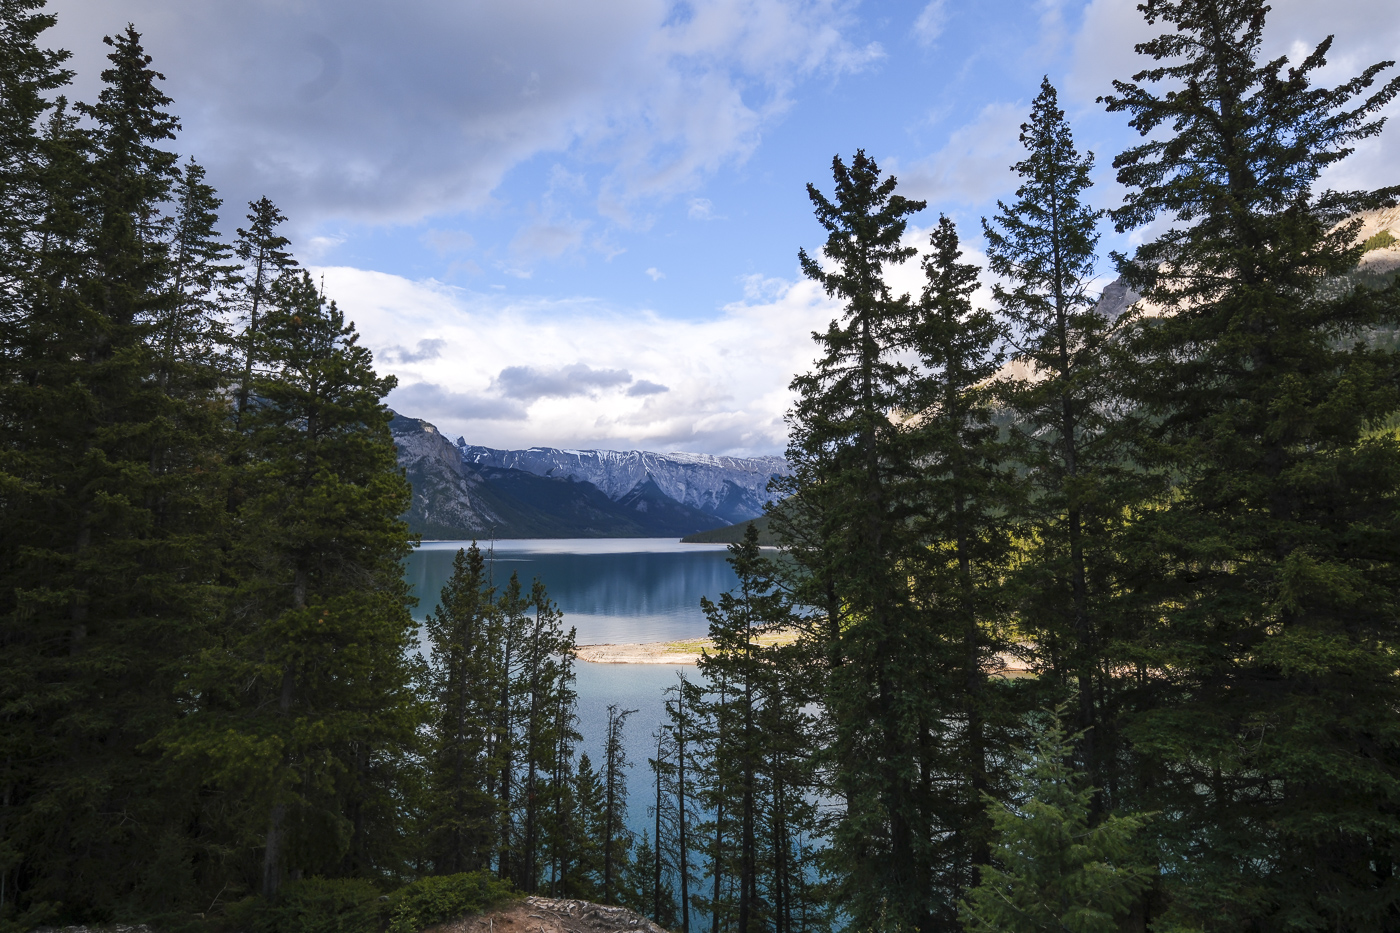
    Lake Minnewanka Loop: definitely take some time to complete this scenic drive right near the townsite. It’s just 24 km and offers tons of great stops at beautiful mountain lakes, hikes, and opportunities for wildlife spotting. We stopped to hike the 3 km Johnson Lake Trail and then checked out Two Jack Lake and Lake Minnewanka itself.
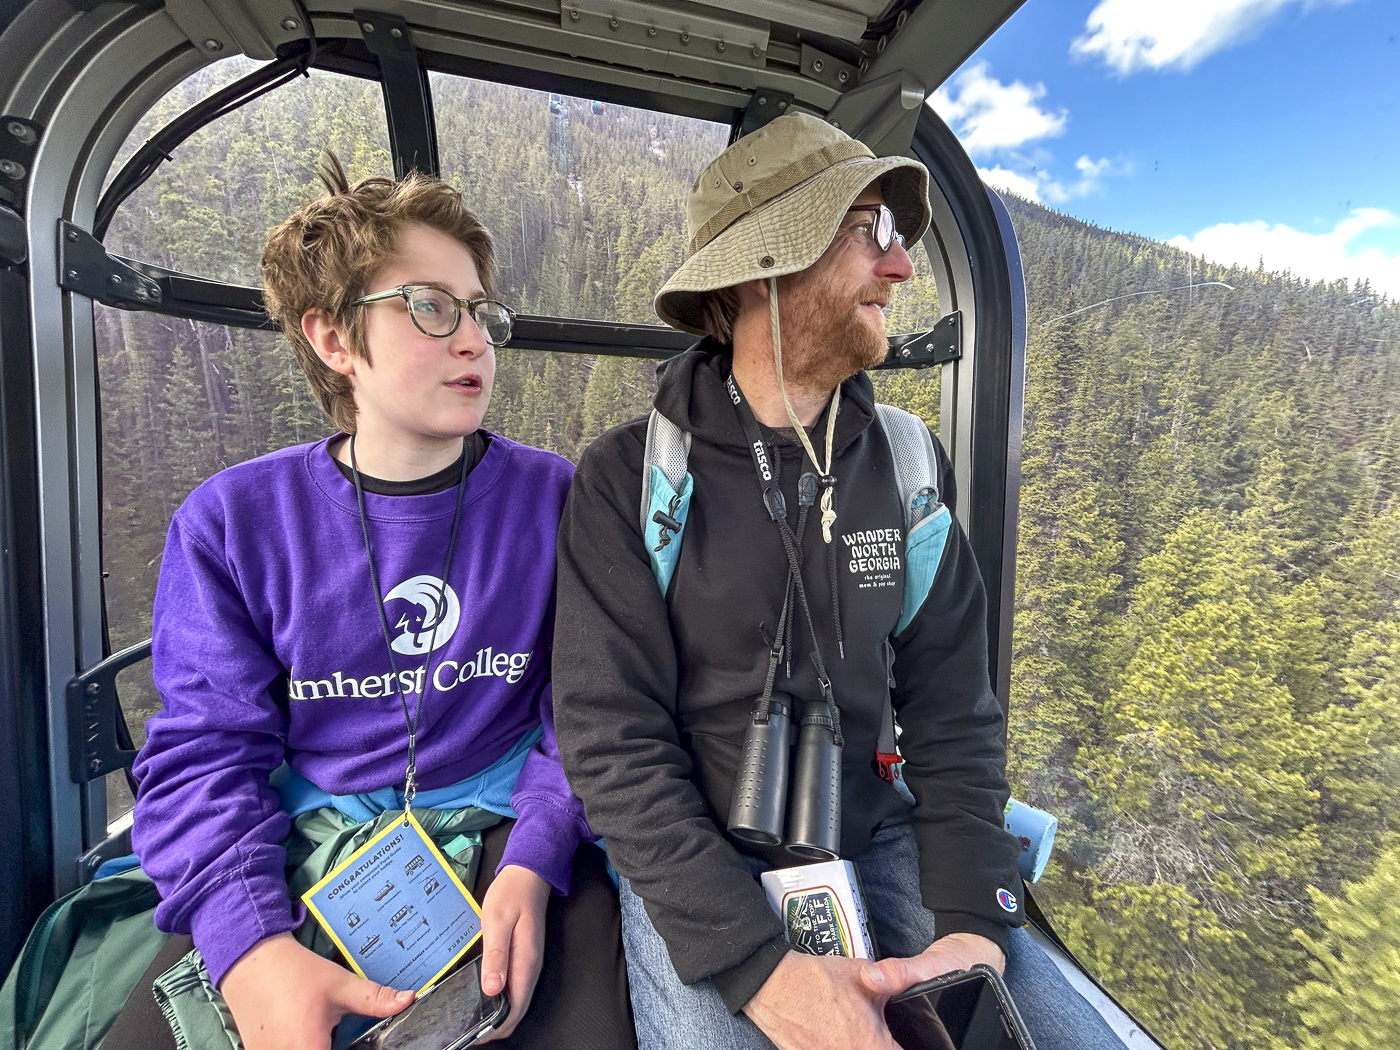
    Banff Gondola: the Banff Gondola ride up to the top of Sulphur Mountain is one of those super expensive, super touristy things where you wonder if it can possibly worth what you have to spend to do it. We reluctantly shelled out the money (they use dynamic pricing, but expect to pay around $90-100 CAD/adult) and…we loved it! We spent a lot of time looking at mountains from below during our time in the Rockies, so this was a great chance to get up high for some different perspectives.
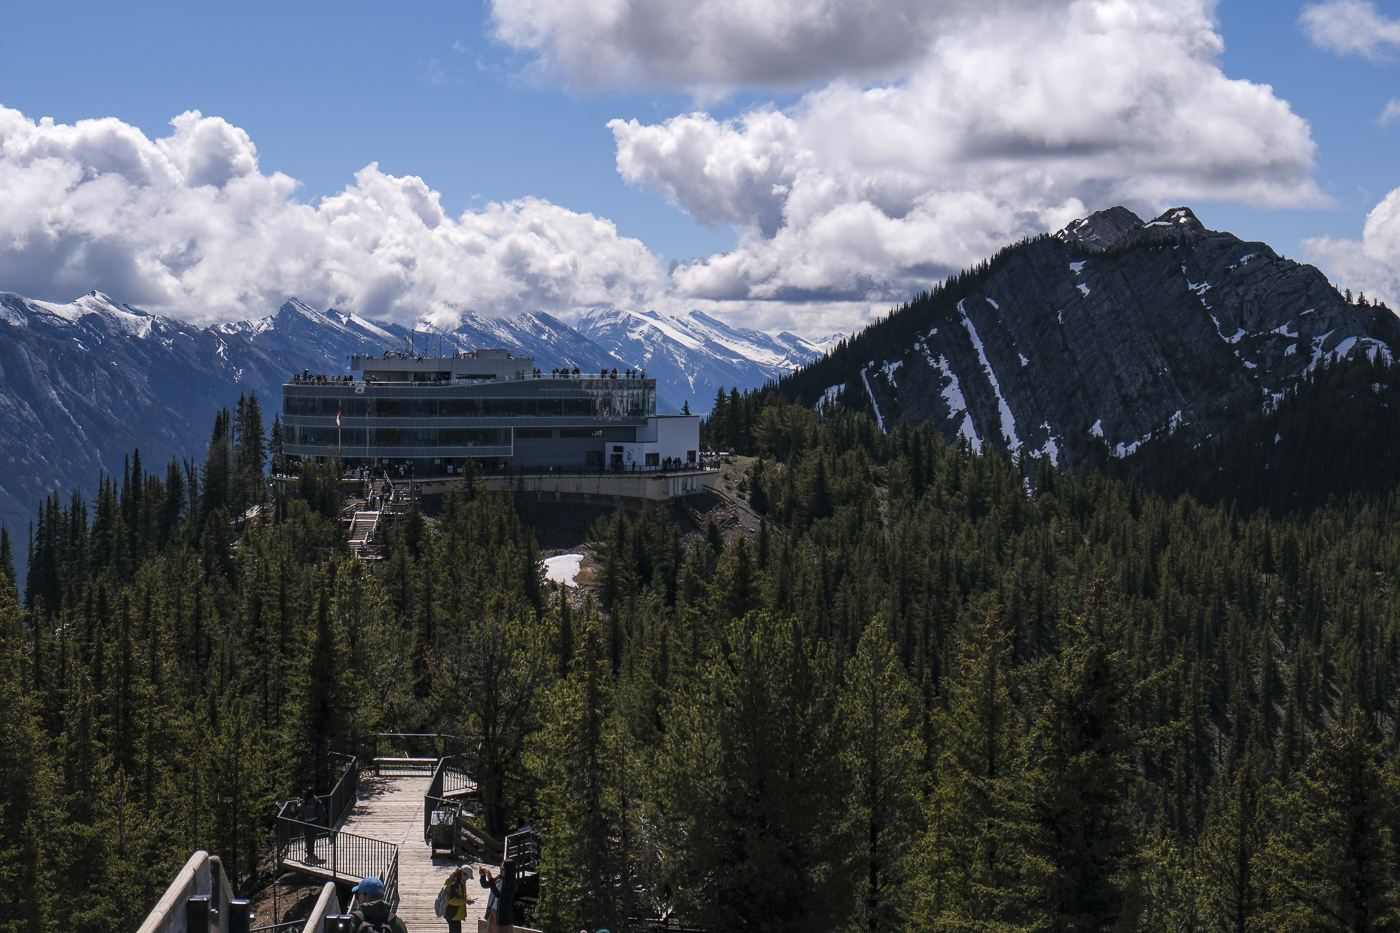
    We saved a bit of money by doing the “Family Experience” which allows kids to go up for free during the first two hours that they’re open. You have to reserve both the time to go up and to come back down when you buy your tickets; I’d recommend leaving yourself plenty of time up at the top to feel like you’re getting the full experience. There’s an interpretive center with restaurants, a gift shop, a movie, and exhibit areas to check out. And you want to make sure you have time to take the boardwalk trail from the visitor center to the old weather station at Sanson’s Peak. And, of course, you’ll want plenty of time to take too many pictures of the mountain and town site views.
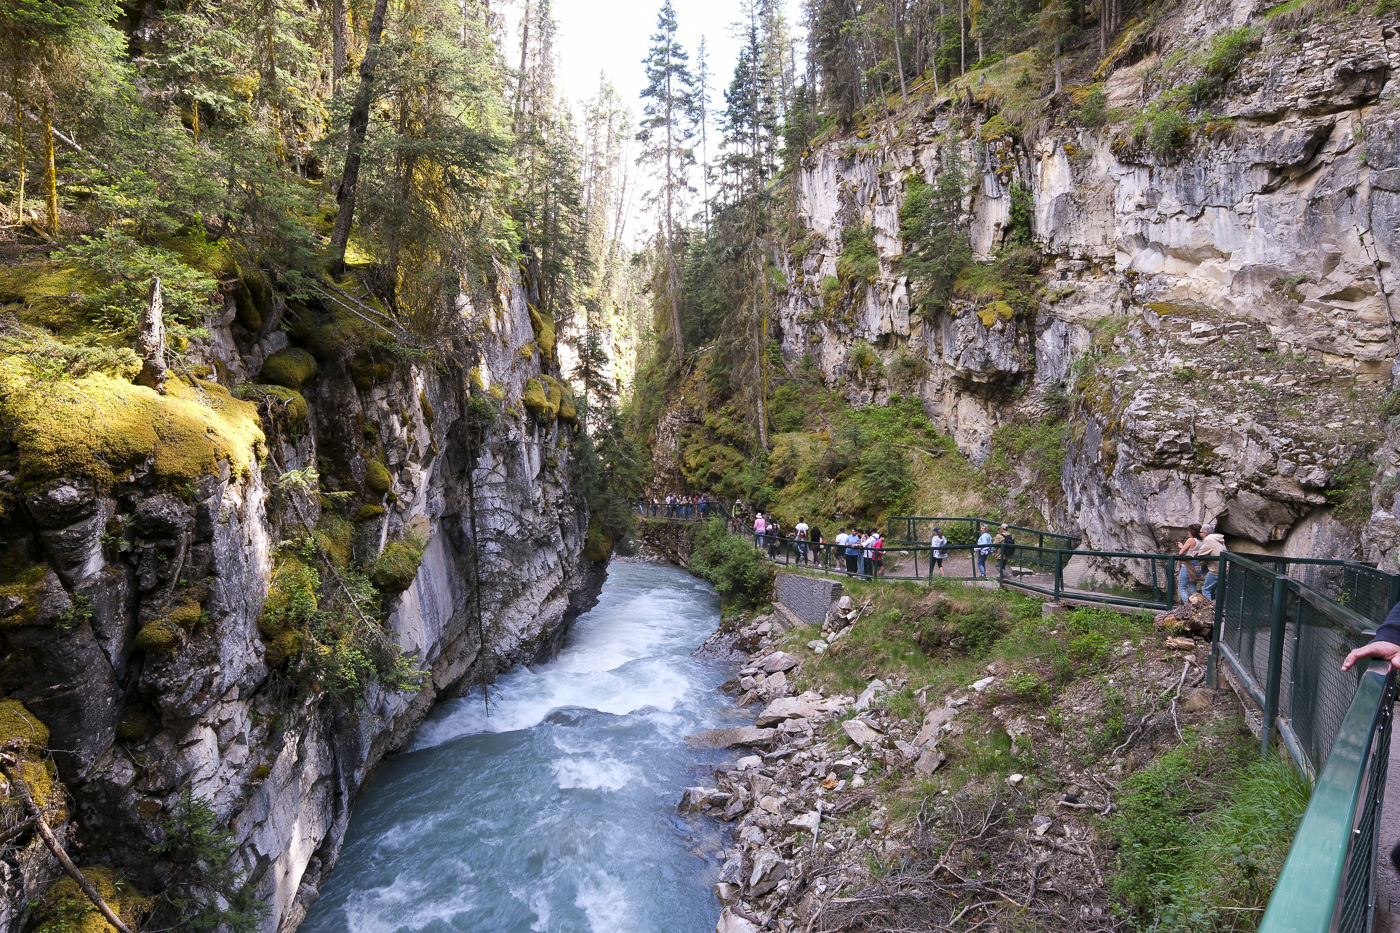
    Johnston Canyon: A system of suspended pathways and trails takes you through this rocky canyon over stunning blue water and past several waterfalls. We decided to hit Johnston Canyon later in the afternoon (around 3 or 4), in hopes of missing the midday crowds. This strategy worked for finding parking easily, but the trails themselves were still packed with people. For the best experience, try to get here very early in the morning or later on in the evening.

    Kootenay National Park
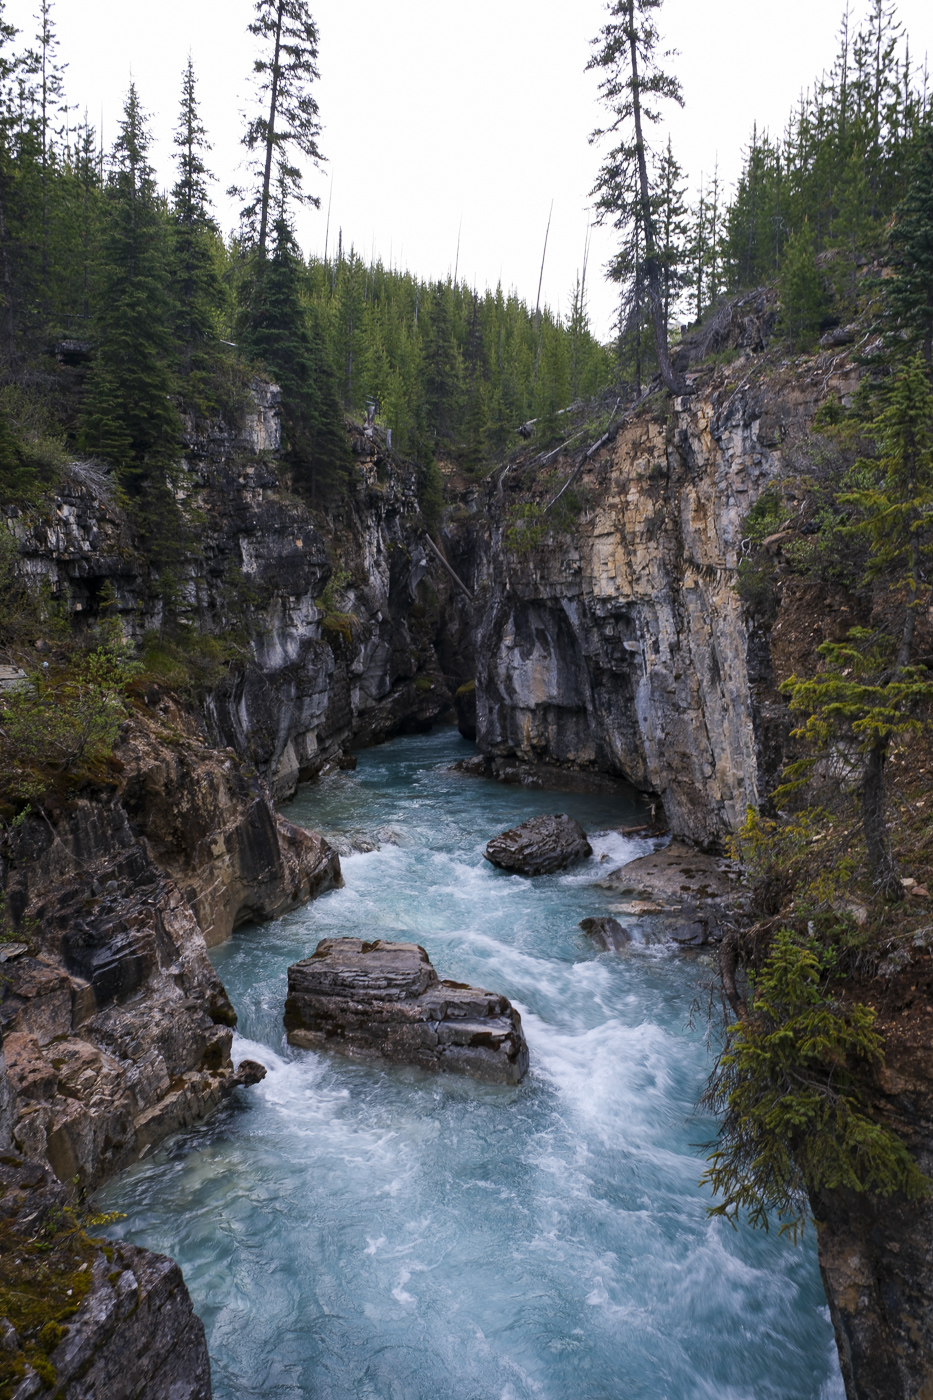
    When we were planning our trip, I was surprised to learn just how many national parks there are in the Canadian Rockies and that often where one ends another one begins. Banff, Jasper, Kootenay, and Yoho are all clustered together, with Glacier (the Canadian one), Mount Revelstoke, and Waterton Lakes not far away. Banff and Jasper tend to steal the spotlight, but the smaller parks have tons worth seeing, too, and very often can offer lower crowds just a short drive from the big name sites. We made the short and scenic drive to Kootenay one day to see Marble Canyon and the Paint Pots. Marble Canyon is just half an hour from the town of Banff, and it’s often billed as a less congested alternative to Johnston Canyon. It features the same deep rocky canyon and impossibly blue water, but the trail takes you uphill to take it in from several viewpoints instead of letting you walk in the canyon itself.

    A bit farther down the road is the Paint Pots trail. To be honest, while the trail itself is lovely, the paint pots were a little lackluster and resembled mud puddles more than an artist’s palette. Still, it’s a short, easy trail and worth a stop if you’re in the area for Marble Canyon. We didn’t make it any further into the park, but if you keep driving another hour you’ll hit the Radium Hot Springs, Kootenay’s big claim to fame.

    Planning a Trip to the Canadian Rockies
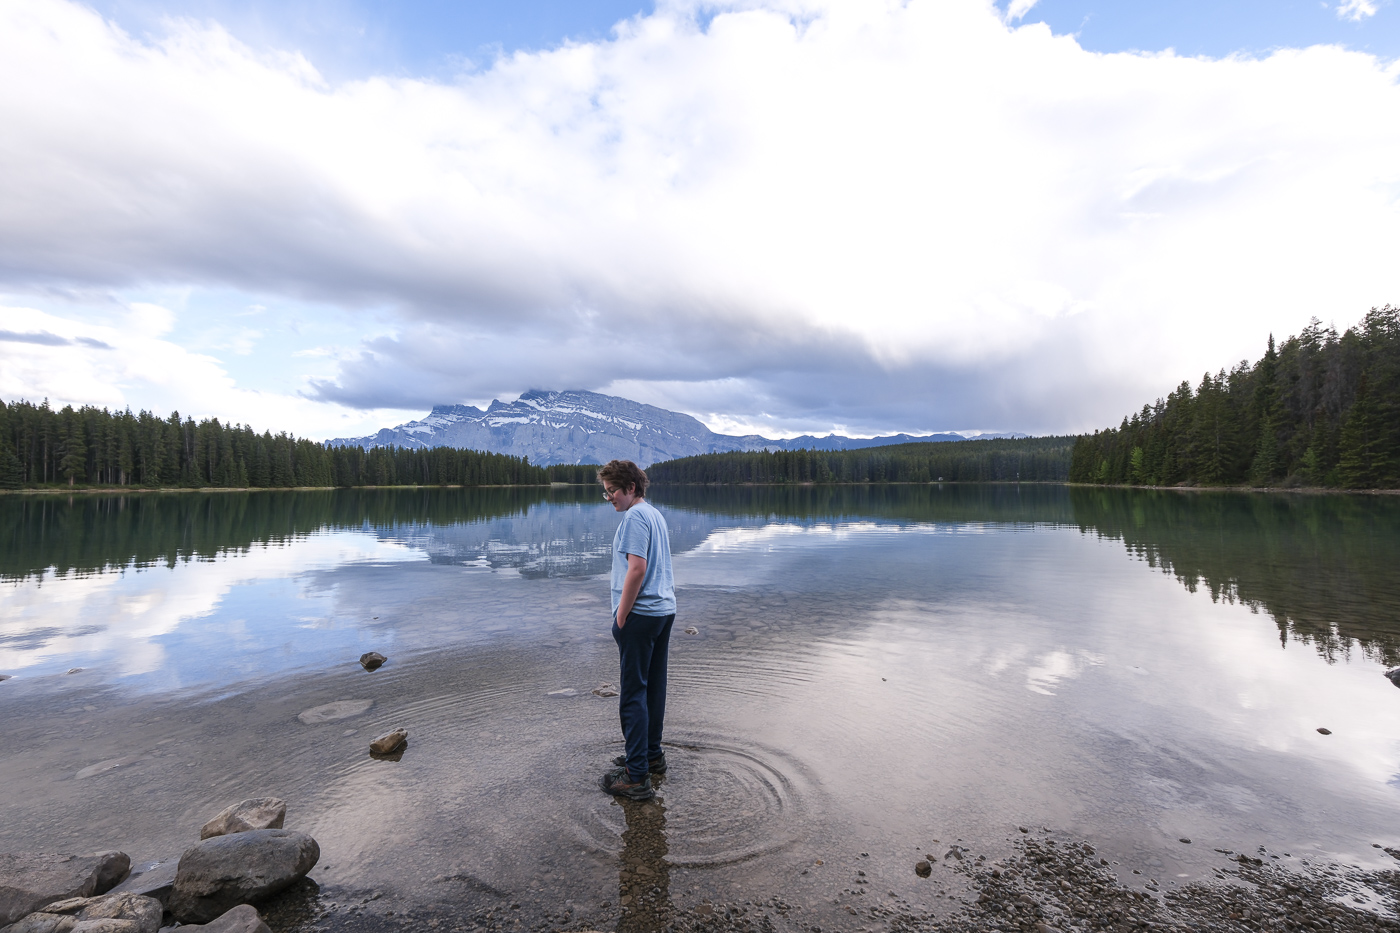
    If you’ve made it this far you’ve probably already picked up on the idea that the Canadian Rockies are busy. We were there in early-mid June, so not even the height of the season, and we already needed to plan carefully to avoid the worst of the crowds. This isn’t the kind of trip that invites spontaneity; you’ll need to book accommodations well in advance and be ready to arrive at major trails and attractions early in the morning or later in the evening before parking lots fill up and crowds build. At the national park campgrounds, reservations for the entire season open up on the same morning, and Parks Canada uses a queuing system for booking. There are lots of good blog posts and YouTube videos out there explaining the system; make sure you learn about it ahead of time and are ready to go as soon as reservations open up in late winter.

    After reading a lot of rave reviews online, we bought the Guide Along audio guide for the Canadian Rockies, and it was an awesome addition to our trip. You install the app on your phone, and it uses a GPS signal to trigger audio commentary as you drive. The narrator is wonderful and shares all kinds of information about the history, science, and culture of different sites. He also tells you which places are must stops and which are okay to skip if you don’t have time. We ended up buying more tours for every destination where one was available on our summer trip and we’ll be looking for more for future trips.

    The post An Epic RV Trip to Western Canada and the Canadian Rockies PT. 1 (Calgary and Banff) appeared first on The RV Atlas.


    1 2 3 8 Next

    Related Podcasts

    Tumble Science Podcast for Kids

    1

    Tumble Science Podcast for Kids Education for Kids
    The Longest Shortest Time: A Women’s Health Show for Everyone

    2

    The Longest Shortest Time: A Women’s Health Show for Everyone Government & Organizations
    Dream Big Podcast for Kids

    3

    Dream Big Podcast for Kids Education for Kids
    Brains On! Science podcast for kids

    4

    Brains On! Science podcast for kids Education for Kids
    The Purrrcast

    5

    The Purrrcast Kids & Family
    The Dog Trainer’s Quick and Dirty Tips for Teaching and Caring for Your Pet

    6

    The Dog Trainer’s Quick and Dirty Tips for Teaching and Caring for Your Pet Education
    footer-logo

    Contact Us

    Toll Free: 844-670-7747

    Links

    • Home
    • Top Charts
    • Networks
    • Apps
    • Independents Podcasts
    • Podcast Advertising
    • Podcast News
    • Contact Us
    • About Us
    • Analytics & Insights

    Stay Connected
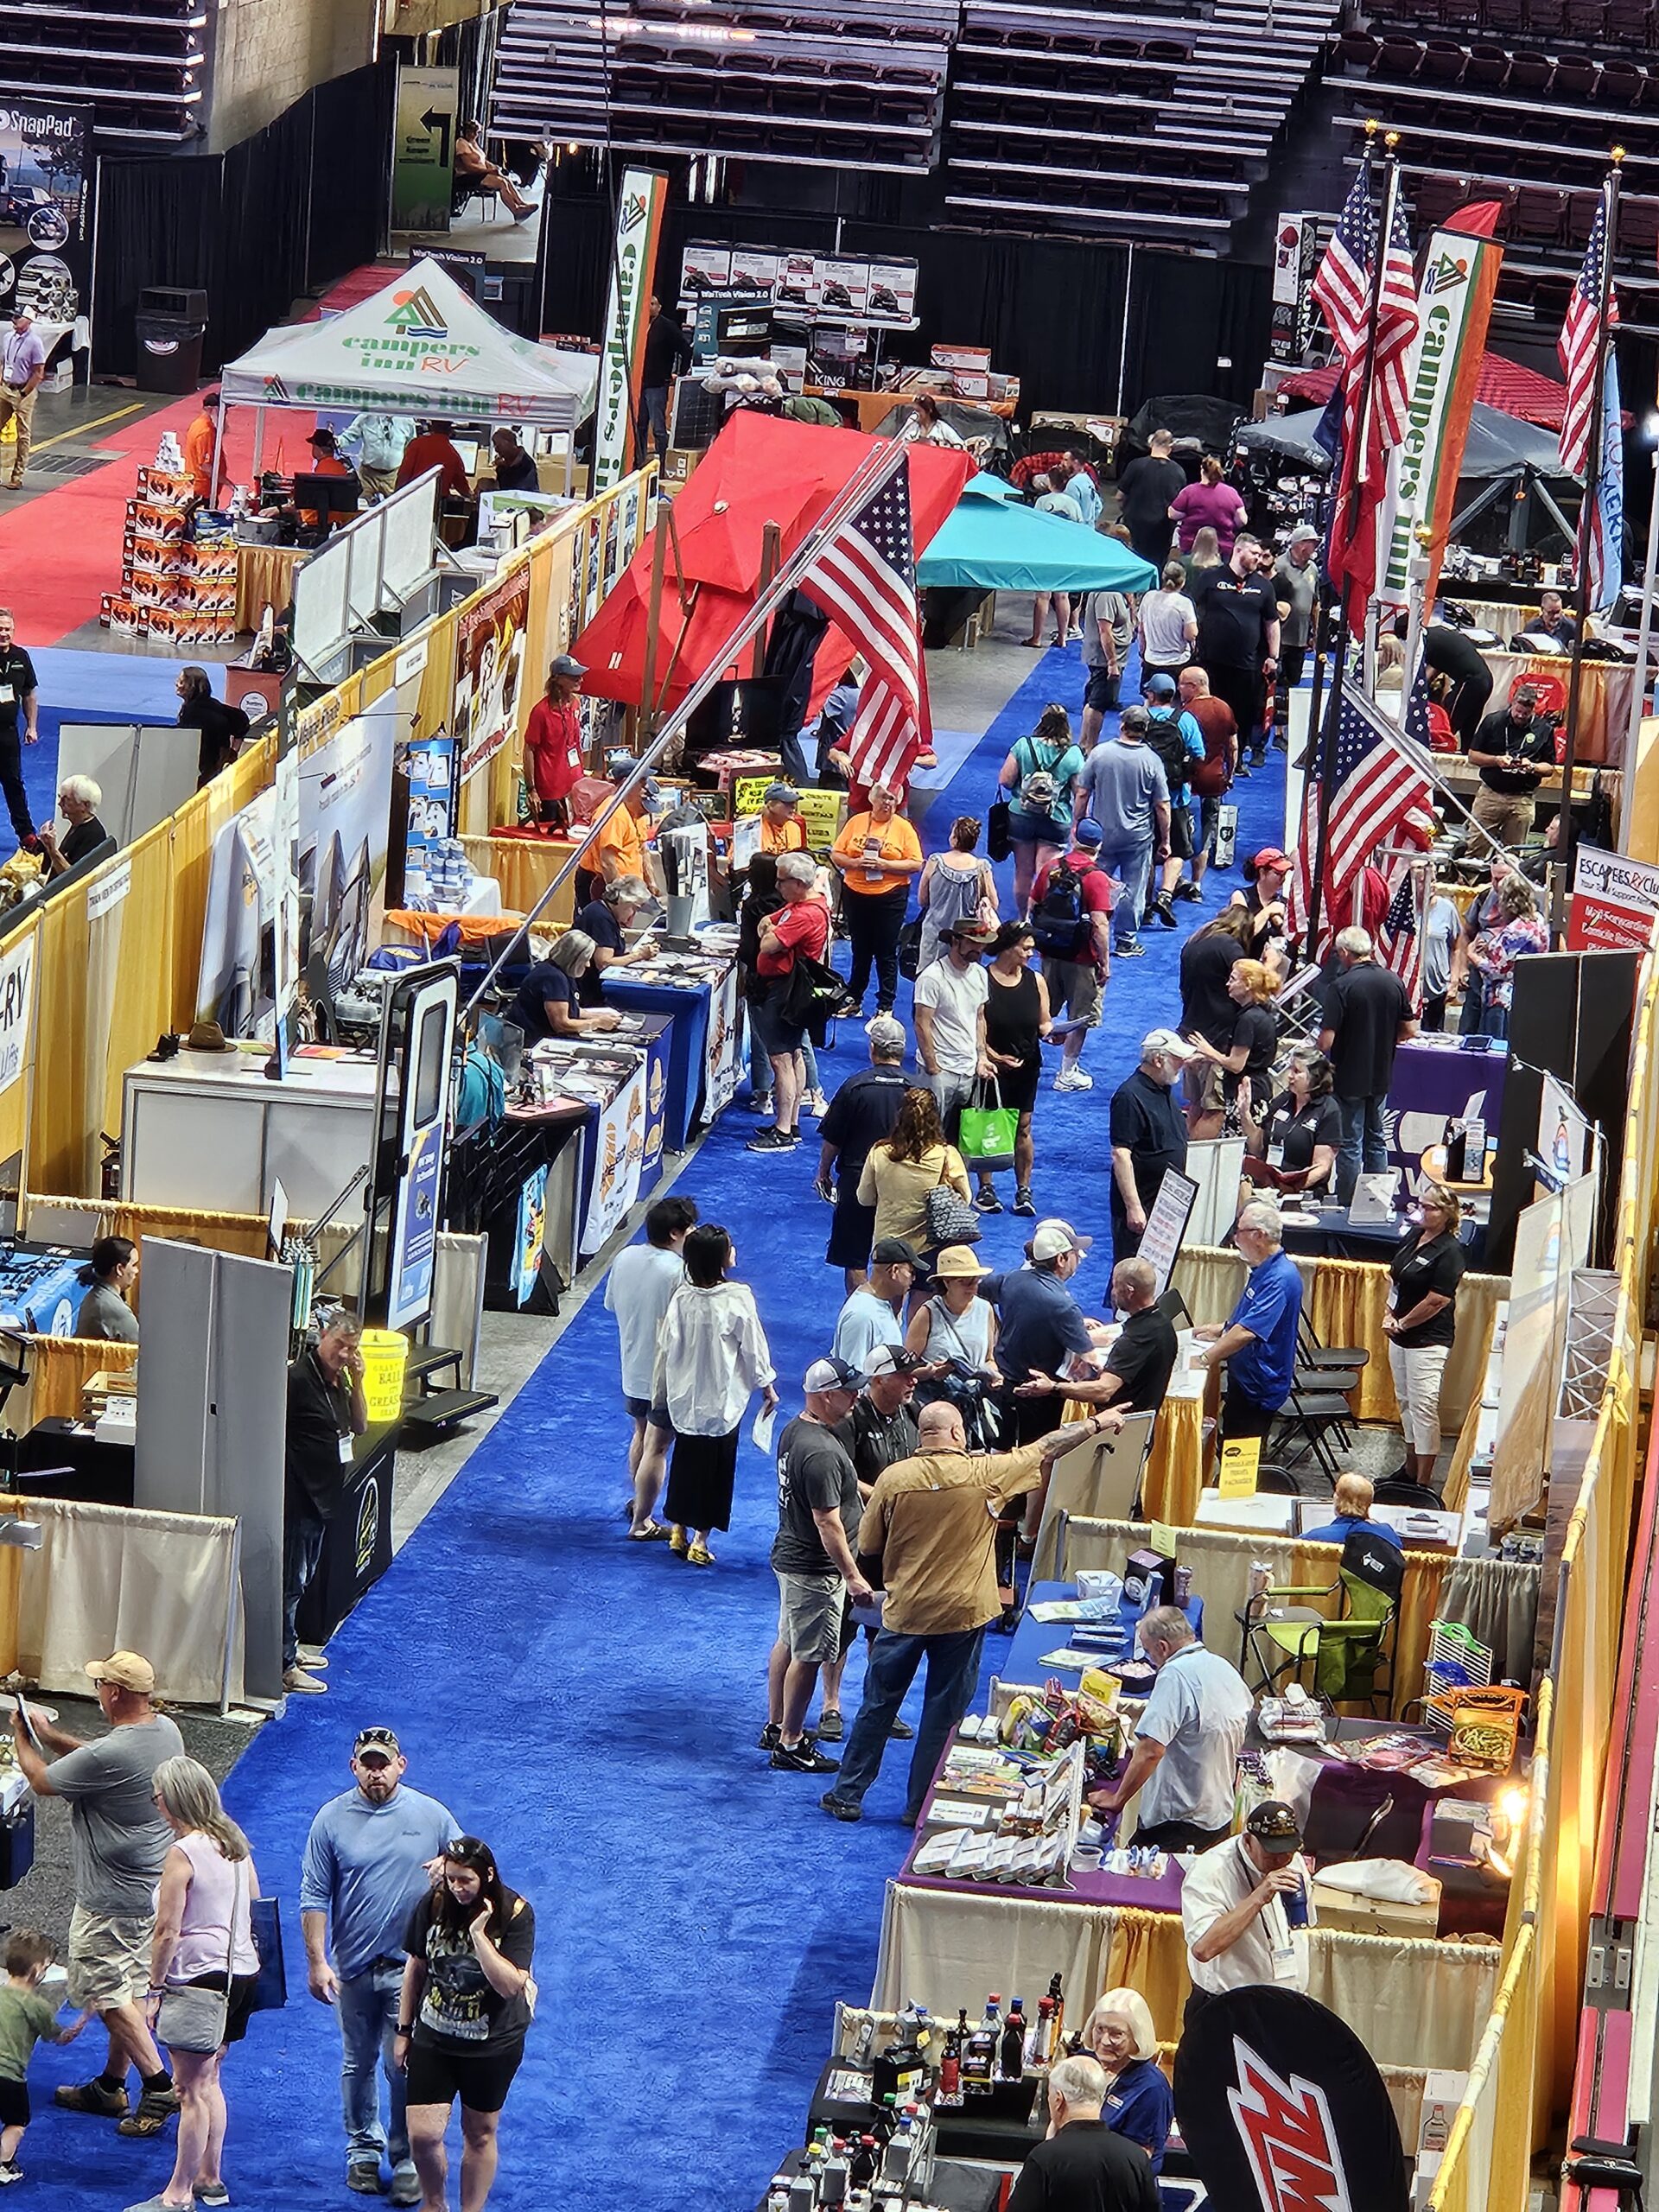
      Privacy, Terms of Use & Our Code of Ethics Protecting Content Creators Copyrights