Speech/Language Therapy 101: Back to Basics for SLPs and Caregivers
Are you looking for the simplest, most effective way to teach communication skills to children and teens?
Well, search no farther!
I’m speech-language pathologist Carrie Clark and in today’s episode of The Speech and Language Kids Podcast, we’re diving into exactly how to make the most of virtual speech sessions so we can work on closing these gaps, one child at a time.
Listen to the Podcast Here
You can listen to the full podcast episode below:
The Different Areas of Speech/Language/Communication:
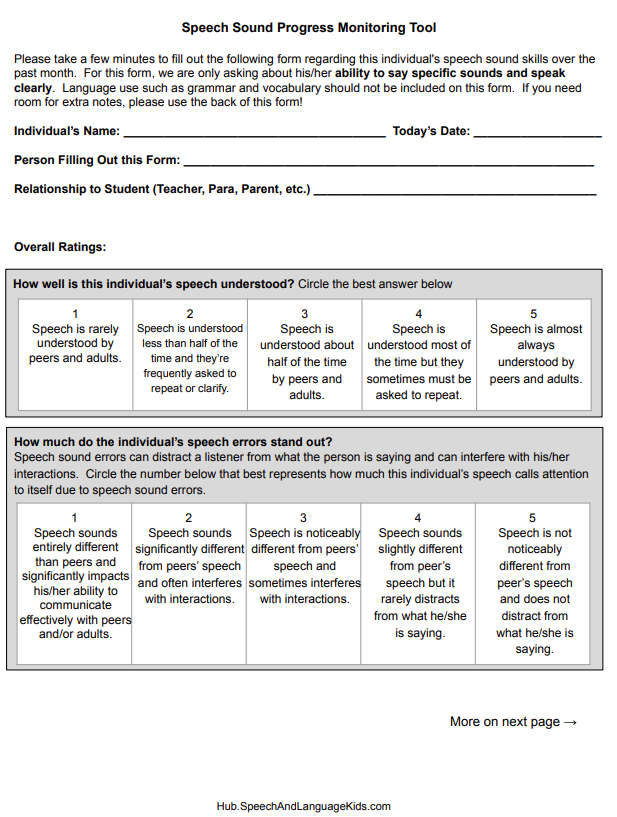
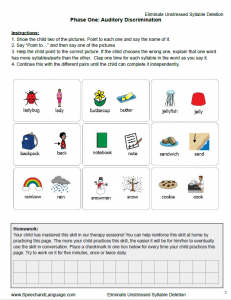
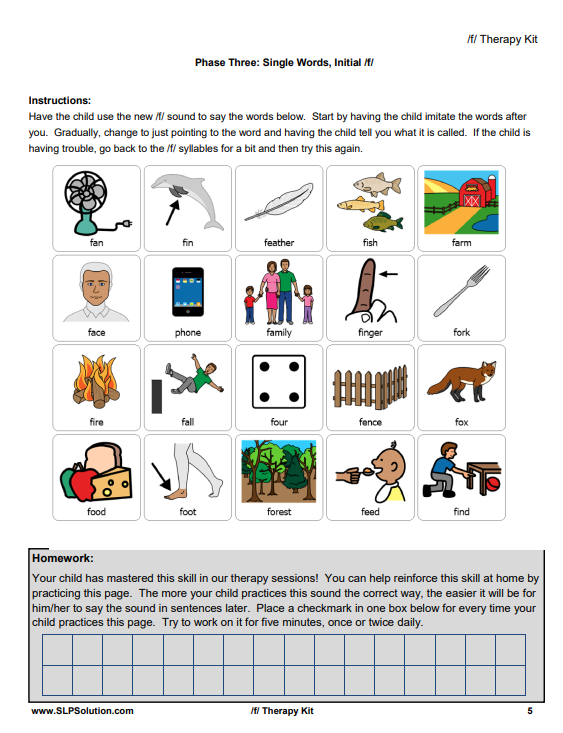
- Speech Sounds: Individuals with speech sound problems have difficulty pronouncing sounds correctly. Their speech is difficult to understand. Fill out the Speech Sounds Progress Monitoring Tool to dive deeper.
- Language: Individuals with language difficulties struggle to understand or use words effectively. This can impact their ability to follow directions, express thoughts, or build sentences correctly. Fill out the Language Progress Monitoring Tool to dive deeper.
- Voice/Resonance: Individuals with voice or resonance concerns may have voices that sound hoarse, too nasal, too quiet, or otherwise unusual. These issues can affect how others perceive and understand them. Fill out the Voice/Resonance Progress Monitoring Tool to dive deeper.
- Fluency: Individuals with fluency difficulties may experience stuttering or interruptions in their speech. This can include repeating sounds, stretching out words, or having frequent pauses. Fill out the Fluency Progress Monitoring Tool to dive deeper.
- Functional Communication: Individuals with functional communication difficulties struggle to get their needs met using speech, gestures, or other means of communication. They may have trouble making requests, answering questions, or using words effectively in daily life. Fill out the Functional Communication Progress Monitoring Tool to dive deeper.
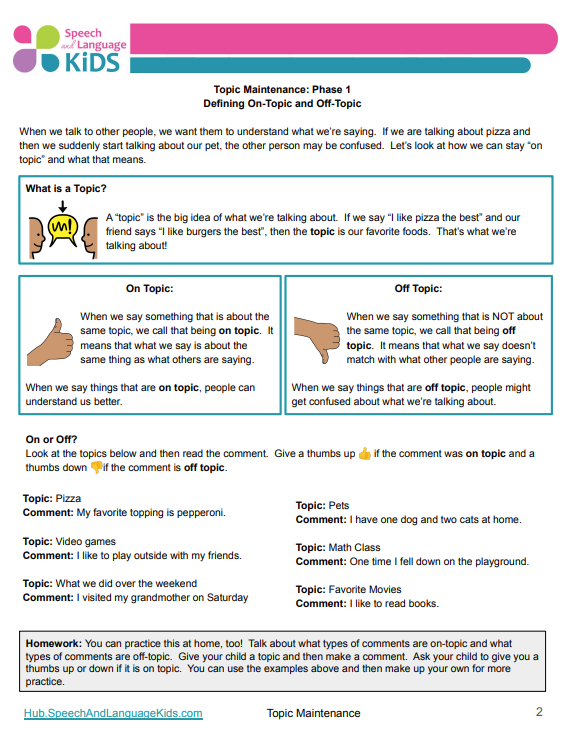
- Social Communication: Individuals with social communication challenges may struggle with conversational skills, understanding social cues, or using language appropriately in different social interactions. This can affect their ability to interact with others successfully. Fill out the Social Communication Progress Monitoring Tool to dive deeper.
To Access the Specific Progress Monitoring Tools, Click Here!
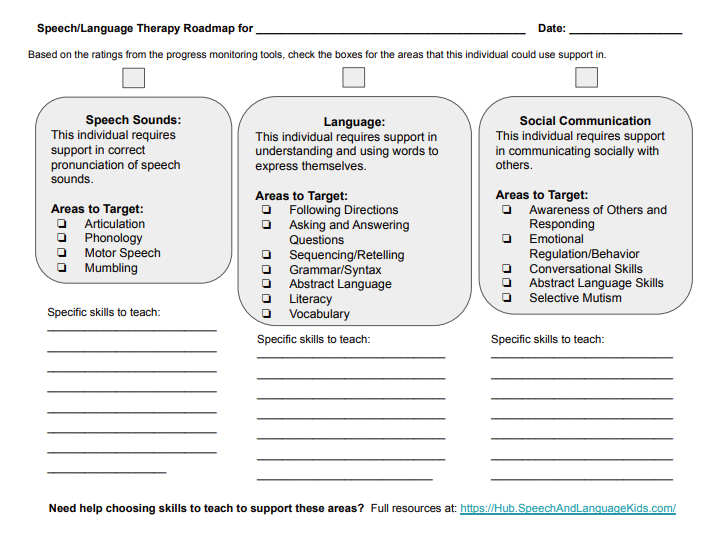
Therapy Pathways for Speech Sounds
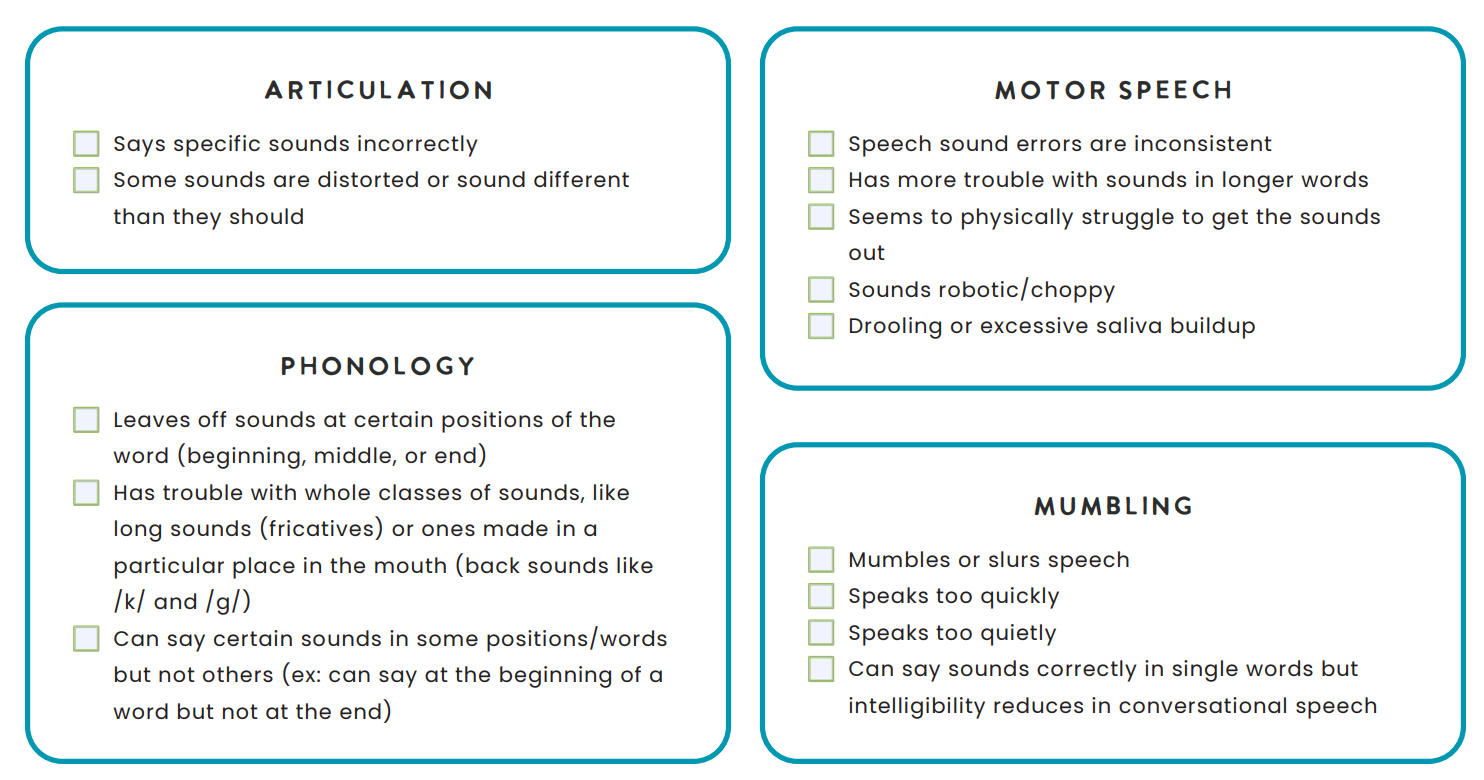
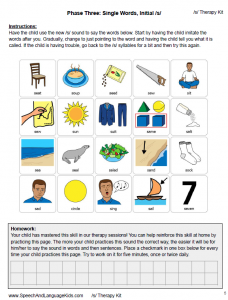
Articulation – Individuals with articulation challenges have difficulty with specific speech sounds, producing them incorrectly or with noticeable distortions. Choose the articulation pathway for traditional sound-by-sound therapy that targets one speech sound at a time.
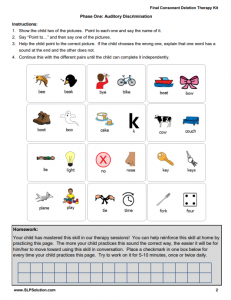
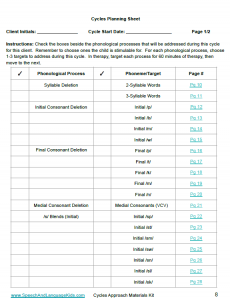
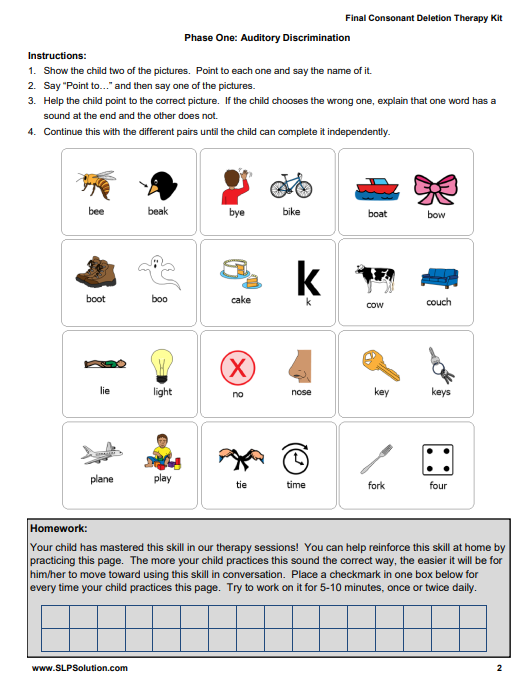
Phonology – Individuals with phonological challenges demonstrate consistent patterns of speech errors, such as omitting sounds at the beginning or end of words or struggling with whole categories of sounds (e.g., back sounds like /k/ and /g/). Choose the phonology pathway to teach sound patterns and eliminate phonological processes such as fronting, stopping, final consonant deletion, etc.
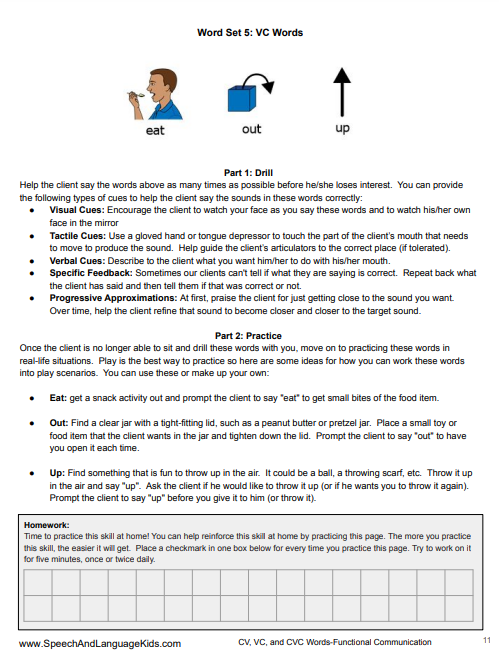
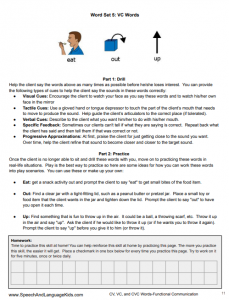
Motor Speech – Individuals with motor speech difficulties have inconsistent speech errors, struggle more with longer words, appear to have difficulty physically producing speech sounds, and may sound choppy and robotic. Choose the motor speech pathway to treat motor-based speech disorders, such as apraxia, by teaching specific word structures, such as CV, VC, CVC, and multisyllabic words.
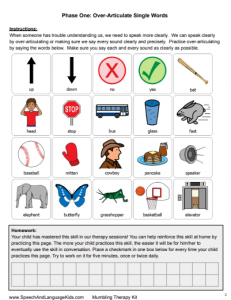
Mumbling Pathway – These individuals may speak too quickly, too quietly, slurs their words, or are able to produce sounds correctly in isolation but become harder to understand in conversation. Choose this pathway for a structured approach to teaching over-articulation and increasing awareness of when they are not understood.
To access these Therapy Pathways and the corresponding Therapy Plans, click here!
Therapy Pathways for Language Skills
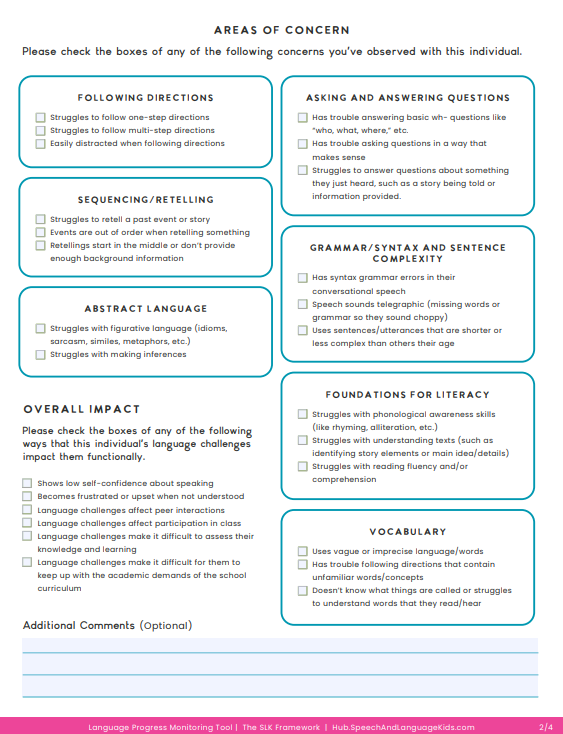
Following Directions Pathway
Individuals with following directions challenges have difficulty understanding and carrying out one-step or multi-step instructions. They may become easily distracted when given directions or struggle to process spoken information. Choose this pathway to target skills like following verbal and written directions, improving attention to instructions, and processing spoken language efficiently.
Asking and Answering Questions Pathway
These individuals have difficulty responding to basic WH-questions (who, what, where, etc.), struggle to ask meaningful questions, or have trouble answering questions about something they just heard. Choose this pathway to build skills in answering WH-questions, formulating clear and relevant questions, and improving comprehension through question-based interactions.
Sequencing & Retelling Pathway
Individuals with sequencing and retelling challenges have difficulty organizing events or stories in logical order. They may start retellings in the middle without context, leave out key details, or struggle to recall events accurately. Choose this pathway to focus on skills like sequencing steps, retelling stories with key details, and structuring a story clearly.
Grammar & Sentence Complexity Pathway
Individuals with grammar and sentence complexity challenges have speech that contains frequent grammar errors, sounds choppy and incomplete, or relies on shorter or simpler sentences than expected for their age. Choose this pathway to strengthen grammar use, expand sentence length and complexity, and improve overall sentence structure.
Foundations for Literacy Pathway
Individuals with literacy challenges have difficulty with early reading skills, such as phonological awareness, understanding written texts, or developing reading fluency and comprehension. Choose this pathway to build phonological awareness, strengthen early literacy skills, and improve reading comprehension and fluency.
Abstract Language Pathway
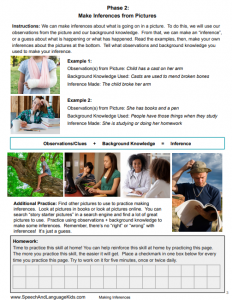
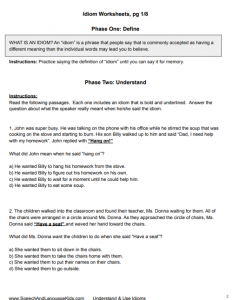
Individuals with abstract language challenges struggle to understand figurative language, such as idioms, sarcasm, and metaphors, or have difficulty making inferences from conversations and texts. Choose this pathway to develop skills in understanding and using figurative language, interpreting implied meanings, and making logical inferences.
Vocabulary Pathway
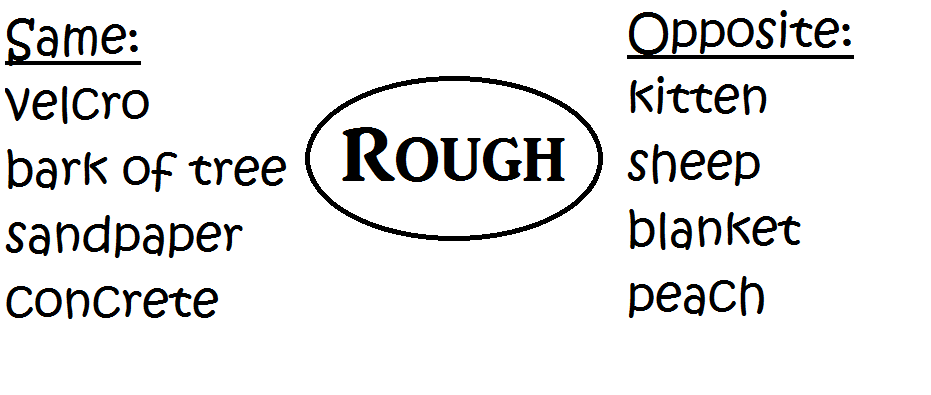
Individuals with vocabulary challenges have difficulty understanding and using new words, rely on vague or imprecise language, or struggle with remembering and using the correct words. Choose this pathway to enhance word knowledge, improve word retrieval, and build precise and meaningful vocabulary use.
To access these Therapy Pathways and the corresponding Therapy Plans, click here!
Therapy Pathways for Social Communication
Social Awareness and Interaction Pathway
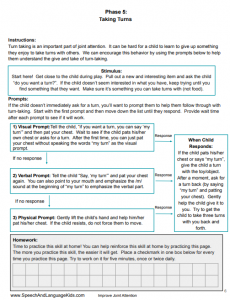
Individuals with social awareness and interaction challenges have difficulty responding to others, understanding different perspectives, and engaging appropriately in social situations. Choose this pathway to build skills responding to others, joint attention, turn taking, topic maintenance, and perspective taking.
Emotional Regulation & Self-Advocacy Pathway
Individuals with emotional regulation and self-advocacy challenges have difficulty expressing their needs, managing emotions, and coping with social stressors. They may struggle to communicate boundaries or self-regulate in overwhelming situations. Choose this pathway to develop skills in emotional awareness, self-advocacy, coping strategies, and effective self-expression.
Conversational Skills Pathway
Individuals with conversational skills challenges have difficulty initiating, maintaining, and appropriately ending conversations. They may struggle to take turns, stay on topic, or understand conversational rules. Choose this pathway to improve an individual’s ability to initiate conversations, keep them going, and adapt them to a variety of situations.
Abstract Language Pathway
Individuals with abstract language challenges struggle to understand figurative language, sarcasm, idioms, and implied meanings in conversations. They may take things literally or have difficulty making inferences. Choose this pathway to strengthen skills in interpreting figurative language, understanding implied messages, and making logical inferences in conversations.
Selective Mutism Pathway
Individuals with selective mutism can speak in some situations but experience anxiety or difficulty speaking in specific social settings (such as speaking freely at home but remaining silent at school). Choose this pathway to build confidence in verbal communication, reduce anxiety around speaking, and support gradual exposure to new speaking environments.
To access these Therapy Pathways and the corresponding Therapy Plans, click here!
Therapy Pathways for Fluency/Stuttering
Foundations for Fluency Pathway
Individuals with fluency challenges may struggle with maintaining smooth, natural speech flow. They may benefit from strategies that support breath control, emotional regulation, and confidence in speaking. Choose this pathway to work on coordinating breathing with speech, increasing awareness of stuttering, and dealing with negative emotions or reactions related to stuttering.
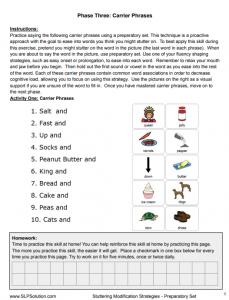
Stuttering Pathway
Individuals with stuttering challenges experience interruptions in speech, such as repetitions, prolongations, or blocks. They may feel frustrated or anxious about speaking. Choose this pathway to develop structured strategies for smoother, more confident communication and to reduce tension associated with stuttering.
Cluttering Pathway
Individuals with cluttering challenges speak too quickly, in a disorganized way, or with reduced clarity, making their speech difficult to understand. They may struggle with self-monitoring and pacing their speech. Choose this pathway to improve speech clarity, regulate speaking rate, and enhance overall communication effectiveness.
Word Finding/Word Retrieval Pathway
Individuals with word finding challenges struggle to retrieve the right words, leading to frequent hesitations, pauses, or substitutions in conversation. Choose this pathway to strengthen word retrieval skills, reduce speaking delays, and increase ease and confidence in communication.
To access these Therapy Pathways and the corresponding Therapy Plans, click here!
Therapy Pathways for Functional Communication
Early Interactions Pathway
Individuals with early interaction challenges may need support with basic social engagement, responding to their name, following simple directions, and participating in early social routines. Choose this pathway to build foundational communication skills, increase social engagement, and support early language development.
Analytic Language Processors (ALP) Pathway
Individuals who are analytic language processors learn language through individual words and phrases. They may need help using words and short phrases effectively across different situations. Choose this pathway to teach a child to use short words for functional communication, build up their vocabulary, and begin to expand their utterance length to longer phrases.
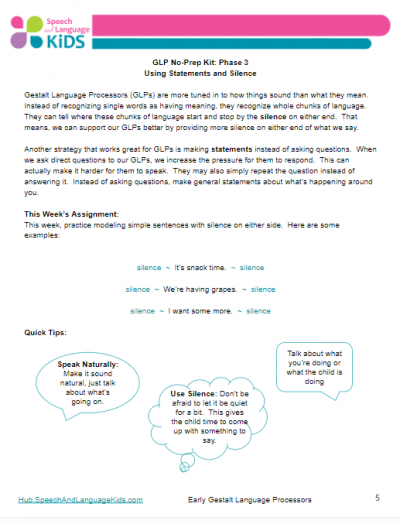
Gestalt Language Processors (GLP) Pathway
Individuals who are gestalt language processors learn language through echolalia, scripts, or repeating chunks of language. They may need structured support in moving toward self-generated speech. Choose this pathway to guide the progression from echolalia to meaningful, spontaneous language use.
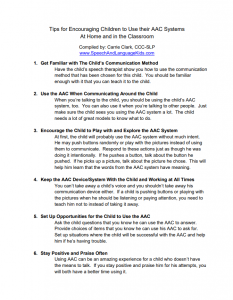
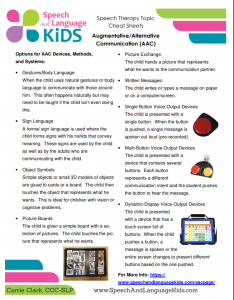
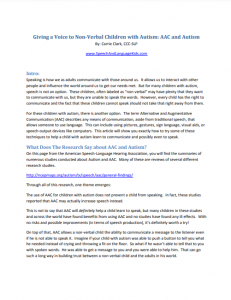
Augmentative & Alternative Communication (AAC) Pathway
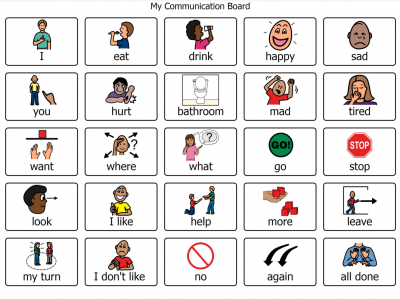
Individuals who use AAC (such as picture boards, speech-generating devices, or gestures) may need support in developing functional and meaningful communication. Others may struggle with speech intelligibility and need alternative ways to express themselves without frustration. Choose this pathway to help a child learn to communicate using alternative means, such as pictures, sign language, or communication devices.
To access these Therapy Pathways and the corresponding Therapy Plans, click here
Therapy Pathways for Voice/Resonance
Foundations of Healthy Voice Use Pathway
Individuals with challenges in healthy voice use may experience vocal strain, fatigue, or difficulty maintaining a strong and clear voice. They may need to improve vocal hygiene, breath support, or voice care habits. Choose this pathway to build healthy vocal habits, reduce strain, and strengthen breath support for better voice production.
Voice Pathway
Individuals with voice challenges may struggle with vocal quality due to strain, tension, or inefficient voice use. Their voice may sound hoarse, breathy, or weak. Choose this pathway to improve vocal quality, develop better vocal control, and reduce strain or tension in speech.
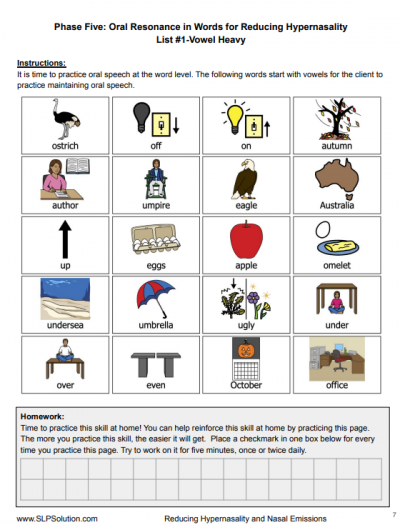
Resonance Pathway
Individuals with resonance challenges may experience hypernasality, nasal emission, or other resonance differences that impact speech clarity. Choose this pathway to improve speech resonance, enhance clarity, and support balanced vocal tone.
Prosody Pathway
Individuals with prosody challenges may have difficulty with pitch, volume, or speech rate, leading to speech that sounds monotone, robotic, or unnatural. Choose this pathway to develop expressive, natural speech patterns by improving pitch variation, volume control, and pacing.
To access these Therapy Pathways and the corresponding Therapy Plans, click here!
The post Speech/Language Therapy 101: Back to Basics for SLPs and Caregivers appeared first on Speech And Language Kids.
 Stay Connected


 Structured. Evidence-based. Confidence-building.
")


")


")


")


")


")


 Special Announcement: Speechie Summer Camp Is Here!
 This Summer, Get Organized and Have Fun!
 What You’ll Learn in This Episode:
 )
) Highlights:
 New! Join Our Teams Program for 2025-2026
 Bonus: Organizations that join the Teams Program also receive exclusive marketing opportunities and recognition in our SLK-Certified Directory.
 Ready to get your team signed up?
 How to Join the Summer Camp:
 Don’t Miss What’s Coming in August:
 Virtual Summer Camps Are Here!
 $75 ticket includes 1 grade level of the Core Language Program ($99 value)
 Runs June to mid-July
 For kids entering K–6th grade with language challenges
 Weekly emails with lessons + fun “camp” activities
 Prizes, badges, and access to a private camp discussion space
 Get organized for the school year with fun activities
 Training on the SLK Framework, therapy planning, data collection, goals, and space/session organization
 New offering for organizations with multiple SLPs
 Includes full Hub membership, Core Language Program, team training, consultation, and SLK-Certified directory listing
 Ideal for private practices, school districts, and staffing agencies
 Interested orgs can contact Carrie at carrie@speechandlanguagekids.com
 Quick Links Mentioned:
 Join the Hub:
  Email Carrie: carrie@speechandlanguagekids.com
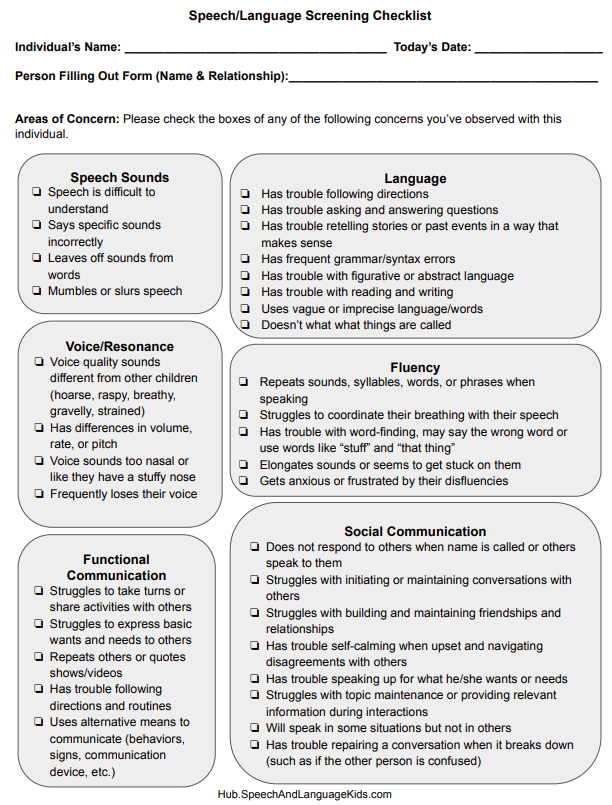


 Frontal lisp therapy can be broken down into six steps.
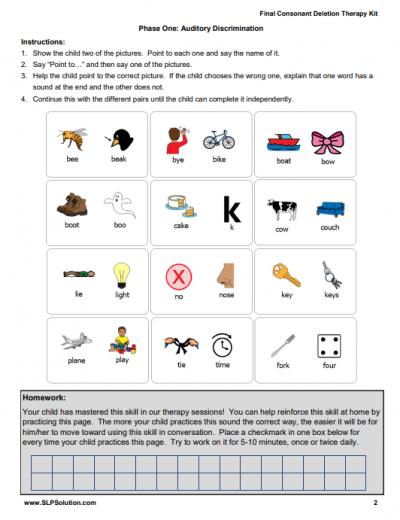
 which offers a comprehensive selection of products and solutions designed to help speech-language pathologists (SLPs), teachers, special educators, and English-as-a-Second-Language instructors overcome challenging speech and language-learning challenges with their students, while having fun! Our flagship product,