TopPodcast.com
Menu
  • Home
  • Top Charts
  • Top Networks
  • Top Apps
  • Top Independents
  • Top Podfluencers
  • Top Picks
    • Top Business Podcasts
    • Top True Crime Podcasts
    • Top Finance Podcasts
    • Top Comedy Podcasts
    • Top Music Podcasts
    • Top Womens Podcasts
    • Top Kids Podcasts
    • Top Sports Podcasts
    • Top News Podcasts
    • Top Tech Podcasts
    • Top Crypto Podcasts
    • Top Entrepreneurial Podcasts
    • Top Fantasy Sports Podcasts
    • Top Political Podcasts
    • Top Science Podcasts
    • Top Self Help Podcasts
    • Top Sports Betting Podcasts
    • Top Stocks Podcasts
  • Podcast News
  • About Us
  • Podcast Advertising
  • Contact
Not in our directory?
Add Show Here
Podcast Equipment
Center

toppodcastlogoOur TOPPODCAST Picks

  • Comedy
  • Crypto
  • Sports
  • News
  • Politics
  • True Crime
  • Business
  • Finance

Follow Us

toppodcastlogoStay Connected

    View Top 200 Chart
    Back to Rankings Page
    Music

    Ray Harmony

    The unorthodoX ideas of multi award-winning music lecturer Ray Harmony. Older episodes were co-hosted by his wife and protégé Kate Harmony. As a songwriter and producer, Ray has made music with Grammy winners and multiplatinum artists, including Serj Tankian (System Of A Down) and Tom Morello (Rage Against The Machine). Join over 255,000 YouTube subscribers learning the fast, easy, and fun way to make music without using AI, cos it ain’t no fun getting a robot to write “your” songs! Download Ray’s free book at HackMusicTheory.com

    Advertise

    Copyright: © 2022 Revolution Harmony

    • Apple Podcasts
    • Google Play
    • Spotify

    Latest Episodes:
    Better Beats in 1 Second. Seriously! Apr 08, 2022
    Show notes

    Better Beats in 1 Second. Seriously!

    In this lesson you'll learn how to improve your drum beats in one second. Seriously. But first… Tea!

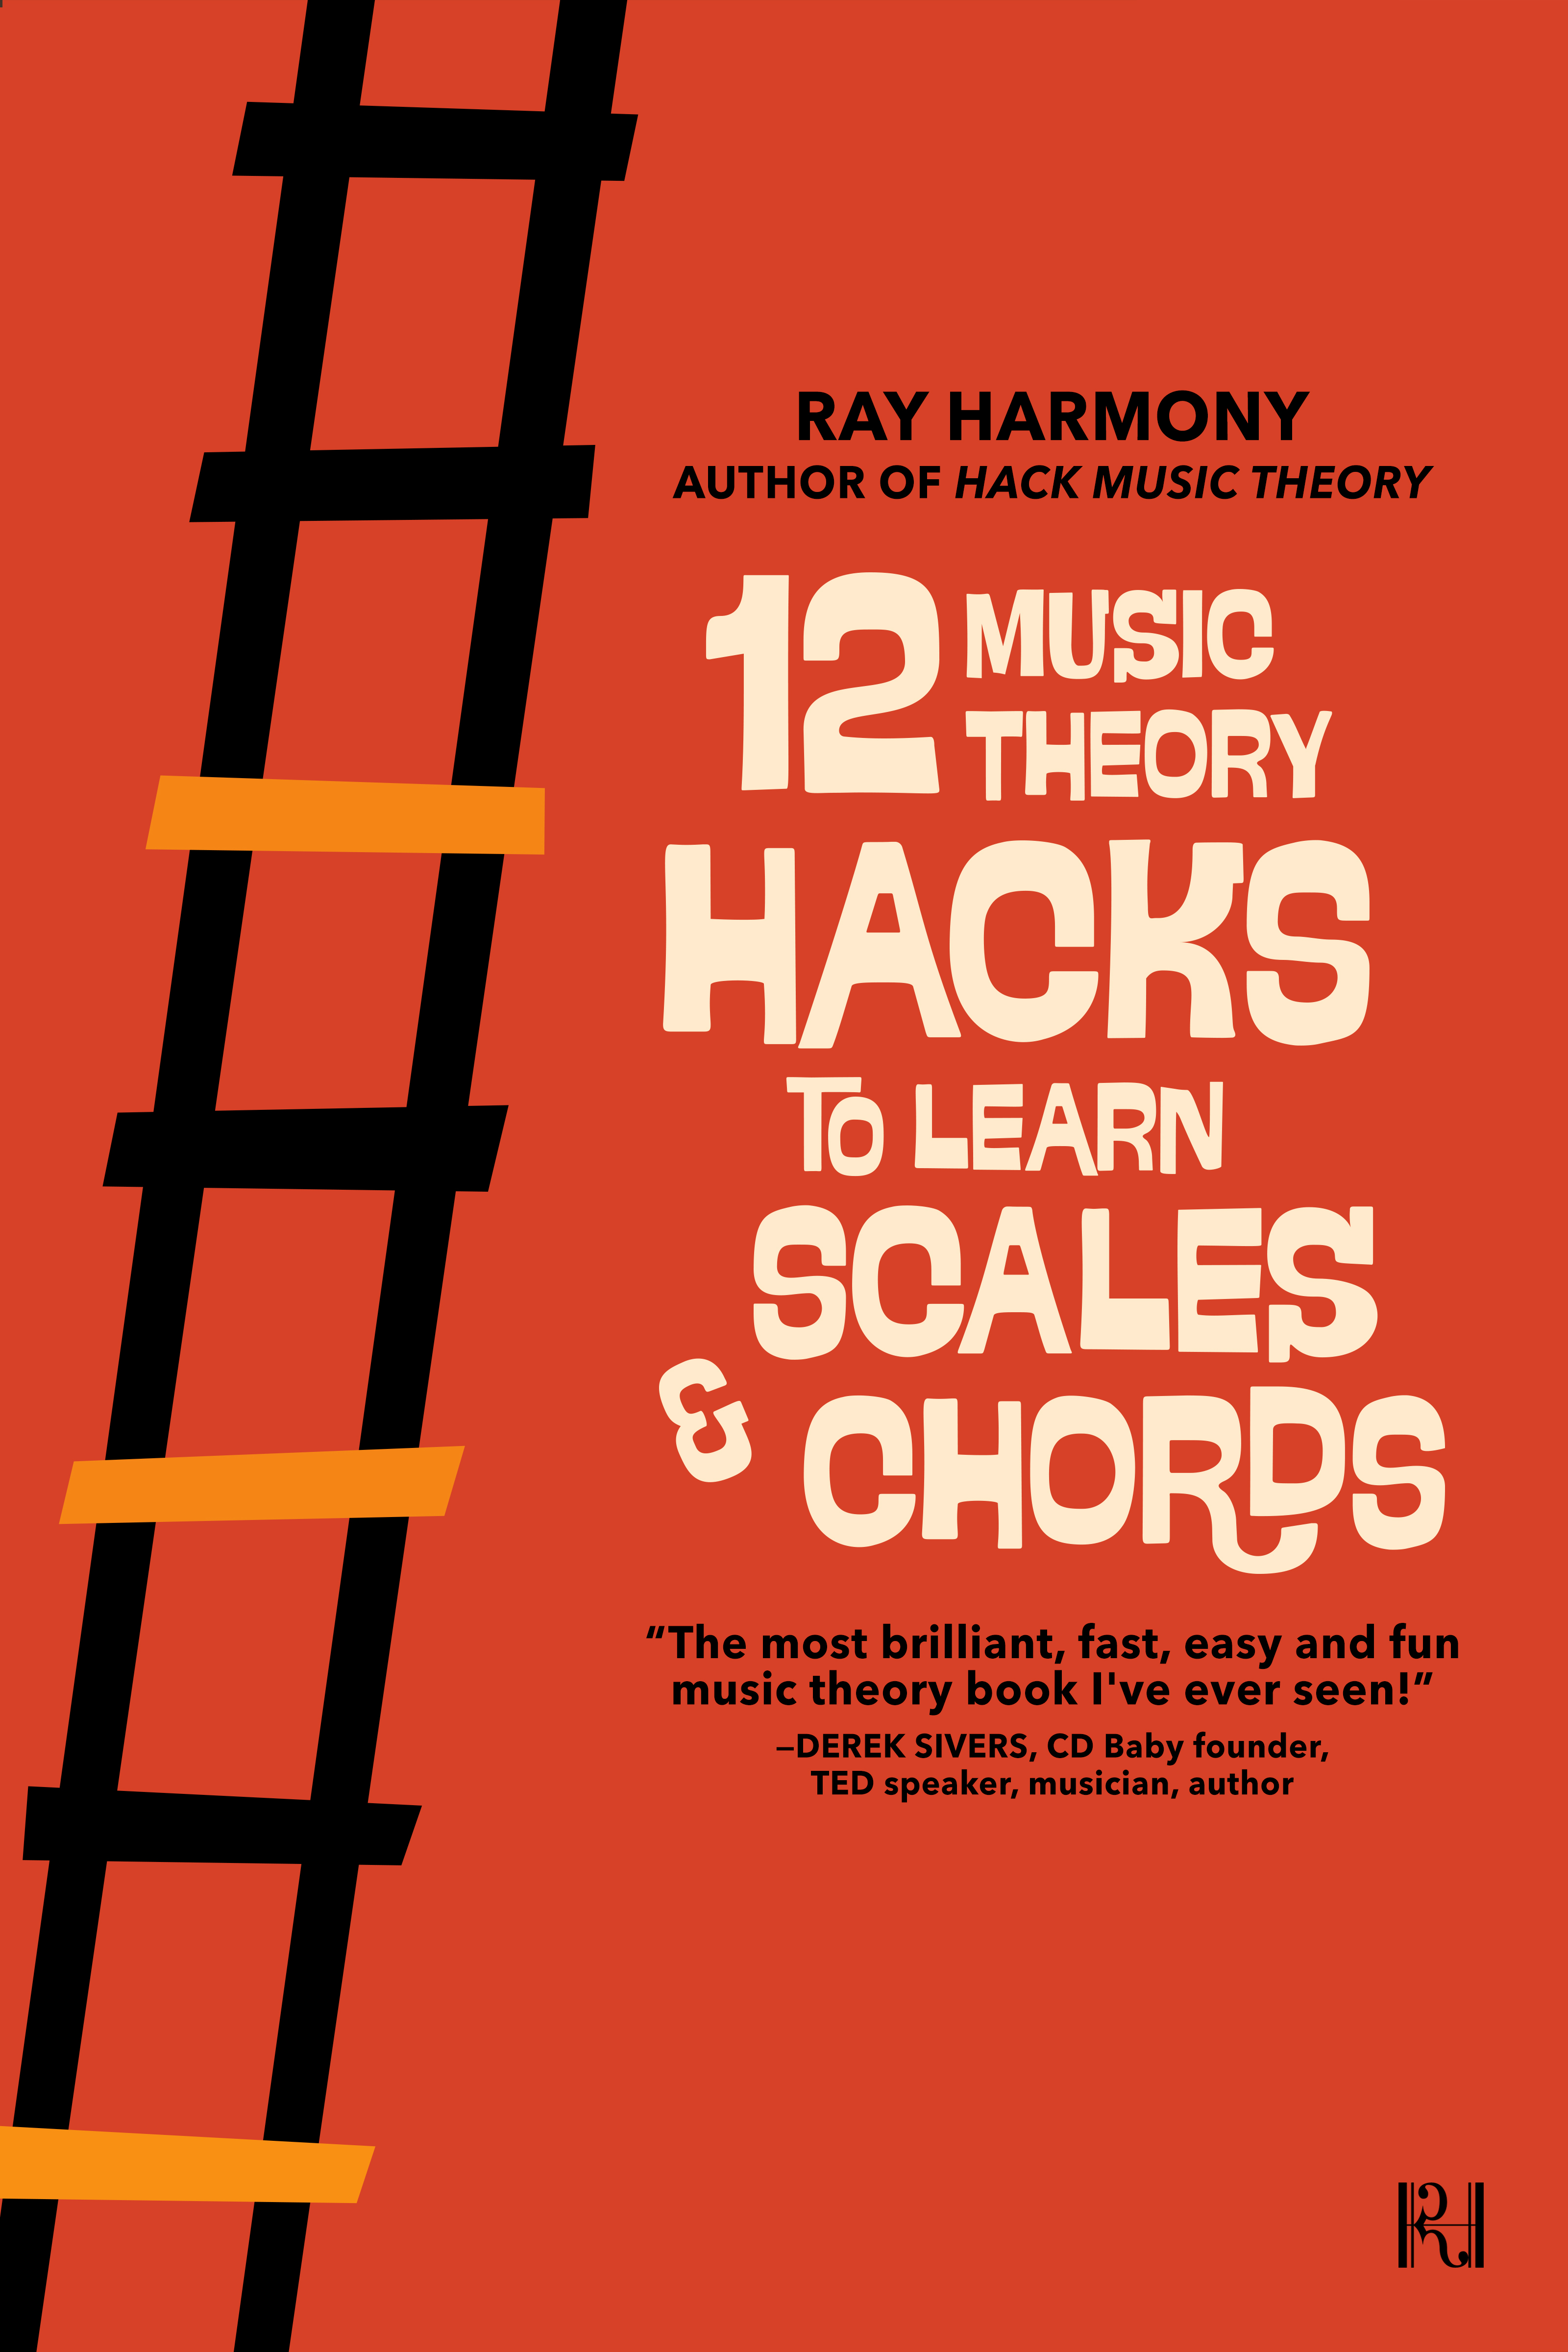
    Hello revolutionary music makers, we are Kate and Ray Harmony (AKA Revolution Harmony), and welcome to Hack Music Theory, the fast, easy and fun way to make music! If you’re new to theory, or if you just want a refresher, then read our free book "12 Music Theory Hacks to Learn Scales & Chords". It’ll give you a super solid music theory foundation in just 30 minutes. The free download is below. Enjoy!

    INTRO

    Does your beat currently sound something like this? (click play above) There’s nothing wrong with that beat, but it’s not very interesting either. So, if you want your drums to grab the listener’s attention, then here’s one of our fastest yet most powerful drum hacks!

    HACK

    The main role of drums is to provide a rhythmic foundation for the music. When that’s all they do though, it’s easy for them to blend into the background. But, if something in that foundation jumps out unexpectedly, the listener’s attention is instantly brought back to the music. And the fastest way to do that is to displace one snare hit. However, this is so powerful, you only need to do it every two or four bars.

    NEXT

    Hope you found this hack helpful, and if you did, then check out our DRUMS page for more!

    Free Book

    Wooohooo!!! You’re a mere 30 minutes away from being even smarter than you already are. Just head on over to your inbox now for your free download.

    There was an error submitting your subscription. Please try again.

    “The most brilliant, fast, easy & fun music theory book I’ve ever seen!” DEREK SIVERS, CD Baby founder We use this field to detect spam bots. If you fill this in, you will be marked as a spammer. DOWNLOAD FREE BOOK

    Podcast

    Listen below, or on any podcast app.


    Meshuggah Hack for Better Djent Riffs Mar 31, 2022
    Show notes

    Meshuggah Hack for Better Djent Riffs

    In this lesson you'll learn how to improve your Djent riffs using a hack from Meshuggah "I Am That Thirst", which is off their new album "Immutable". But first… Tea!

    Hello revolutionary music makers, we are Kate and Ray Harmony (AKA Revolution Harmony), and welcome to Hack Music Theory, the fast, easy and fun way to make music! If you’re new to theory, or if you just want a refresher, then read our free book "12 Music Theory Hacks to Learn Scales & Chords". It’ll give you a super solid music theory foundation in just 30 minutes. The free download is below. Enjoy!

    INTRO

    Is your djent riff currently sounding something like this? (click play above)

    FAULT

    One of the most common faults in djent is that all the emphasis is placed on writing a crazy rhythm, but then that rhythm is often played on one note. How disappointing! So, here’s a hack from the new Meshuggah single to fix this fault.

    HACK

    Meshuggah use arguably the most djenty scale: the octatonic. This 8-note scale is made by repeating the pattern of one semitone followed by one whole tone. So, instead of djenting your riff away on only one note, add a melodic run into it using the octatonic scale. That way you’ll have a crazy rhythm and a crazy melody!

    NEXT

    Hope you found this hack helpful, and if you did, then check out our DJENT page for more!

    Free Book

    Wooohooo!!! You’re a mere 30 minutes away from being even smarter than you already are. Just head on over to your inbox now for your free download.

    There was an error submitting your subscription. Please try again.

    “The most brilliant, fast, easy & fun music theory book I’ve ever seen!” DEREK SIVERS, CD Baby founder We use this field to detect spam bots. If you fill this in, you will be marked as a spammer. DOWNLOAD FREE BOOK

    Podcast

    Listen below, or on any podcast app.


    How to Add Energy to Bass Lines Mar 25, 2022
    Show notes

    How to Add Energy to Bass Lines

    In this lesson you'll learn how to write better bass lines, by using 1/16 rests. But first… Tea!

    Hello revolutionary music makers, we are Kate and Ray Harmony (AKA Revolution Harmony), and welcome to Hack Music Theory, the fast, easy and fun way to make music! If you’re new to theory, or if you just want a refresher, then read our free book "12 Music Theory Hacks to Learn Scales & Chords". It’ll give you a super solid music theory foundation in just 30 minutes. The free download is below. Enjoy!

    Example

    Is your bass line currently sounding something like this? (click play above)

    Fault

    That’s sounding pretty good, but it’s still kinda boring because it’s lacking energy. So, here’s an awesome hack that will instantly add energy to your bass lines!

    Fixed

    One of the best ways to energise your bass line is totally counterintuitive. You’d think we’d need to add something in order to add energy, but, arguably the best way to add energy is actually to subtract notes. Yep, a couple well-placed rests (especially 1/16 rests) will breathe new life into your bass. And, how easy is it to delete a couple notes!

    Next

    Hope you found this hack helpful, and if you did, then check out our Songwriting & Producing PDF.

    Free Book

    Wooohooo!!! You’re a mere 30 minutes away from being even smarter than you already are. Just head on over to your inbox now for your free download.

    There was an error submitting your subscription. Please try again.

    “The most brilliant, fast, easy & fun music theory book I’ve ever seen!” DEREK SIVERS, CD Baby founder We use this field to detect spam bots. If you fill this in, you will be marked as a spammer. DOWNLOAD FREE BOOK

    Podcast

    Listen below, or on any podcast app.


    Harmonic Rhythm for Better Bass Lines Mar 23, 2022
    Show notes

    Harmonic Rhythm for Better Bass

    Learn how to write better bass lines by improving your harmonic rhythm!

    Hello revolutionary music makers, we are Kate and Ray Harmony (AKA Revolution Harmony), and welcome to Hack Music Theory, the fast, easy and fun way to make music! If you’re new to theory, or if you just want a refresher, then read our free book "12 Music Theory Hacks to Learn Scales & Chords". It’ll give you a super solid music theory foundation in just 30 minutes. The free download is below. Enjoy!

    Intro

    Alright, so we’re in the key of D minor, and here’s an example that represents a lot of bass lines these days. Maybe your bass is currently sounding something like this?

    Boring

    That’s a solid starting place for your bass line, but changing notes on the main beats only is gonna get boring real quick. So, here’s a hack that will spice up your bass lines, without losing that simplicity!

    Better

    This bass line is outlining a chord progression, by playing each chord’s root note. Where the chords change is known as the harmonic rhythm. By making a more interesting harmonic rhythm, you get a better bass line. So, instead of changing chords on the main beats only, move some changes to before or after the main beats. This will add an element of surprise, which will grab your listeners’ attention.

    Hope you found this hack helpful, and if you did, then check out our Songwriting & Producing PDF.

    Free Book

    Wooohooo!!! You’re a mere 30 minutes away from being even smarter than you already are. Just head on over to your inbox now for your free download.

    There was an error submitting your subscription. Please try again.

    “The most brilliant, fast, easy & fun music theory book I’ve ever seen!” DEREK SIVERS, CD Baby founder We use this field to detect spam bots. If you fill this in, you will be marked as a spammer. DOWNLOAD FREE BOOK

    Podcast

    Listen below, or on any podcast app.


    How to Make Better Dance Beats Mar 17, 2022
    Show notes

    How to Make Better Dance Beats

    In this lesson you'll learn how to improve your four-on-the-floor drum beats. But first… Tea!

    Hello revolutionary music makers, we are Kate and Ray Harmony (AKA Revolution Harmony), and welcome to Hack Music Theory, the fast, easy and fun way to make music! If you’re new to theory, or if you just want a refresher, then read our free book "12 Music Theory Hacks to Learn Scales & Chords". It’ll give you a super solid music theory foundation in just 30 minutes. The free download is below. Enjoy!

    Example

    Alright, so our tempo is 120 BPM, and here’s an example of a basic four-on-the-floor beat. Maybe your drums are currently sounding something like this? (click play above)

    Boring

    That’s a solid foundation for your song, but it’s gonna get boring real quick. So, here’s a hack that will spice up your four-on-the-floor drums, without compromising that dancey feel we love about this beat!

    Better

    So, change your grid to 1/16 note triplets, and add a few hits on the toms. Toms are great, because they add groove but don’t interfere with that vital kick pattern. You can also add a 1/16 note triplet on the snare, but be super careful with adding extra snare hits, as they can mess up that dancey feel.

    Hope you found this hack helpful, and if you did, then check out our Drum PDFs.

    Free Book

    Wooohooo!!! You’re a mere 30 minutes away from being even smarter than you already are. Just head on over to your inbox now for your free download.

    There was an error submitting your subscription. Please try again.

    “The most brilliant, fast, easy & fun music theory book I’ve ever seen!” DEREK SIVERS, CD Baby founder We use this field to detect spam bots. If you fill this in, you will be marked as a spammer. DOWNLOAD FREE BOOK

    Podcast

    Listen below, or on any podcast app.


    Chord Flow Rule Mar 03, 2022
    Show notes

    Chord Flow Rule

    DOWNLOAD This Tutorial as PDF (includes MIDI file)

    In this lesson you’ll learn a common fault that many songwriters and producers make when writing chord progressions. More importantly, though, you’ll learn our theory hack for quickly and easily fixing this fault. But first… Tea!

    Hello revolutionary music makers, we are Kate and Ray Harmony (AKA Revolution Harmony), and welcome to Hack Music Theory, the fast, easy and fun way to make music! If you’re new to theory, or if you just want a refresher, then read our free book "12 Music Theory Hacks to Learn Scales & Chords". It’ll give you a super solid music theory foundation in just 30 minutes. The free download is below. Enjoy!

    FAULT

    Firstly, just to clarify. A fault is not a mistake! Music is an art, so if you’re making music from your heart, then there cannot be any mistakes. But, when songwriters and producers don’t understand theory, which is the grammar of music, they’re not able to fully express themselves. Just like if someone was trying to write a poem in a language they didn’t speak. The resulting work of art will undoubtedly have weaknesses. And a fault is defined as a weakness.

    So, what’s the fault in this chord progression?

    Well, the chords are jumping all over the place (up and down!), and that makes the progression sound like a beginner made it. To be clear, there’s nothing wrong with the actual chords in this progression. But, the chord changes sound really abrupt and disjointed, i.e. the progression doesn’t flow at all. And of course, if for some reason you want your chord changes to sound abrupt, then leave them as they are.

    By the way, our example is in the key of G Mixolydian, which is all the white notes from G to G, and the tempo is 105 BPM. If you’re not familiar with the happy-but-serious Mixolydian mode, you can use the Mode Hack in our Songwriting & Producing PDF.

    FIX

    Okay, so how do we fix this progression and make the chords flow smoothly into each other, instead of abruptly jumping up and down when they change? In a word: Inversions. An inversion is just the fancy word for when you rearrange the notes in a chord. You see, if you have three notes in a chord, you can play that chord in three different ways.

    For example, let’s take our root chord Gmaj. You can play the notes in the original order of G B D. Or, you can rearrange the notes and play B D G, or D G B. Same notes. Same chord. Just inverted.

    Root position: 1 3 5 (G B D)

    1st inversion: 3 5 1 (B D G)

    2nd inversion: 5 1 3 (D G B)

    The different inversions have different names, but those aren’t important, what is important is learning how to rearrange the notes in a way that makes your chords flow smoothly into each other. This hack will instantly make your chord progressions sound super creative and professional! So, how do you do that?

    LINK

    Well, it’s all about emphasising the similarities between chords. In other words, we need to emphasise the notes that are the same from one chord to the next. These notes are called common notes, and they act as powerful links that connect chords.

    Let’s take the first two chords in our progression as an example. Our first chord is Gmaj, which consists of the notes G B D, and our next chord is Em, which consists of the notes E G B.

    Now, when we compare these two chords, we find that they actually have two common notes. So, these two chords are literally ⅔ identical, yet when we change from Gmaj to Em, it sounds abrupt and disjointed.

    The reason for this is because we’re not making the most of their similarities. If we bring attention to their common notes, it will sound like the Gmaj chord is effortlessly melting into the Em chord, making that chord change flow beautifully.

    FLOW

    So, how do you bring attention to common notes in a chord change to make it flow smoothly? Easy, you simply rearrange the notes in one chord to make their common notes line up. In other words, the common note should be in the same place within the chords. That’s what creates the powerful link that connects chords!

    In our example, G and B are common notes, but we can see that G is at the bottom of the Gmaj chord, and it’s in the middle of the Em chord. So, we need to rearrange the notes of one chord to get G in the same place within those chords.

    In the Em chord, if we move the E up an octave, then the G is now also at the bottom of that chord, like it is in the Gmaj chord. And that also lines up our other common note as well, because B is now in the middle of both chords. So, thanks to an inversion of the Em chord, this previously abrupt chord change now sounds super smooth and professional!

    ISSUES

    Now that you know how to rearrange the notes in your chords to get their common notes in the same place (i.e. bottom, middle, or top), go through the rest of your progression and do the same for each chord change. Just a heads-up though, there are a couple of issues you’ll run into when doing this. Maybe not in your current chord progression, but these issues will definitely turn up regularly.

    The first issue is that the last chord in your progression needs to flow back around into your first chord. That chord change often requires a hack to make it flow smoothly. That wasn’t a problem in this example, because our progression actually ends and begins on the same chord, Gmaj. But, usually the last chord and first chord will be different, so you’ll need a hack to make that change flow smoothly.

    Then the second issue you’ll come across is trying to make a chord change flow smoothly when the two chords do not have a common note.

    For example, at the end of our progression we have Am (A C E) changing to Gmaj (G B D). Those two chords do not have any common notes. So, what do you do in these situations? You make a common note! Of course that requires another hack.

    And we don’t have time in this lesson to cover these two hacks as well, but if you wanna learn them, they’re in our Songwriting & Producing Course. And the course also includes our Songwriting & Producing PDF that we mentioned earlier, so you’ll get that too, along with permanent access to all the videos in the course.

    RULE

    So to conclude. Our Chord Flow Rule is that your chords should flow smoothly into each other, by ensuring that when you change chords there is at least one common note linking them, and that common note is in the same place within both chords. Thanks for being here in the Hack Music Theory community, you are truly valued, and we're excited to hang out with you again soon!

    Free Book

    Wooohooo!!! You’re a mere 30 minutes away from being even smarter than you already are. Just head on over to your inbox now for your free download.

    There was an error submitting your subscription. Please try again.

    “The most brilliant, fast, easy & fun music theory book I’ve ever seen!” DEREK SIVERS, CD Baby founder We use this field to detect spam bots. If you fill this in, you will be marked as a spammer. DOWNLOAD FREE BOOK

    Podcast

    Listen below, or on any podcast app.


    Melody Range Rule Jan 13, 2022
    Show notes

    Melody Range Rule

    In this lesson you’ll learn a common fault that many songwriters and producers make when writing melodies. More importantly, though, you’ll learn our theory hack for quickly and easily fixing this fault. But first… Tea!

    Hello revolutionary music makers, we are Kate and Ray Harmony (AKA Revolution Harmony), and welcome to Hack Music Theory, the fast, easy and fun way to make music! If you’re new to theory, or if you just want a refresher, then read our free book "12 Music Theory Hacks to Learn Scales & Chords". It’ll give you a super solid music theory foundation in just 30 minutes. The free download is below. Enjoy!

    THE FAULT

    Firstly, just to clarify. A fault is not a mistake! Music is an art, so if you’re making music from your heart, then there cannot be any mistakes. But, when songwriters and producers don’t understand theory, which is the grammar of music, they’re not able to fully express themselves. Just like if someone was trying to write a poem in a language they didn’t speak. The resulting work of art will undoubtedly have weaknesses. And a fault is defined as a weakness. So, what’s the fault in this melody?

    Well, the melody’s range is too small. The range of a melody is the interval from its lowest note (C) to its highest note (F). In this melody, that distance is only five semitones. That’s small! Listening to a melody with a small range is like listening to a person talking who doesn’t vary their pitch. It’s monotonous, which gets boring! So, just like in speech, a big range will bring interest and life into your melodies.

    And by the way, our example is in the key of F Lydian, which is all the white notes from F to F, and the tempo is 90 BPM. And if you’re not familiar with the Lydian mode, you can use the Mode Hack in our Songwriting & Producing PDF.

    THE FIX

    Okay, so now that you can identify the fault, how do you fix it? Well, it’s shockingly easy to fix, as you simply need to move the MIDI notes up and down to extend your melody’s range. In practice, however, it’s a little more tricky than that. So, here’s our step-by-step method for creating a big range in your melodies:

    STEP 1. CLIMAX

    Start by deciding where the climax of your melody will happen (i.e. the highest note). Using the concept of counterpoint, we suggest playing your melody’s highest note over your bass line’s lowest note, or at least one of its lowest notes. We chose to play our highest note over the first chord, Fmaj.

    STEP 2. HIGHEST

    Once you know where your highest note is going, you need to decide on what that note will actually be. A good place to start is with the 3 of your chord below, because the 3 is the most powerful note*. For example, over an Fmaj chord, the 3 is the note A. And obviously you don’t have to use the 3 as your highest note, it’s just a good note to get your creative juices flowing. We actually used the 2 as our highest note. So over the Fmaj chord, that’s G.

    *To learn why the 3 is the most powerful note, read Hack 9 in our free book (link below).

    STEP 3. LOWEST

    Next, do the opposite: Decide on where the lowest note of your melody is going, and what it will be. We suggest playing your melody’s lowest note over your bass line’s highest note, or at least one of its highest notes.

    STEP 4. CONTOUR

    Now that you’ve got your highest and lowest notes in place, you can create a flowing contour to join them up. If you want a big jump in your contour, that’s awesome, but use those large intervals very sparingly, as they can be overwhelming. For most of your melody, you’ll want to use smaller intervals.

    IDEAL RANGE

    Right, now you’re probably wondering: What’s the ideal range for a melody? Well, just like every person in the world is different, every melody is different too. So while there’s no one-size-fits-all range that’s ideal, you’ll know when your melody’s range is too small, because it will be boring and lifeless. And you’ll know when your melody’s range is too big, because it will be really difficult to sing. Somewhere between those two guidelines is where you’ll find the ideal range for each melody. And yes, your melody should be singable even if you’re writing it for synth, or guitar, or some other instrument. Great melodies are singable melodies! Always.

    THE RULE

    So to conclude. Our Melody Range Rule is that your melody must have a big enough range to keep it interesting and full of life, but not too big so that it’s hard to sing. Lastly, if you need more help writing melodies, then simply use our Melody Checklist, which tells you exactly what to do and what not to do in your melodies. The Melody Checklist can be found in our Songwriting & Producing PDF. Thanks for being here in the Hack Music Theory community, you are truly valued, and we're excited to hang out with you again soon!

    Free Book

    Wooohooo!!! You’re a mere 30 minutes away from being even smarter than you already are. Just head on over to your inbox now for your free download.

    There was an error submitting your subscription. Please try again.

    “The most brilliant, fast, easy & fun music theory book I’ve ever seen!” DEREK SIVERS, CD Baby founder We use this field to detect spam bots. If you fill this in, you will be marked as a spammer. DOWNLOAD FREE BOOK

    Podcast

    Listen below, or on any podcast app.


    Why MIDI Packs Suck Jan 05, 2022
    Show notes

    Why MIDI Packs Suck!

    You’ve probably seen those ads for MIDI packs, right? You know the ones, where they’re trying to sell you premade chord progressions and melodies. Well, you’re about to learn why you should never ever use a MIDI pack. But first…

    Hello revolutionary music makers, we are Kate and Ray Harmony (AKA Revolution Harmony), and welcome to Hack Music Theory, the fast, easy and fun way to make music! If you’re new to theory, or if you just want a refresher, then read our free book "12 Music Theory Hacks to Learn Scales & Chords". It’ll give you a super solid music theory foundation in just 30 minutes. You can download the book below. Enjoy!

    Just a heads-up. If you’re a subscriber, then this tutorial isn’t actually for you, it’s for your friend. Yeah, that friend who’s always starting their songs by dragging and dropping premade MIDI into their DAW. So, please share this post with that person, because friends don’t let friends use MIDI packs.

    Whatever desperation drives a producer to start using MIDI packs, the result is always the same: They end up skipping most of the writing process. And shockingly, companies that sell MIDI packs actually try to convince producers that that’s a good thing. But, the reason we write music is because we love writing music!

    If someone offers you a product that will help you stop doing something you love doing, would you buy it? Of course not! So, why are producers taking the bait? Because they’re not loving the writing process. Why? In a word: Frustration! But why are producers frustrated with the writing process? Because they don’t have the theory knowledge to express themselves eloquently through their music, and that’s extremely frustrating.

    That problem is easily solvable, though, and that’s exactly why we started Hack Music Theory back in 2016. The way music theory is traditionally taught overcomplicates it, and makes learning it time-consuming and boring. That’s why when Ray started teaching music theory way back in 1995, he made a promise to music that he would teach her language in a way that was fast, easy and fun.

    And speaking of fun. Writing music is fun! In fact, for us music makers, it’s by far the most fun part of the process. So, think of it like this: Writing a song is like a party. It’s fun! Now, from that perspective. If someone tried to sell you a product that would guarantee you missed the party, would you buy it? Of course not!

    So, the moral of the story is this: If you find yourself tempted by a MIDI pack, that’s merely a sign that you’re frustrated with the writing process. But don’t skip the party just because you’re frustrated. It’s your party. Don’t ever let anyone trick you into missing your own party! Simply take some time to learn music theory and how to apply it creatively to your own songs, then you’ll totally fall in love with the writing process, and you’ll never again be tempted to skip the fun part.

    So, how do you learn music theory in a way that’s fast, easy and fun? Well I’m glad you asked, because it so happens that we’ve written a music theory book for you, which you can download for free. Yep, no strings attached, it’s all yours for free. And, it’ll only take you 30 minutes to read, then you’ll have a super solid music theory foundation. You can download the book below. Thanks for being here with us, and we’re stoked to hang out with you again soon!

    Free Book

    Wooohooo!!! You’re a mere 30 minutes away from being even smarter than you already are. Just head on over to your inbox now for your free download.

    There was an error submitting your subscription. Please try again.

    “The most brilliant, fast, easy & fun music theory book I’ve ever seen!” DEREK SIVERS, CD Baby founder We use this field to detect spam bots. If you fill this in, you will be marked as a spammer. DOWNLOAD FREE BOOK

    Pro Drum Fills in 4 Steps Dec 01, 2021
    Show notes

    Drum Fills in 4 Steps

    In this lesson you’ll learn our 4-step method for making better drum fills. We invite you to work along with us through these steps, so by the end of this lesson, you’ll also have a super tasty drum fill.

    Hello revolutionary music makers, we are Kate and Ray Harmony (AKA Revolution Harmony), and welcome to Hack Music Theory, the fast, easy and fun way to make music! If you’re new to theory, or if you just want a refresher, then read our free book "12 Music Theory Hacks to Learn Scales & Chords". It’ll give you a super solid music theory foundation in just 30 minutes. The free download is below. Enjoy!

    INTRO

    In another lesson, we covered the 3 Types of Drum Fills: variation, tension, and notification. And, we also showed you where (and how) to use them in your music. Now in this lesson, we’ll share our 4-step method for actually writing those drum fills. And yes, this method works for all three types of fills!

    STEP 1. ENDING

    The first thing you need to do is the last thing! It sounds counterintuitive, but drum fills take your listeners through a percussive journey that has a beginning and an ending. Once you’ve decided on these two points in your music, then you write a drum fill that connects them. It’s sad how many producers don’t think about these beginning and ending points, and merely start and stop their fills at the predictable places. But that won’t be you!

    So, how do you choose where to end your fill, and why do you have to choose the ending first? Well, the place where you end your fill will have an accent as a result, so you want to make sure that it’s a point in your music that you intentionally want to emphasize. Most producers end all their fills on beat 1, and while that’s a super strong place for an ending, when every fill ends on beat 1, it’s also super boring!

    Listen to your music, it will tell you where it wants you to end each fill. And remember, you can end your fills before beat 1 or after beat 1. A drum fill should only end on beat 1 if that’s exactly what your music wants at that specific point.

    In our example, we’re transitioning from the chorus to the bridge, so we need a notification fill to alert the listener to this upcoming change. The bridge has a natural accent on beat 2, so that’s definitely the best place to end our fill.

    STEP 2. BEGINNING

    Right, now that you know where your fill is ending, you can work backwards and figure out how long it needs to be and where it should begin. The way you choose a beginning point for your fill is different to how you just chose the ending. In this step, the first and most important thing to decide is how long your fill needs to be. There will be numerous naturally-occurring accents in your music where you could start a fill from, so trying to decide that way will only confuse you. Instead, loop up a few bars on either side of where your fill is going to be, then listen. The music will tell you how long the fill needs to be, which in turn tells you where to begin it.

    And keep in mind, the length that your drum fill needs to be depends on which type of fill it is: variation, tension, or notification. Check out the 3 Types of Drum Fills lesson to learn all about that. Our fill is a notification fill, so it needs to be long enough to prepare the listener for the upcoming change, but not too long, otherwise it will build too much intensity. This led us to the perfect place to begin our fill: beat 2+ (in the last bar of our chorus). So, that makes our fill just less than one bar long.

    STEP 3. SKETCH

    Okay, so you know where your fill is ending, and where it’s beginning. Now it’s time to connect the dots! In this step, the first and most important thing to decide is the energy contour of your fill. Once again, this depends on which one of the three types of fills it is. But generally speaking, with your drum fills you’ll either want to increase the energy level, decrease it, or keep it more-or-less the same.

    As we’re using a notification fill and going into a section with a higher intensity level, we need to increase the energy with our fill. To decide what your drum fill should do, loop up the same bars as you did before, close your eyes, and listen deeply. The energy contour will paint itself in your mind.

    Once you know what the energy needs to do, you can start sketching the fill. Tasty fills tend to have a variety of note values, so have fun experimenting with that. But, because a drum kit has so many drums and cymbals, it’s easy to get distracted by all the possible combinations. So to stay focused, we recommend sketching out your fill using only the snare drum.

    STEP 4 SPREAD

    Right, so now that you’ve sketched out your fill on the snare drum, it’s time to finish things up by spreading out your fill over the whole drum kit. Remember though, a hit on the snare drum is far more intense than a tom or a kick, so be very very careful in this step not to mess up your energy contour.

    We used the whole kit in our fill: snare, kick, toms, and cymbals. But, we kept coming back to the snare in order to sustain that momentum. As you can see, towards the end of our fill in the first bar of the bridge, we played the snare on beat 1. Without this vital snare hit, our fill would lose momentum over the bar line. If you feel that your fill is lacking momentum, it probably needs more snare hits. If, on the other hand, you feel it’s too intense, then it probably needs fewer snare hits.

    After you’ve finished this step, double check that your final drum fill is still delivering the energy contour that you designed in step 3. If it is, then you’re done!

    NEXT

    If you need help making original beats, then check out our Hack Drum Beats PDF. It contains everything you need to know in one PDF. And, it's currently half price, as our biggest sale of the year is on right now (ends 12 December 2021). Enjoy! Thanks so much for being here in the Hack Music Theory community, you are truly valued, and we’re excited to hang out with you again soon!

    Free Book

    Wooohooo!!! You’re a mere 30 minutes away from being even smarter than you already are. Just head on over to your inbox now for your free download.

    There was an error submitting your subscription. Please try again.

    “The most brilliant, fast, easy & fun music theory book I’ve ever seen!” DEREK SIVERS, CD Baby founder We use this field to detect spam bots. If you fill this in, you will be marked as a spammer. DOWNLOAD FREE BOOK

    Podcast

    Listen below, or on any podcast app.


    3 Types of Drum Fills Oct 15, 2021
    Show notes

    3 Types of Drum Fills

    In this lesson you’ll learn the three types of drum fills, where to use them, and how to make them. But first... Tea!

    Hello revolutionary music makers, we are Kate and Ray Harmony (AKA Revolution Harmony), and welcome to Hack Music Theory, the fast, easy and fun way to make music! If you’re new to theory, or if you just want a refresher, then read our free book "12 Music Theory Hacks to Learn Scales & Chords". It’ll give you a super solid music theory foundation in just 30 minutes. The free download is below. Enjoy!

    Intro

    You know how in some movies there’s a narrator who guides the audience through the story? Well, drum fills act as a percussive narrator for our musical stories. For example, when a song is about to transition into a new section, a drum fill will narrate this upcoming change to the audience, thereby creating anticipation for it. All drum fills can be grouped into three types: variation, tension, and notification. Each type of fill has a different function. In other words, they each narrate something different to the listener. Alright, now let’s jump into each type of drum fill by exploring its unique function, and how to use it in your music.

    Type 1. Variation

    The function of a variation drum fill is to spice up a section. An example of where you’d use this type of fill in your music, is halfway through a 16-bar verse. Whenever you have a longer section without many changes, there’s a chance of losing your listener’s attention. A fill of this type will gently bring their attention back. You can simply add a few extra notes to your drum beat, that’ll do it. Go for subtlety, and avoid big fills (those will disrupt the flow of your section). We just threw in a few snares and toms, while keeping our kick and snare pattern the same.

    Type 2. Tension

    The function of a tension drum fill is to build up to something big. An example of where you’d use this type of fill in your music, is leading up to a bass drop (or a breakdown, in the metal genre). Whenever you want to build up the intensity to an energetic climax in your song, the best way to get there is with a fill of this type.

    For that reason, it needs to be big and loud! And the longer the fill lasts, the more tension it builds. These fills are often on the snare drum, but you can use anything (or everything) in your kit. Tension fills typically start with 1/4 or 1/8 notes, and build into 1/16, 1/32, or even 1/64 notes, depending on the tempo. You can use whatever note values you want, though, as long as you keep building the tension.

    We went with the standard approach, but made it more interesting by using toms, as well as a few 1/16 and 1/32 note triplets on the snare, at the very end of the fill.

    Type 3. Notification

    The function of a notification drum fill is to introduce something. An example of where you’d use this type of fill in your music, is transitioning from the verse to the chorus. Whenever you want to alert the listener of an upcoming change, use this type of fill. The size and speed of your fill depends on what it’s going into. If you’re transitioning into a higher energy section, then go bigger and faster. If you’re transitioning into a lower energy section, then decrease the overall intensity with a subtler and slower fill. And if you’re transitioning into a section with a similar energy level, then find the middle path between too much intensity and too little.

    Also, notification fills aren’t only for transitions, you can use them anytime you want to introduce something new, like a new melody, or a new instrument. You can even use a notification fill to start a song, which is what we did in our example.

    Lastly, drum fills are all about setting up an expectation in the listener. Remember though, your songs are your musical stories. You decide the plot. So, feel free to set up an expectation, but then take your listener somewhere totally unexpected. For example, use a tension fill to build towards a climax, then stop in total silence. Or, use a variation fill, but then suddenly change into a completely different section.

    Next

    If you found this lesson helpful, be sure to subscribe, as next time we’ll be giving you our step-by-step method for making drum fills. In the meantime though, if you need help making original drum beats, then check out our Hack Drum Beats PDF. It contains everything you need to know in one PDF. Thanks for being here in the Hack Music Theory community, you are truly valued, and we’re excited to hang out with you again soon! Until then, we're sending you good vibes and gratitude :)

    Free Book

    Wooohooo!!! You’re a mere 30 minutes away from being even smarter than you already are. Just head on over to your inbox now for your free download.

    There was an error submitting your subscription. Please try again.

    “The most brilliant, fast, easy & fun music theory book I’ve ever seen!” DEREK SIVERS, CD Baby founder We use this field to detect spam bots. If you fill this in, you will be marked as a spammer. DOWNLOAD FREE BOOK

    Podcast

    Listen below, or on any podcast app.


    Previous 1 8 9 10 11 12 25 Next

    Related Podcasts

    Twenty Thousand Hertz

    1

    Twenty Thousand Hertz Arts
    NPR Music

    2

    NPR Music Music
    Here’s The Thing with Alec Baldwin

    3

    Here’s The Thing with Alec Baldwin Arts
    Drink Champs

    4

    Drink Champs Music
    Soundtracking with Edith Bowman

    5

    Soundtracking with Edith Bowman Music
    Red FM Bauaa

    6

    Red FM Bauaa Music
    footer-logo

    Contact Us

    Toll Free: 844-670-7747

    Links

    • Home
    • Top Charts
    • Networks
    • Apps
    • Independents Podcasts
    • Podcast Advertising
    • Podcast News
    • Contact Us
    • About Us
    • Analytics & Insights

    Stay Connected

      Privacy, Terms of Use & Our Code of Ethics Protecting Content Creators Copyrights