We started recording /dev/hell because we thought it would be fun. We wanted it to sound decent, but we didn’t want to work hard at making that happen, because we are lazy. And cheap.
I’ve had some experience with indie audio production, so I know a few things about making stuff sound better than it should. That, and a lot of stuff I’ve picked up on the way, has helped make /dev/hell sound semi-decent on a very, very small budget.
In this series of articles, I’ll detail the hardware, software, and processes we use when we record /dev/hell. If you’re thinking about making your own podcasts, this will get you started with a minimum amount of cash and a maximum amount of awesome.
All of the /dev/hell podcasts are recordings of voice chats between Chris and me, plus any guests who happen to be with us. This is actually a lot easier than recording in person, and lets us optimize a lot in terms of hardware and software expense. We record with pretty cheap hardware and software, and do a bit more post-production work to make stuff sound decent.
Note that we do all our podcasting work on OS X, so hardware and software have only been tested there. Most of what we discuss should work with Windows, but I’m not sure about Linux support.
Hardware
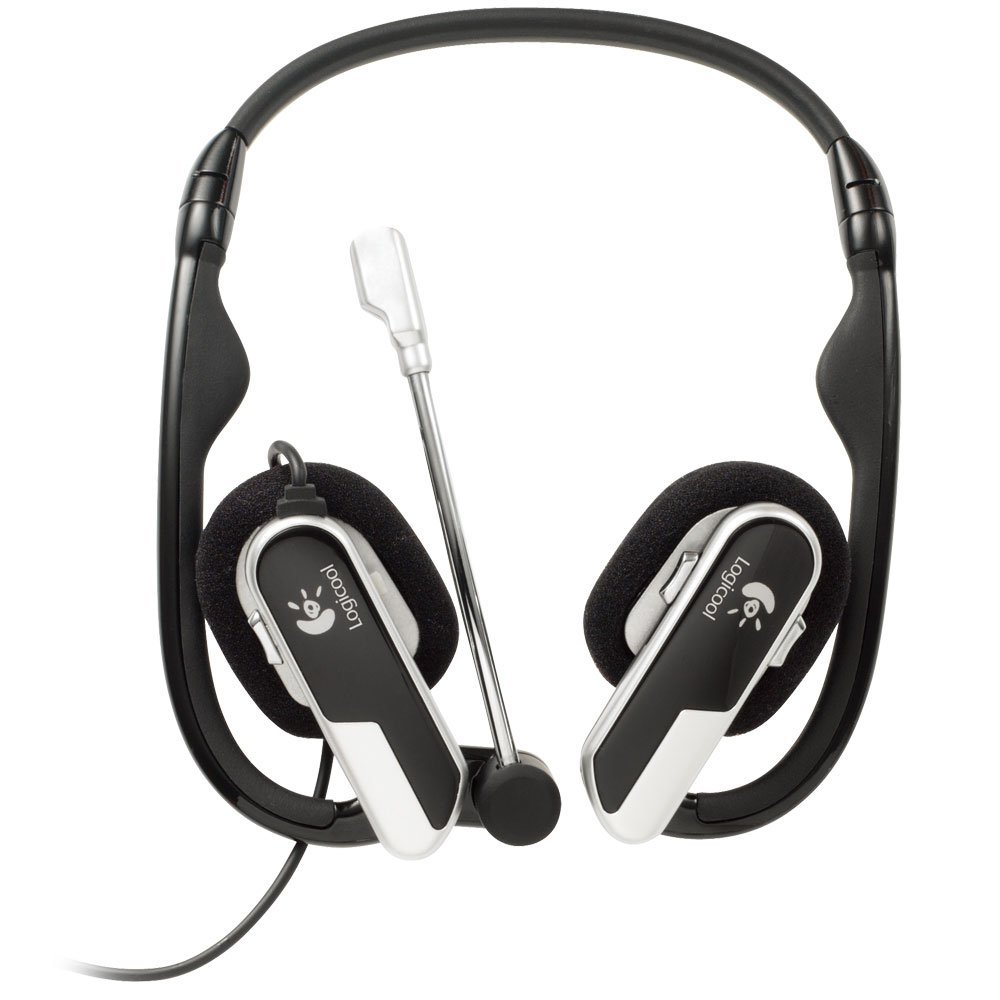
I use a Logitech H555 headset to record on my side. It’s also my go-to headset for any voice chat. My speech sounds clear and intelligible through it, and it does a pretty good job of cancelling out ambient noise. It’s USB and wired, so I don’t have issues with connectivity there, and it has a physical mute switch, which is really handy when you have to cough or throw up. It’s not the cheapest headset you can find, but for the price, the voice fidelity is very good. The only significant issue I’ve found is that the mic will pick up the sound from the headphones if I have it really turned up, but I can mitigate that with a noise gate in post-production. I’ve carried this thing all around the country, and it has consistently Just Worked as soon as I plug it in.
Alternately, you might check out the Logitech USB Headset H530, which is similar, but looks like it would be a bit more comfortable (but less portable).
I have messed some with bluetooth headsets and ear pieces, and they all have sucked. Constant pairing issues, audio quality problems, and battery drain. You don’t want to mess with this stuff just before you’re scheduled to record, let alone have it die in the middle of a sesson.
I also avoid any cheap stuff that plugs into the 1/8” analog inputs on my computer, particularly microphones. That stuff is almost always garbage – poor quality, prone to clipping and picking up hums and noise. Don’t do it.
You can get better quality mics than my headset has, but it also introduces a lot more hassle and expense. Decent-quality USB mics are going to run you at least $60, and they tie you to a desk or mic stand. If you want to have more flexibility, you can get XLR mics (I have a Shure SM-58), but then you’ll also need an outboard audio interface and mixer – more equipment to tie you down, and now we’re getting into at least a few hundred dollars in hardware.
If you do get a separate mic, I’d recommend a dynamic mic, especially if you’re only recording yourself talking on Skype. Chris is currently using a Blue Yeti condenser mic, and it picks up tons of ambient noise in the room. Condensers are great for doing in-person interviews where you just drop the mic on a table between everybody, but they’re not well-suited for for voice chat. You’ll end up muting yourself any time you’re not talking, and spending time in post-production editing out squeaky chairs and keyboard typing.
Software
We use Skype to talk to each other. It has the best audio quality of all the voice chat options I’ve tried, and it’s free and available on all major desktop platforms. It’s not perfect, but it’s the best option available.
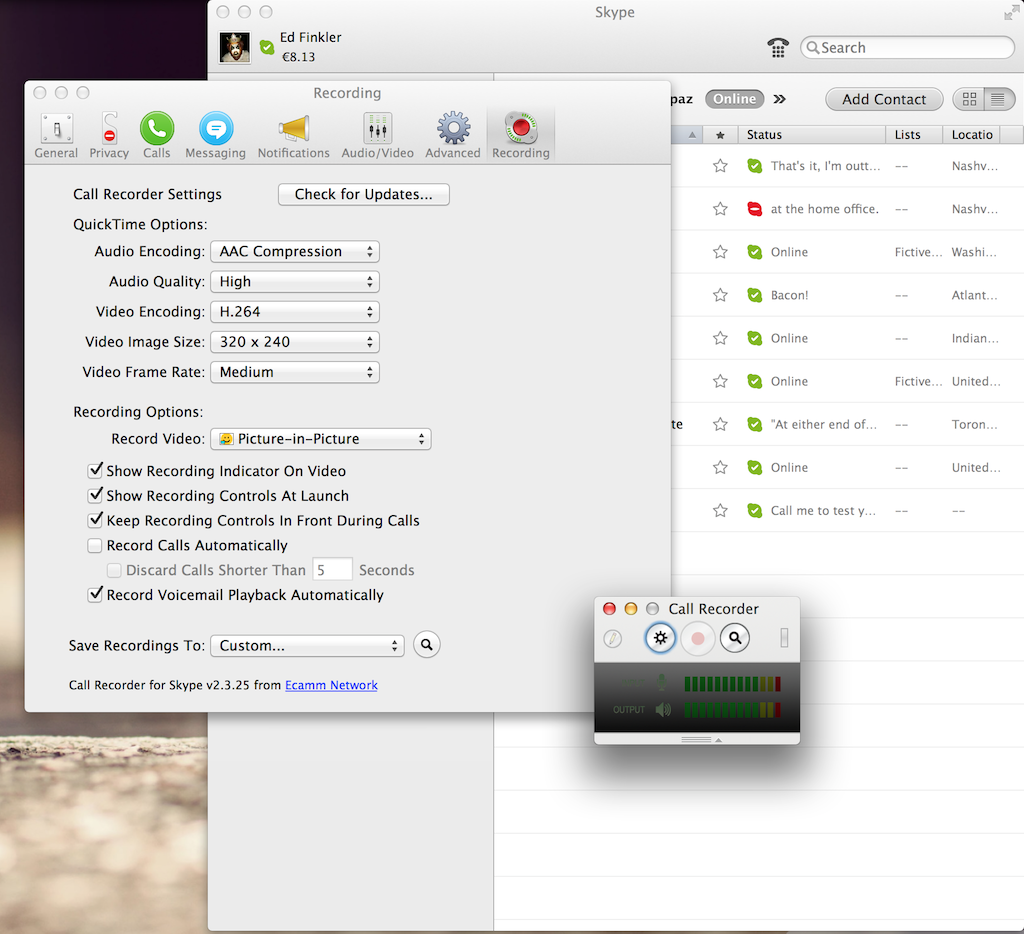
To record our Skype conversations, I recommend Call Recorder, a $20 add-on to Skype for Windows and OS X. The biggest win with Call Recorder is its ability to split the two sides of your conversation intp separate tracks, so you can process and edit them separately in post-production. It also has a simple, easy to use interface. There’s a 15-day fully functional trial, so it should work okay for one-off guests who don’t want to drop $20 just to be on your show.
We’ve also used Audio Hijack Pro, a $32 application for OS X. AHP is much more flexible than Call Recorder: it can record any audio being generated by any application in OS X, do timed recordings, and lots of other cool stuff. It also can separate Skype conversations into the left and right sides of a stereo track, so you can treat them separately in post-production. But, being a significantly more complex application than Call Recorder, it’s also easier to screw stuff up, which I’ve done a few times.
Recording

Before you do any recording, use the Skype test call feature to record yourself speaking as you would in the session. Have a paragraph of text handy and recite it into the call. Alternately, call up your co-host and just shoot the breeze for a few minutes, recording it with Call Recorder. Listen to the recording, make note of issues, and address accordingly.
All the session participants should be in a quiet area where they won’t get visitors and don’t get a lot of echo (carpeted areas are better in this regard). I always record in a big recliner in the corner of the living room with my laptop on my lap, and always wait until 9pm so the Kinder are in bed. Let folks in your home know that you’ll be recording, so they don’t bug you about stuff in the middle of the session.
If you’re the person who will be doing post-production, have a notepad handy – physical or virtual – to write down possible edit spots. If you hear a big glitch/slip-up/disconnection/meltdown, it is much easier to find it if you have written down the time it happened. Listening through your entire podcast to find it will be extremely tedious, especially if you tend to ramble like we do.
About 10 minutes before you’re scheduled to record, get everyone on the Skype call. This should allow you to hear potential issues and try to address them before you start recording, like excessive background noise or bandwidth problems.
One thing I recommend is that you get people to record on a computer that’s connected via wired ethernet. WiFi gets really flakey, and can cause glitches in Skype that you wouldn’t anticipate. This is particularly problematic in more densely populated areas. You may not have much issue – I’m lucky in that my WiFi is very fast and consistent – but it’s definitely safer to be wired. If you’re not able to connect directly, at least sit where you have good, consistent WiFi reception, and don’t move.
When you’re ready to start the podcast, the easiest thing to do is just have one person record using one of the above applications. This works okay if everyone involved has a very solid Internet connection and local network. The more people you have on the call, though, the more problems you’re likely to have.
I recommend having every participant in the session record on their end. This can be a bit of a pain if you have frequent guests, but the 15-day trial version of Call Recorder should allow them to handle this without spending any cash. With everyone recording locally, you can get a high-quality local recording of each participant, mitigating the glitchiness that you’ll get with Skype. It also means you have backup recordings in case you forgot to hit Record (not that I’d ever do that). The relevant settings I use in Call Recorder’s preferences are:
- Audio Encoding: AAC Compression
- Audio Quality: High
- Show Recording Controls At Launch
- Keep Recording Controls In Front During calls
Note: normally you never want to record with “lossy” compression like AAC or MP3. But because we’re recording speech, and our final format is relatively low-fidelity (64kbps mono MP3), I don’t think there’s any perceptible advantage. It’s fine to record compressed files, though, and would be a good idea if you’re striving for the best possible fidelity.
When you’re done, have everyone upload their recordings in a shared space so you can grab them. A shared Dropbox folder has worked well for us.
Note that you won’t be able to magically sync up all your recordings. You can and should try to start recording all at the same time (a little bit before you actually start the podcast), but you’ll have to manually line stuff up in post-production.
That’s it for recording. Next time we’ll cover post-production, where you turn your separate audio tracks into something worth hearing.

 Our TOPPODCAST Picks
  Stay Connected


